Give your friends $10 off their first order!
Refer a FRIEND


WHAT YOU WILL NEED:
White landscape card blank 5 x 7"
Kraft cardstock
Vellum
Grow Your Own Way HD3D Embossing Folder
Vintage Bloom Painted Mounts
SBM Hybrid Ink Pad: Midnight
SBM Pigment Ink Pad: Cotton
Anti-static bag
White embossing powder
Heat tool
Eureka 101 Watercolour Tablet
SBM A3 Magnetic glass mat
Paper Trimmer
Glue
Double-sided tape
Die Cutting machine
[click image to enlarge] 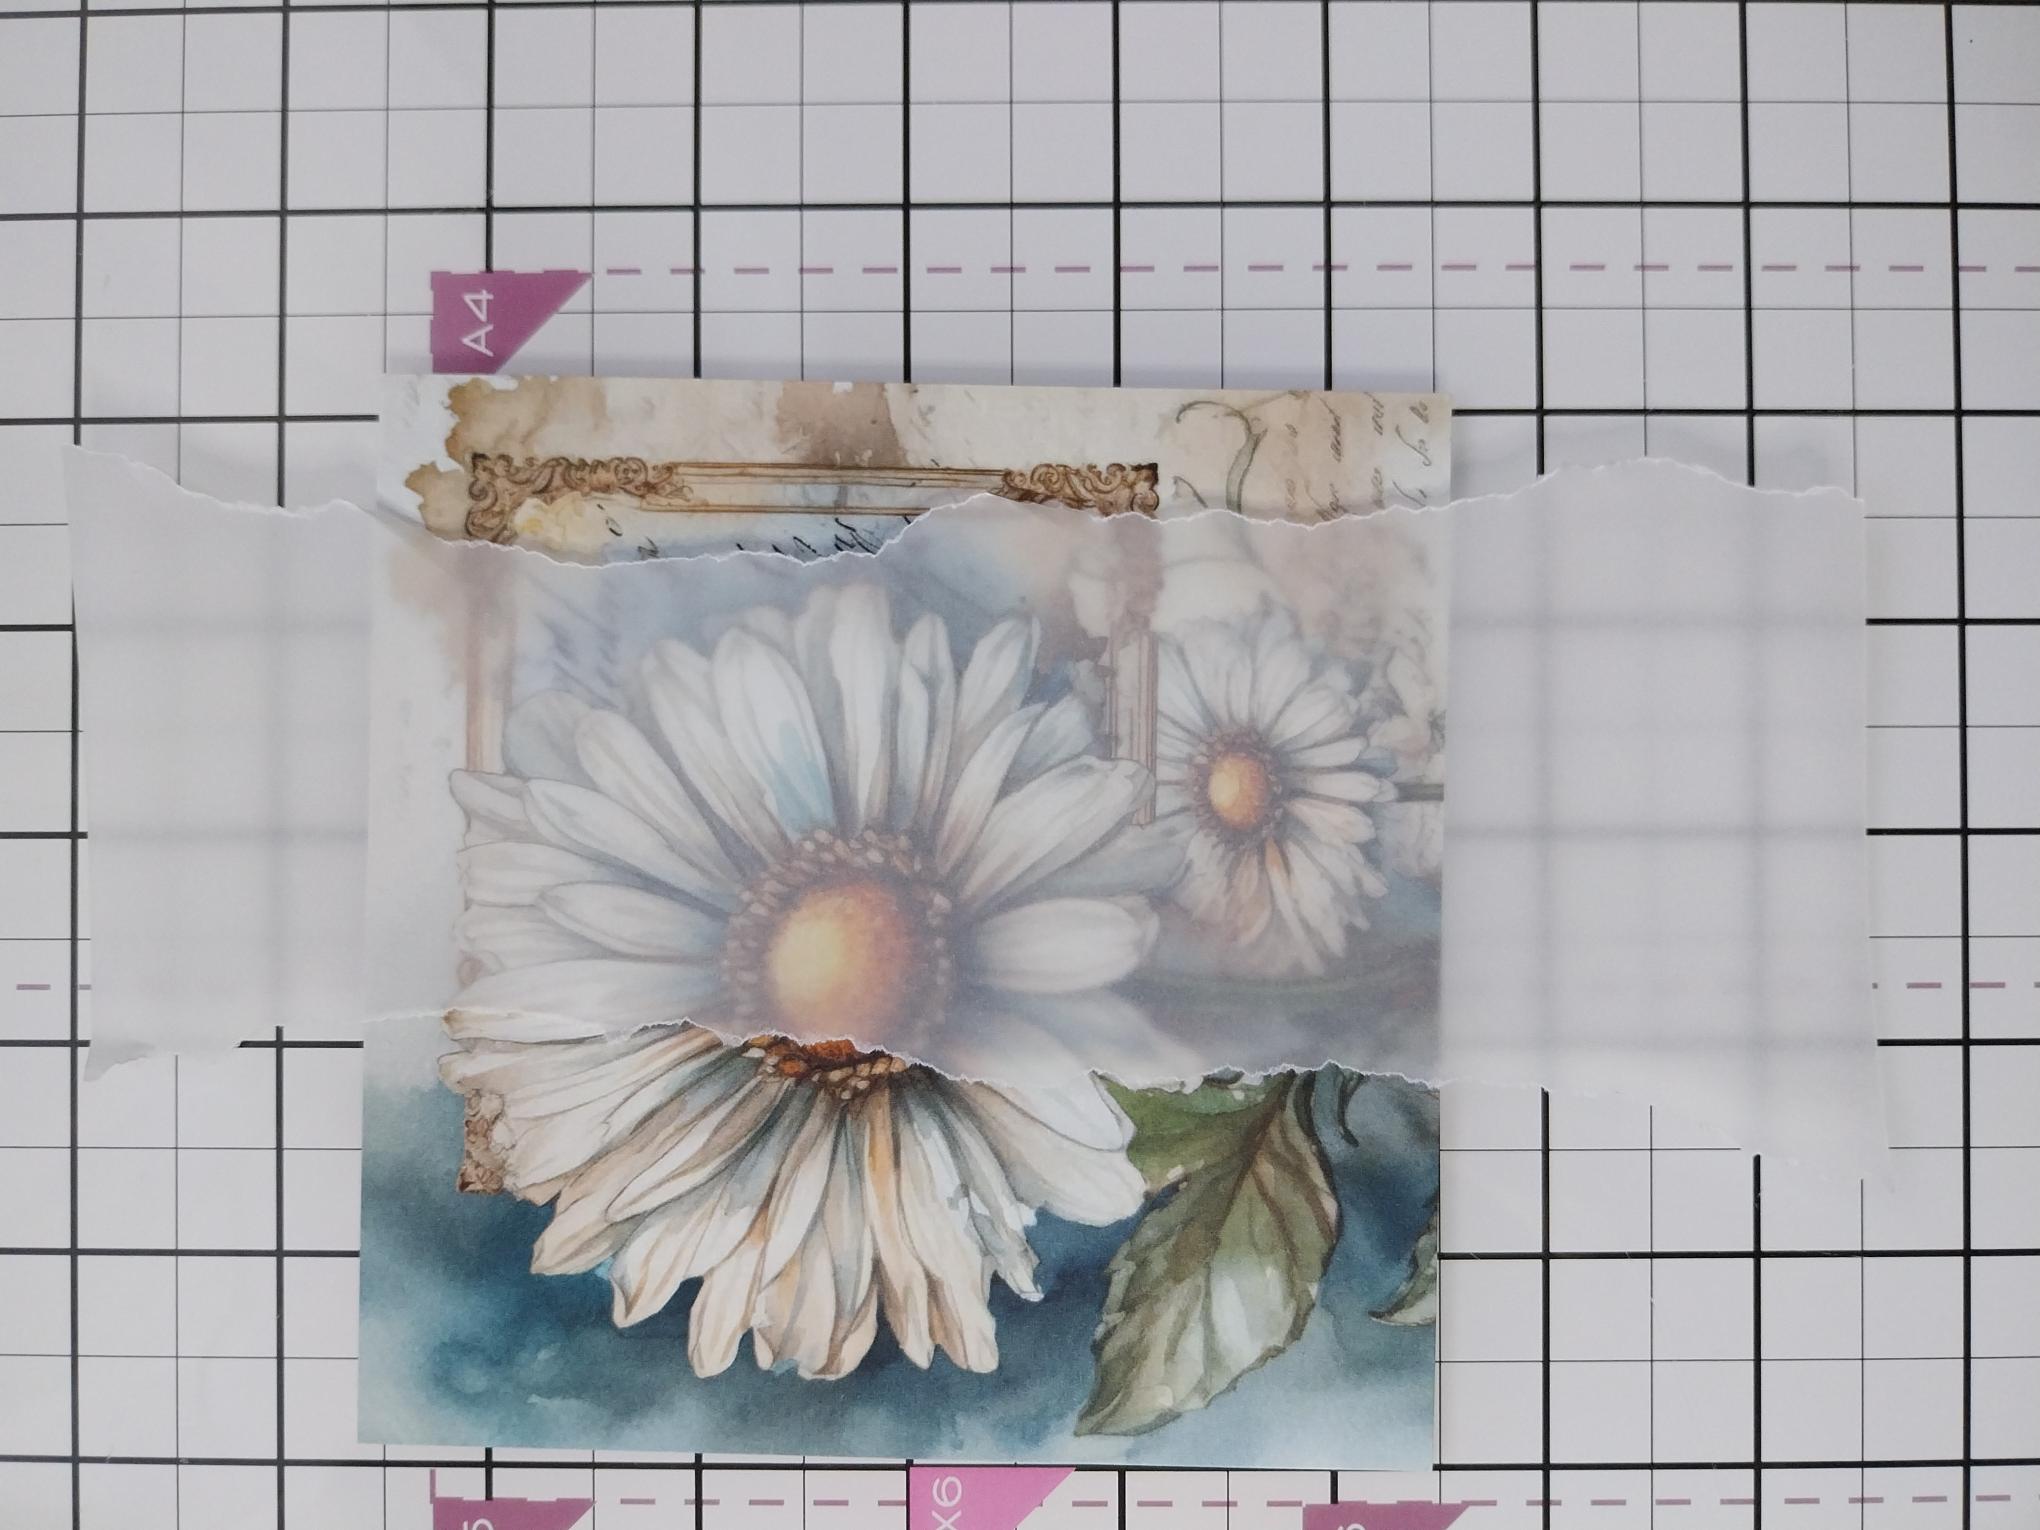
|
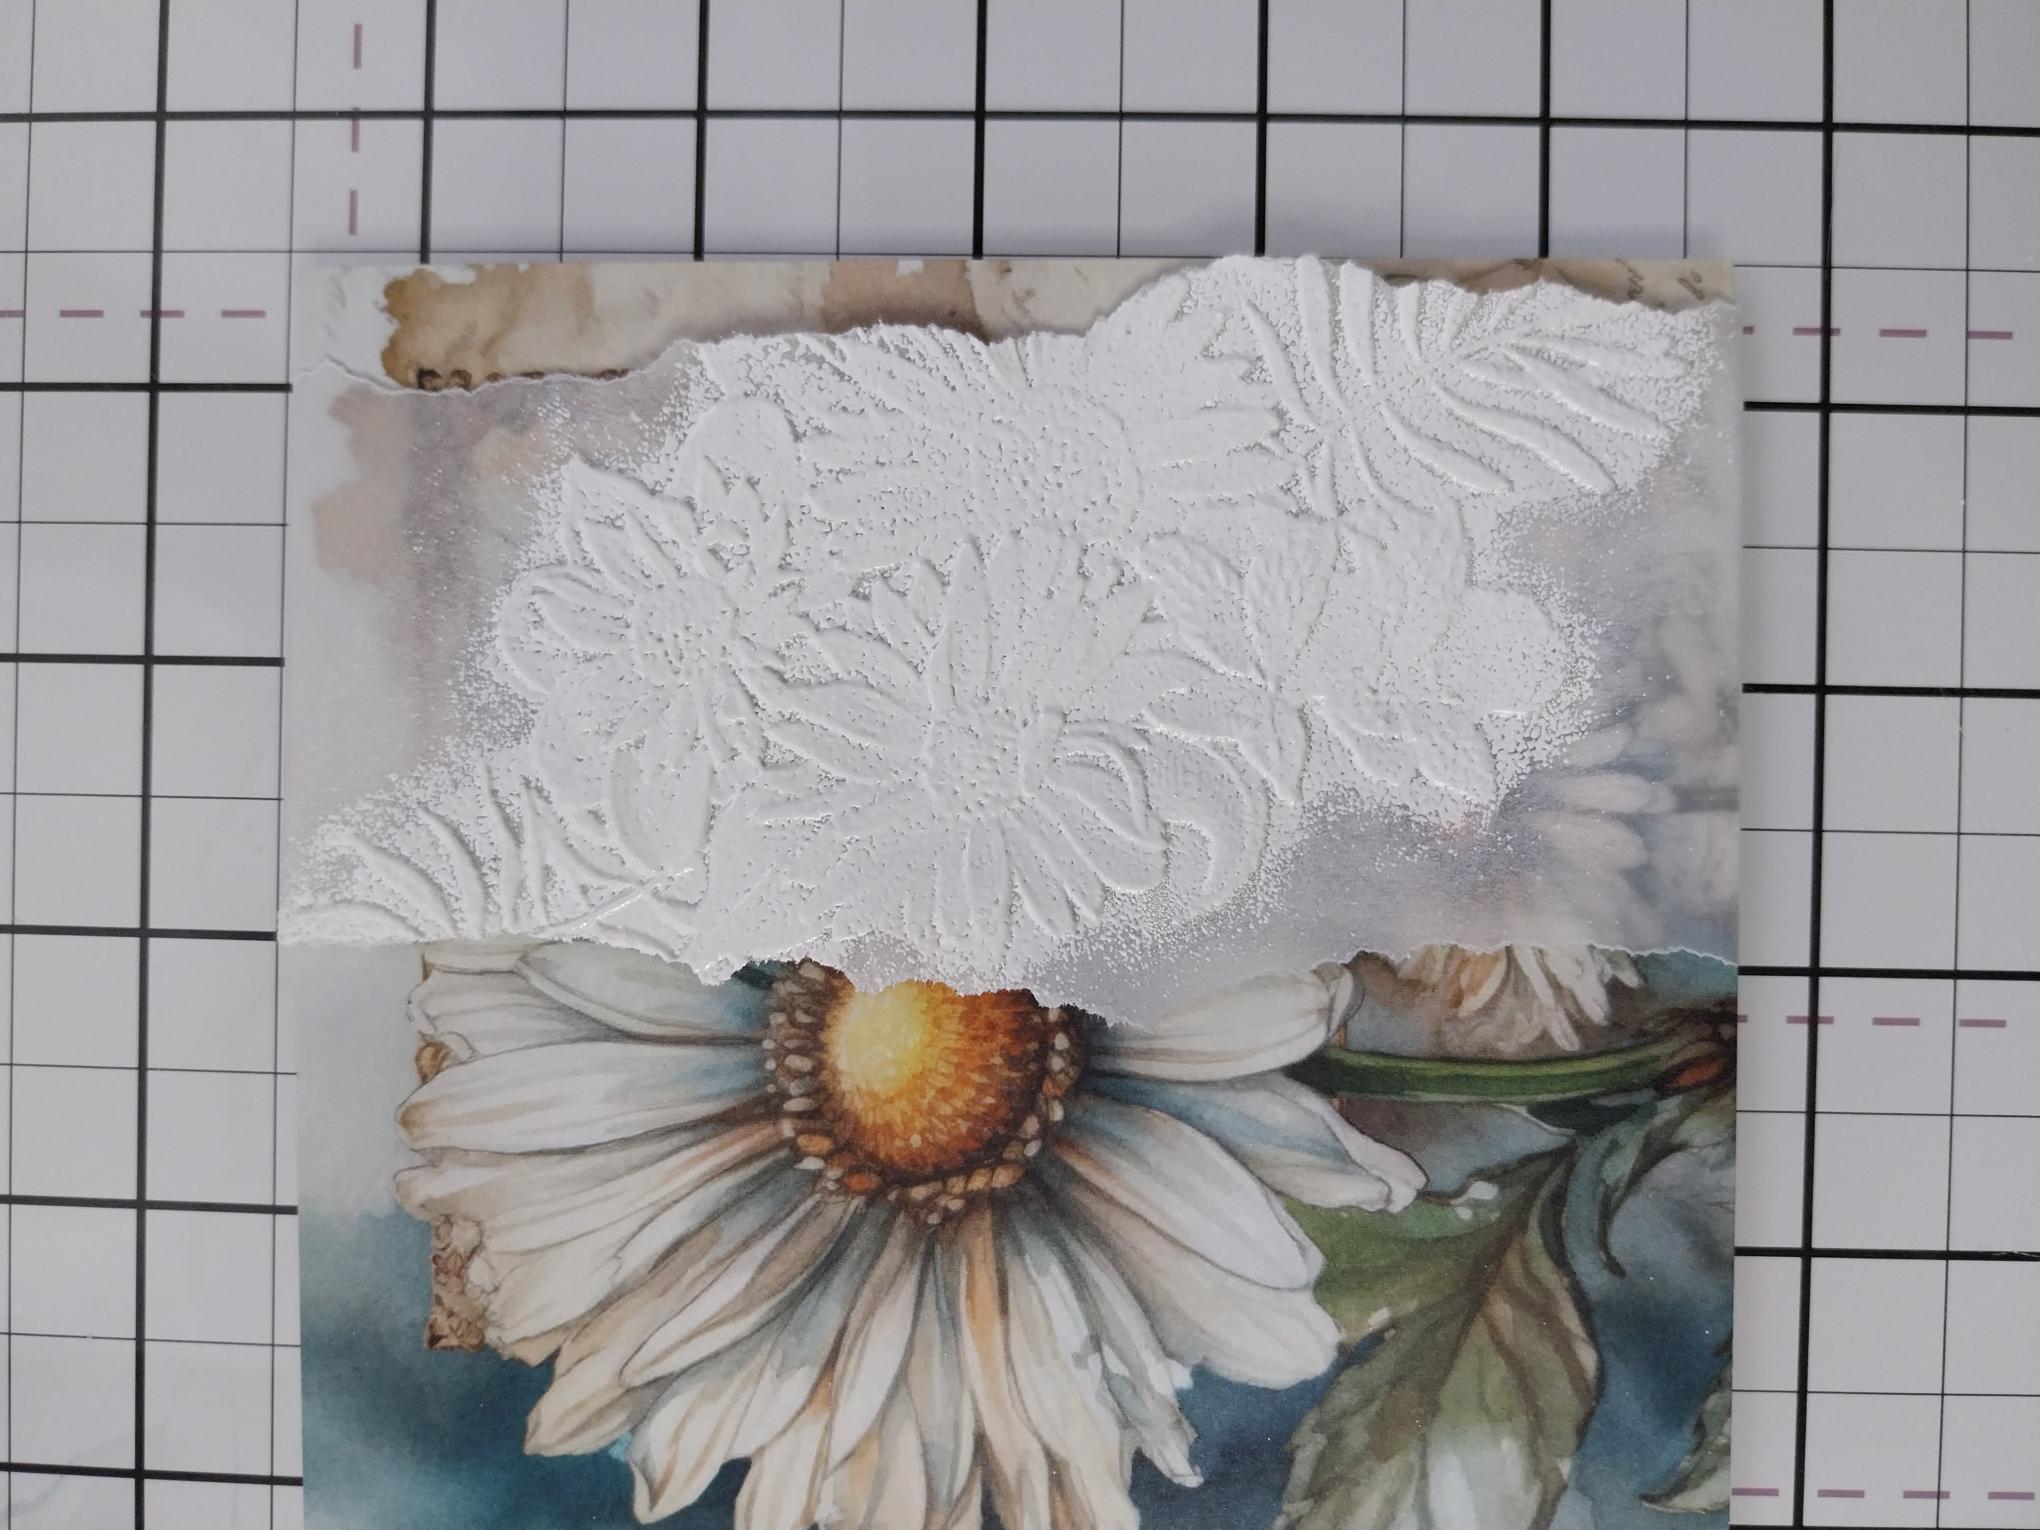
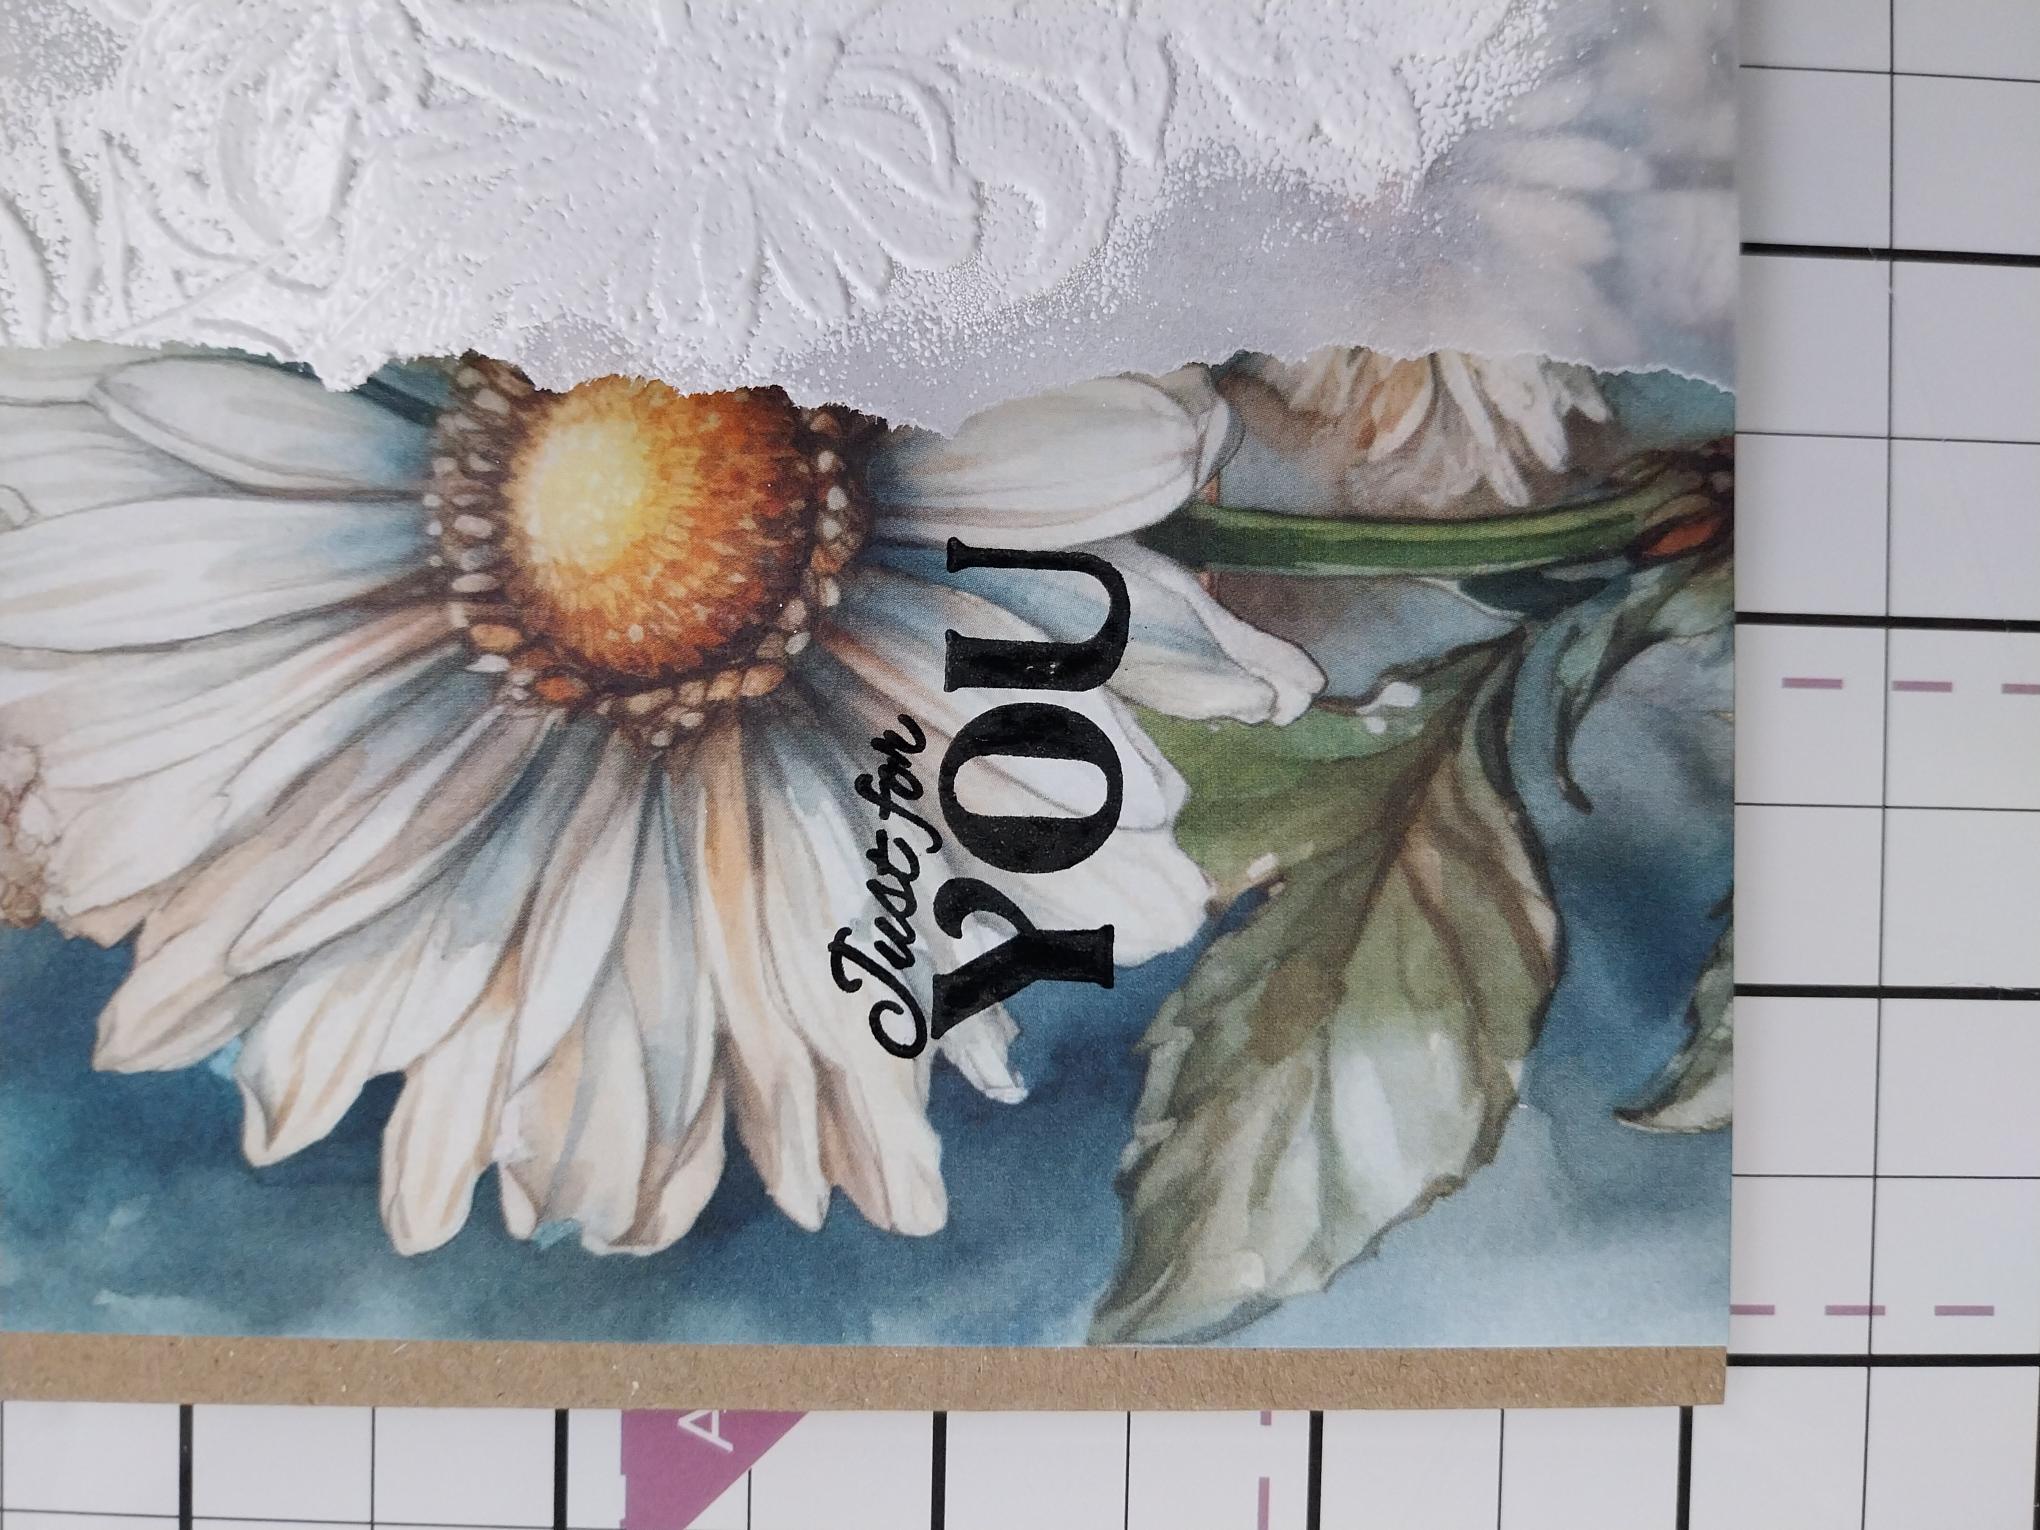
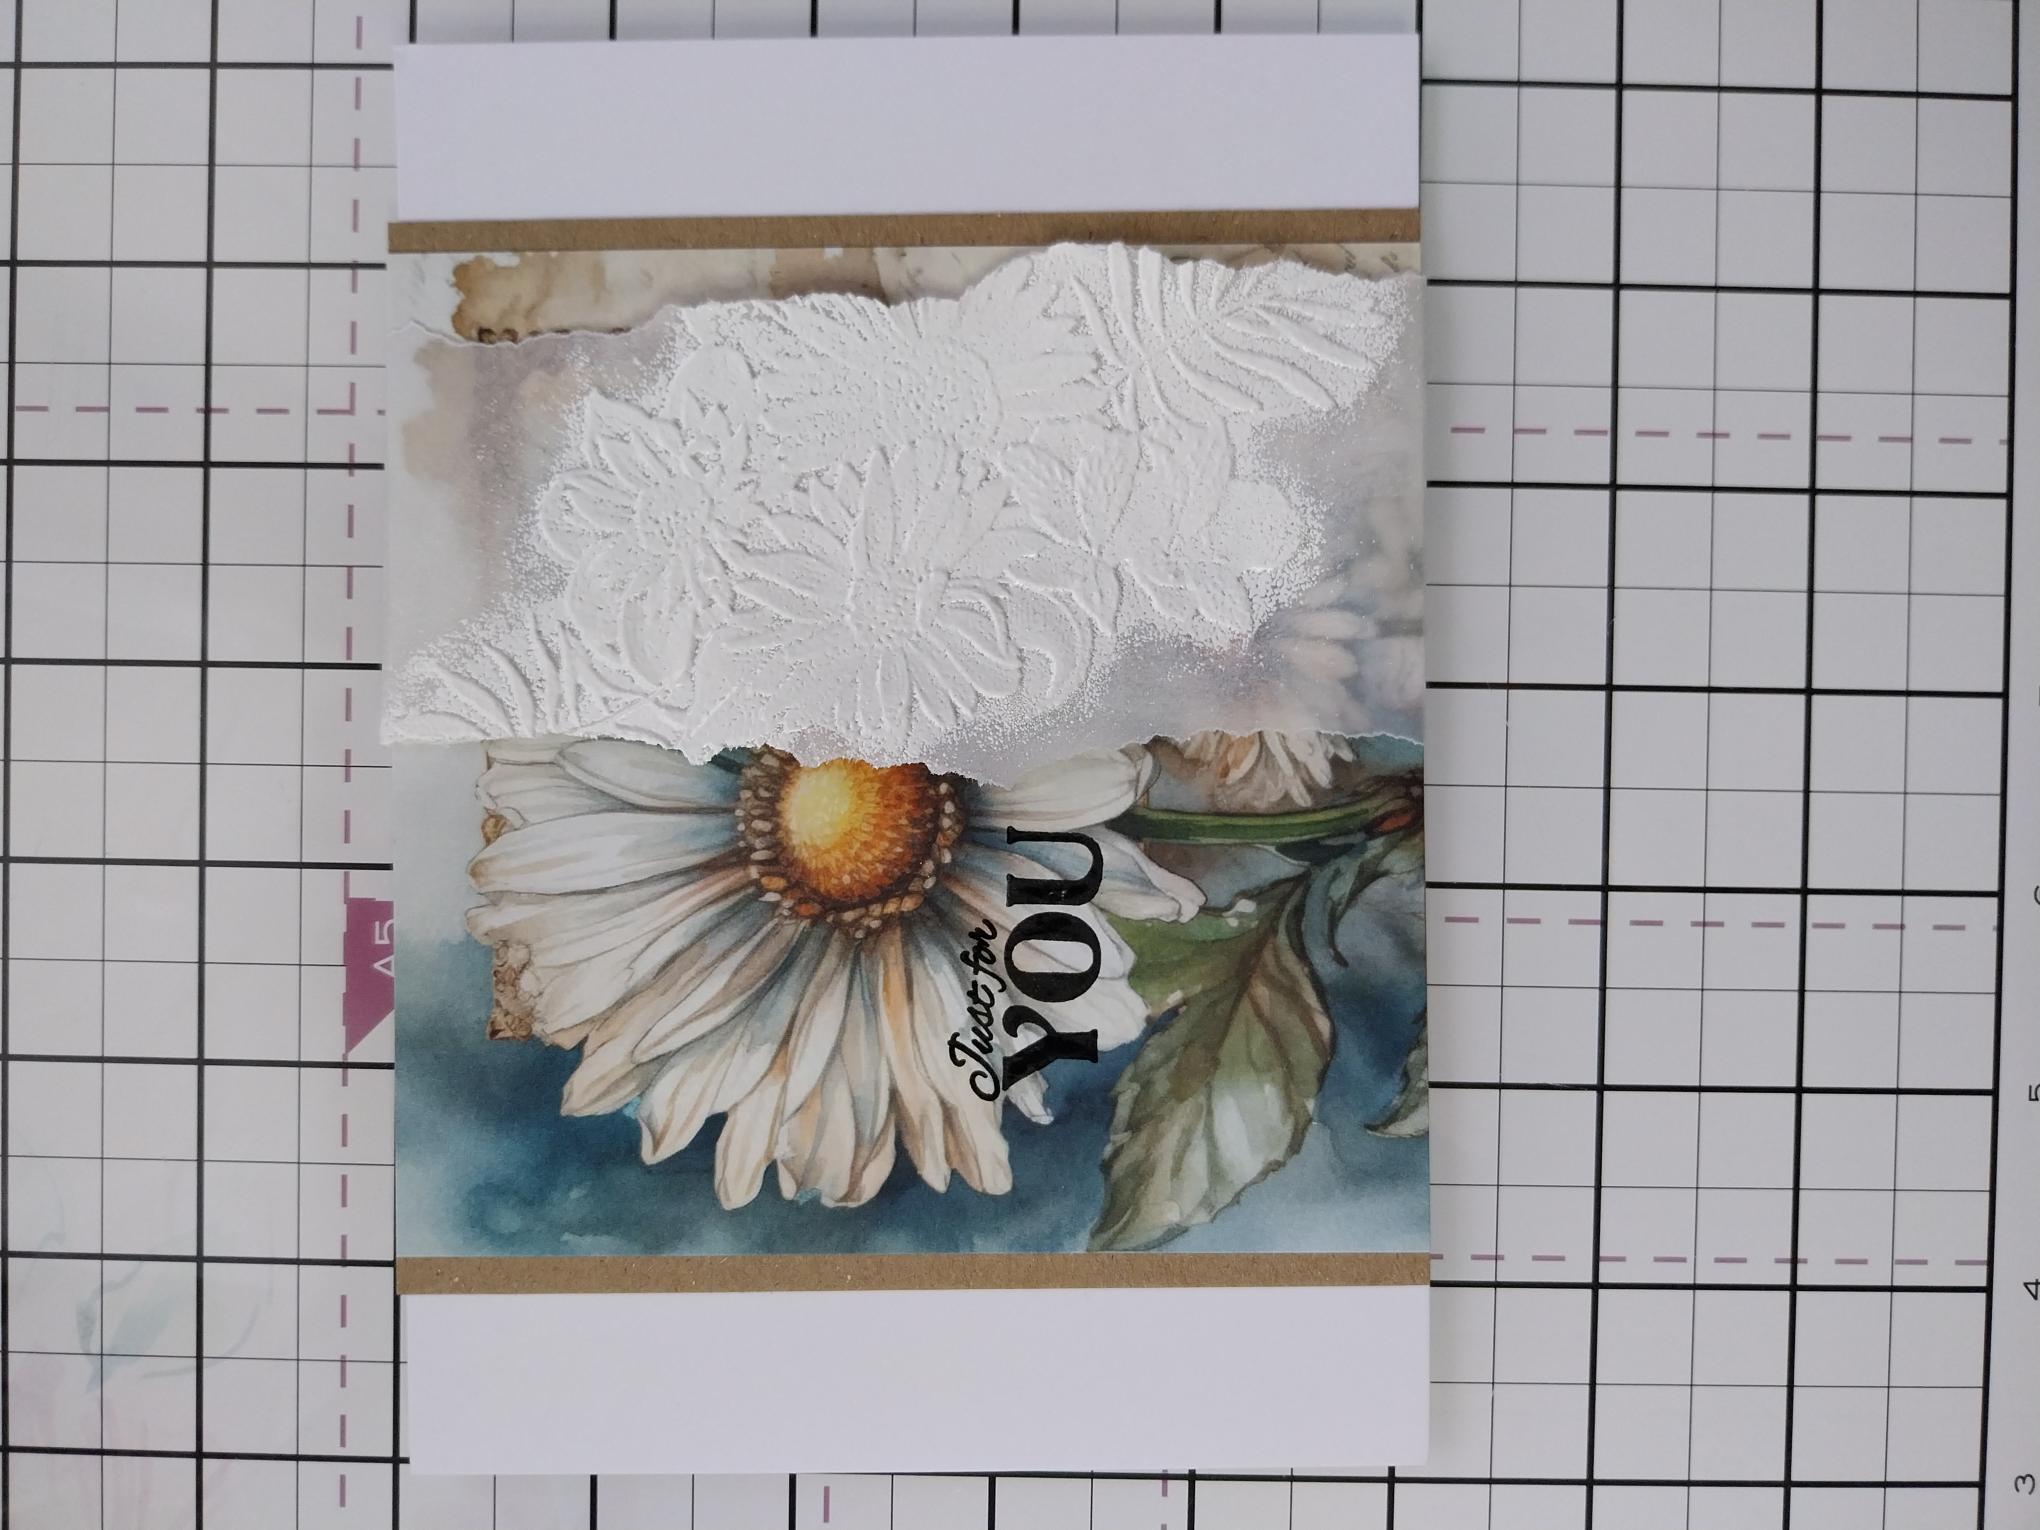
Choose your painted mount from the Vintage Bloom pack. Tear a vellum panel slightly longer than the mount and as wide as you wish. |
|
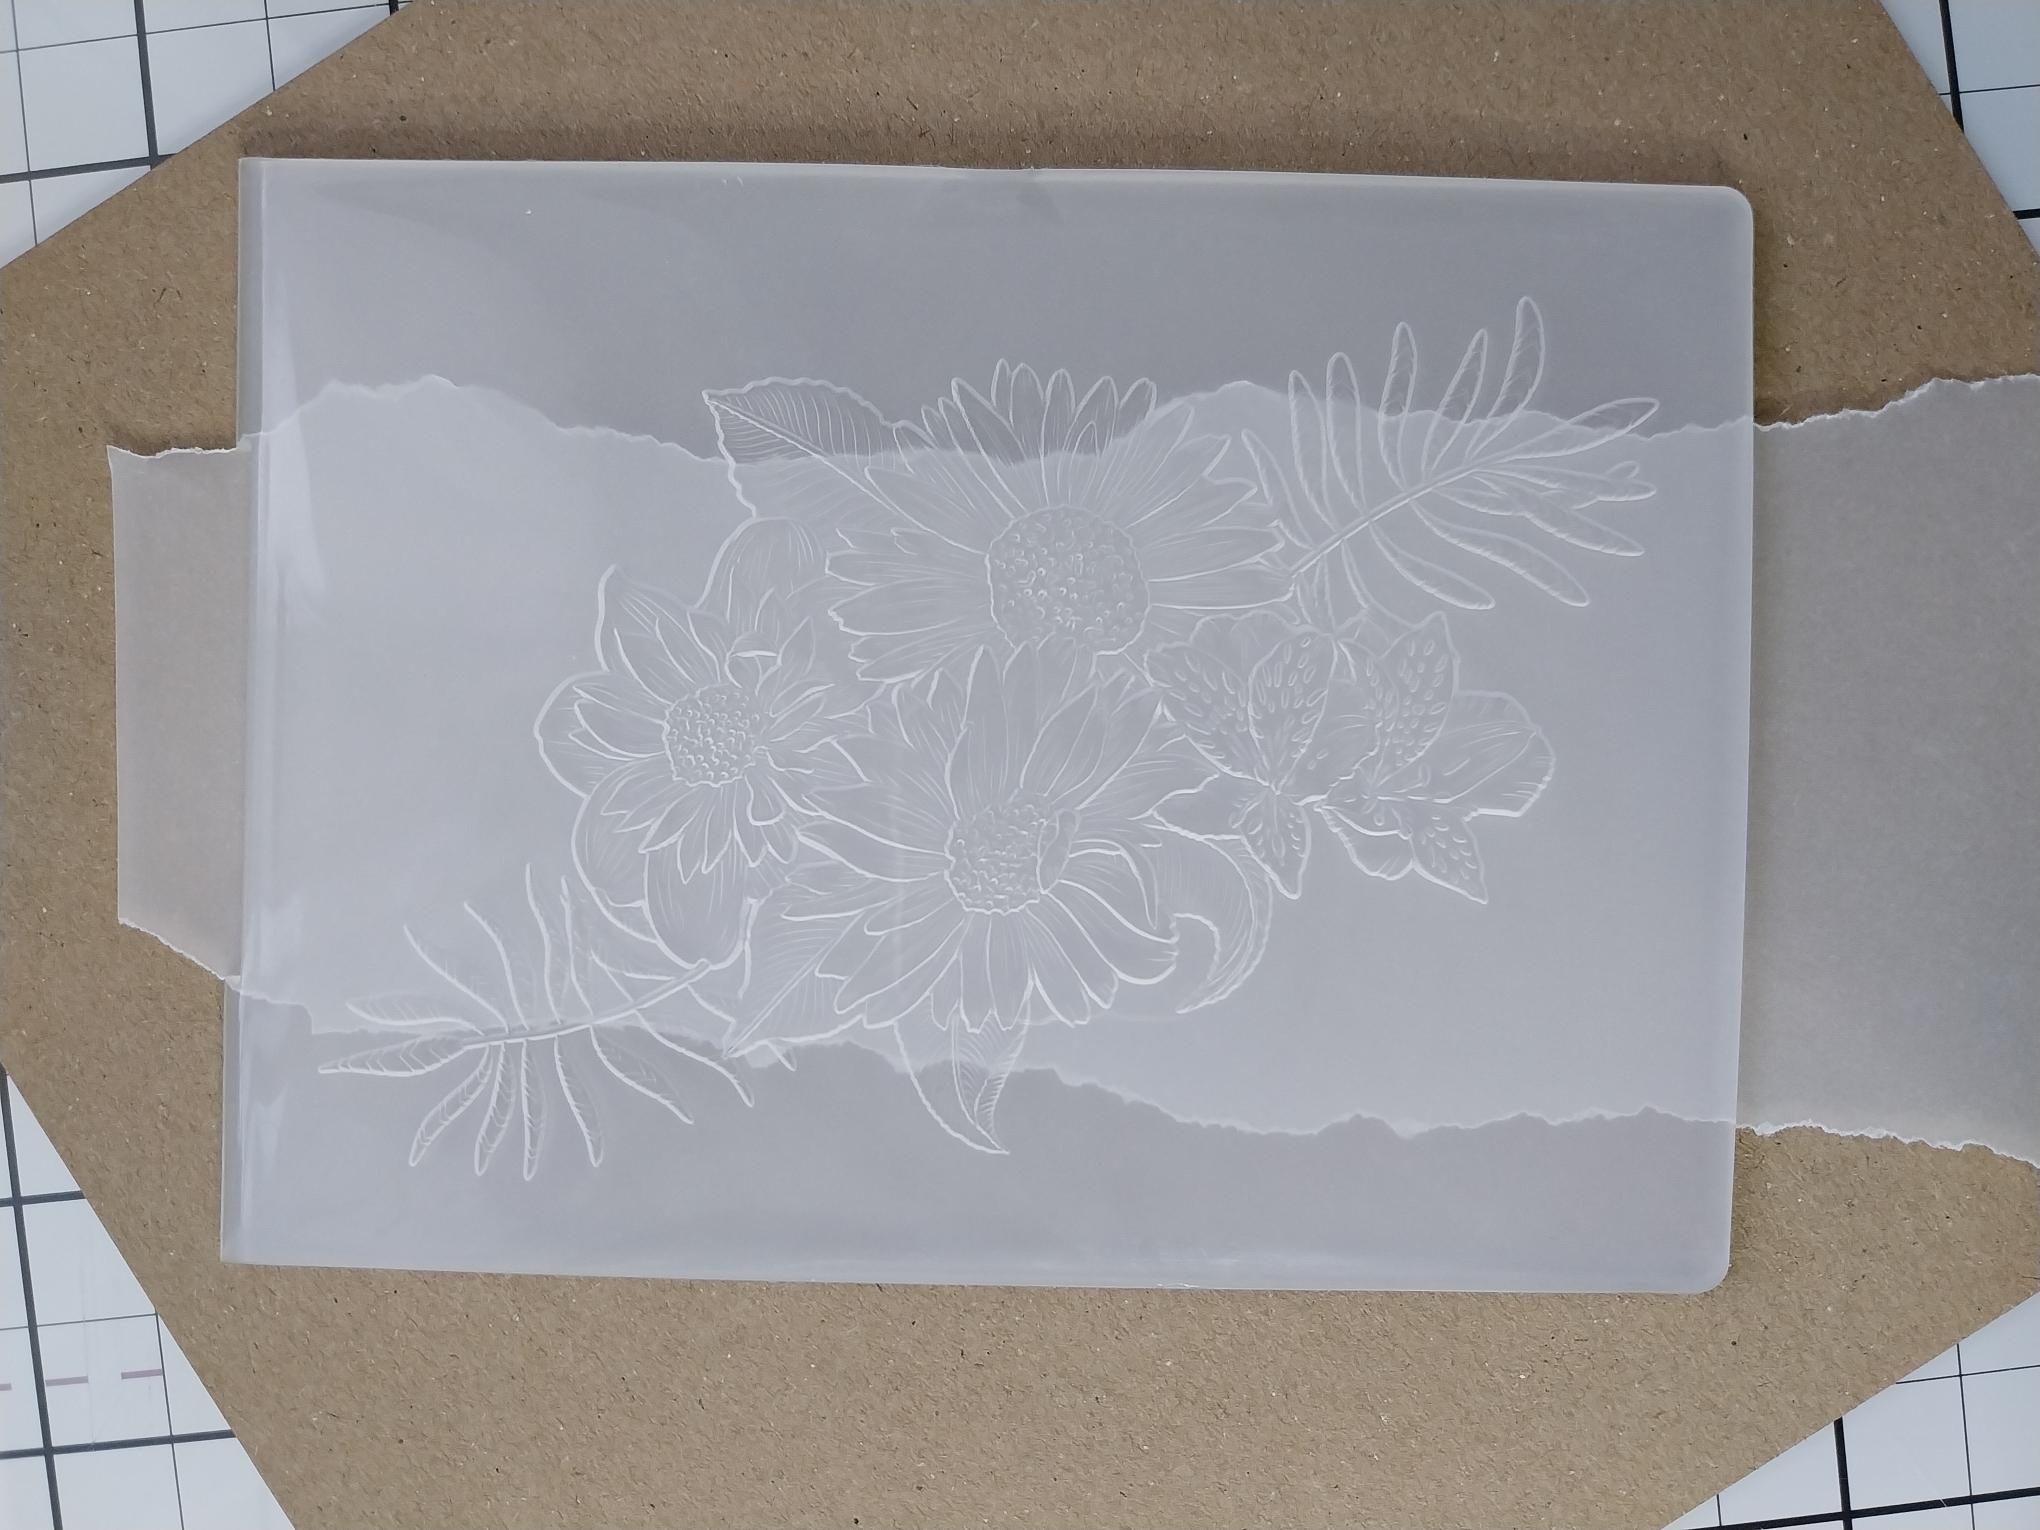
Place inside your embossing folder on the area of the design you wish to pick up. If needs be, you can fold a little vellum over at the top first, as this will be hidden behind the mount anyway. |
|
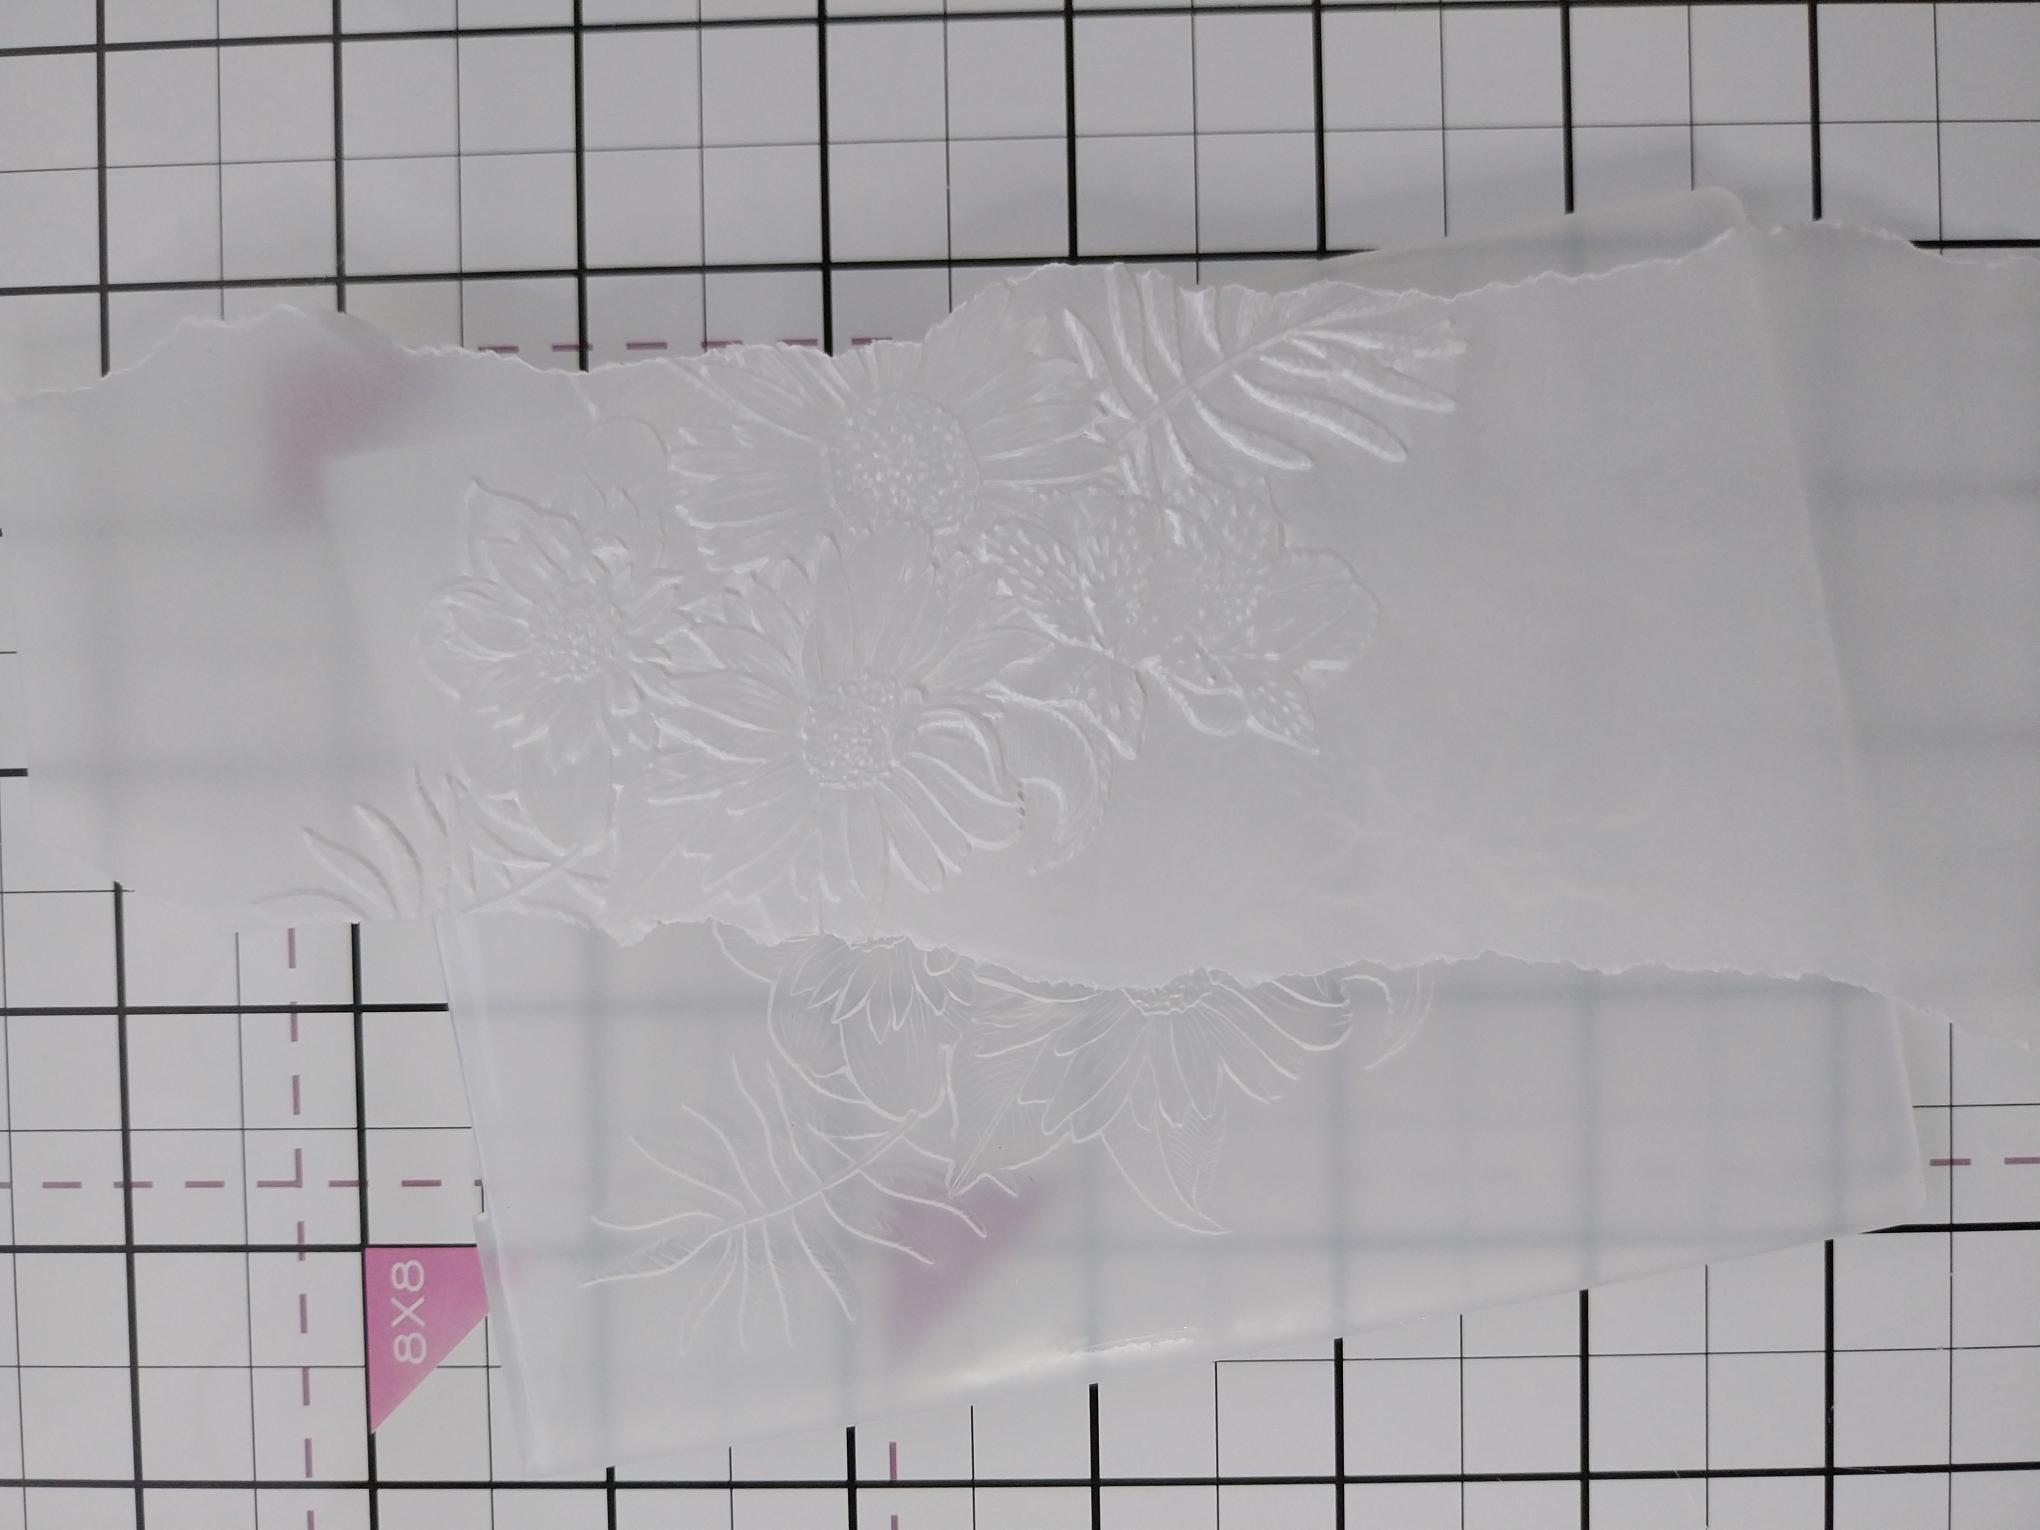
Run through your embossing machine. |
|
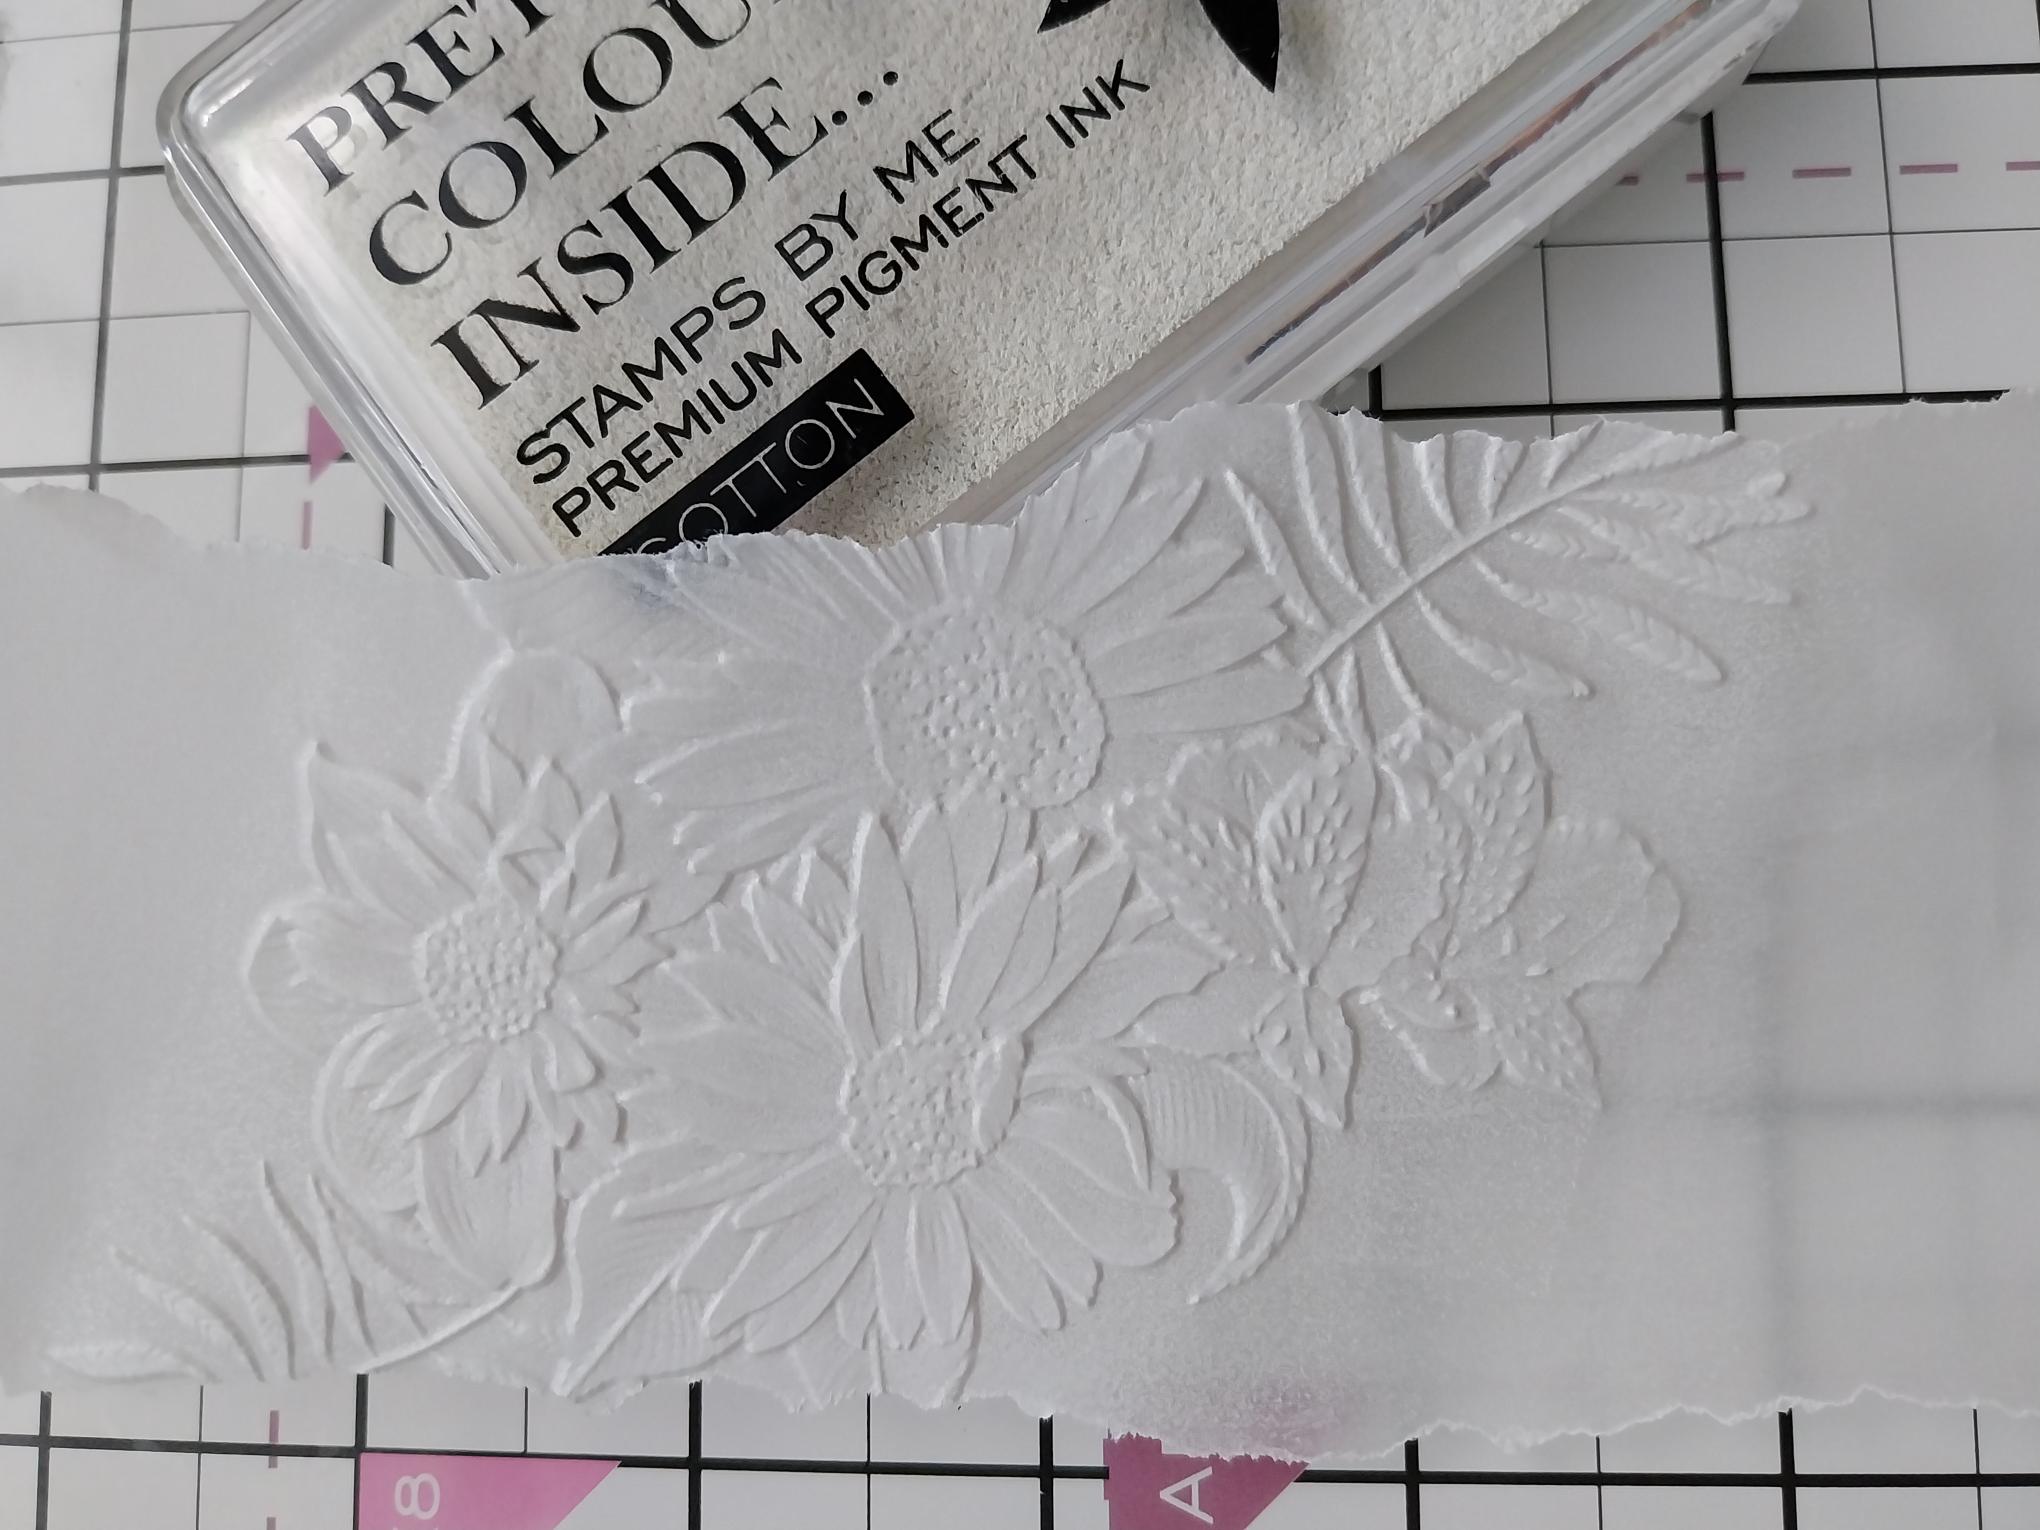
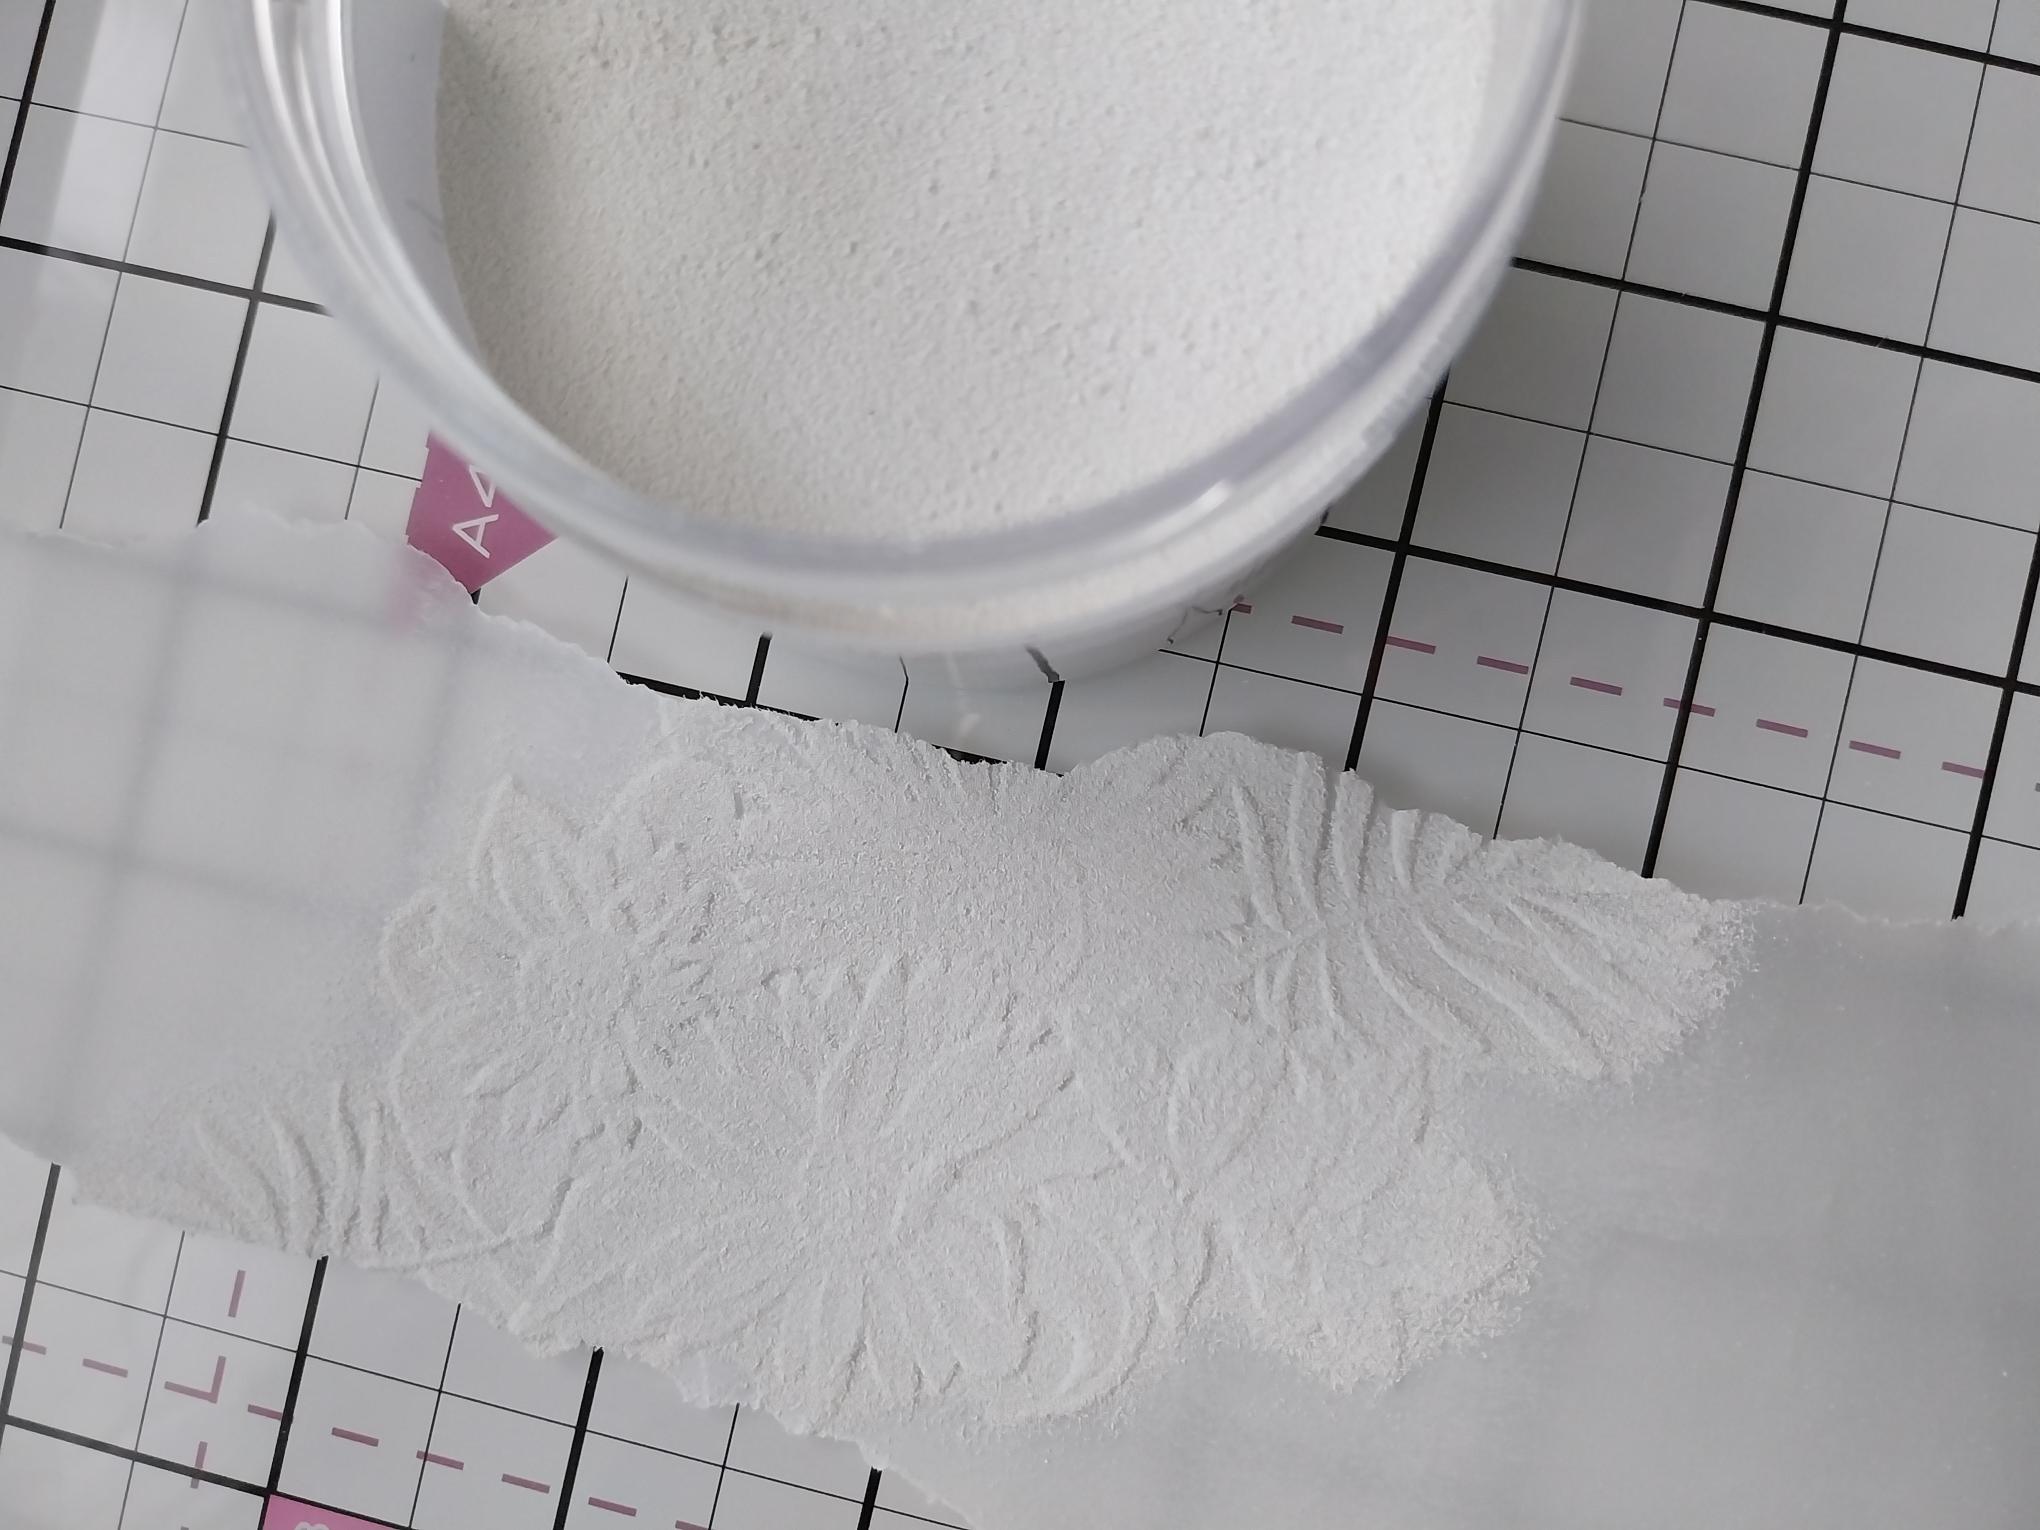
Wipe over the embossed vellum with an anti-static bag before lightly pouncing the Cotton ink pad over the raised areas. You can use a clear sticky ink but I wanted to intensify the whiteness! |
|
Apply white or clear embossing powder over the Cotton ink, brushing off any random bits with a little brush. |
|
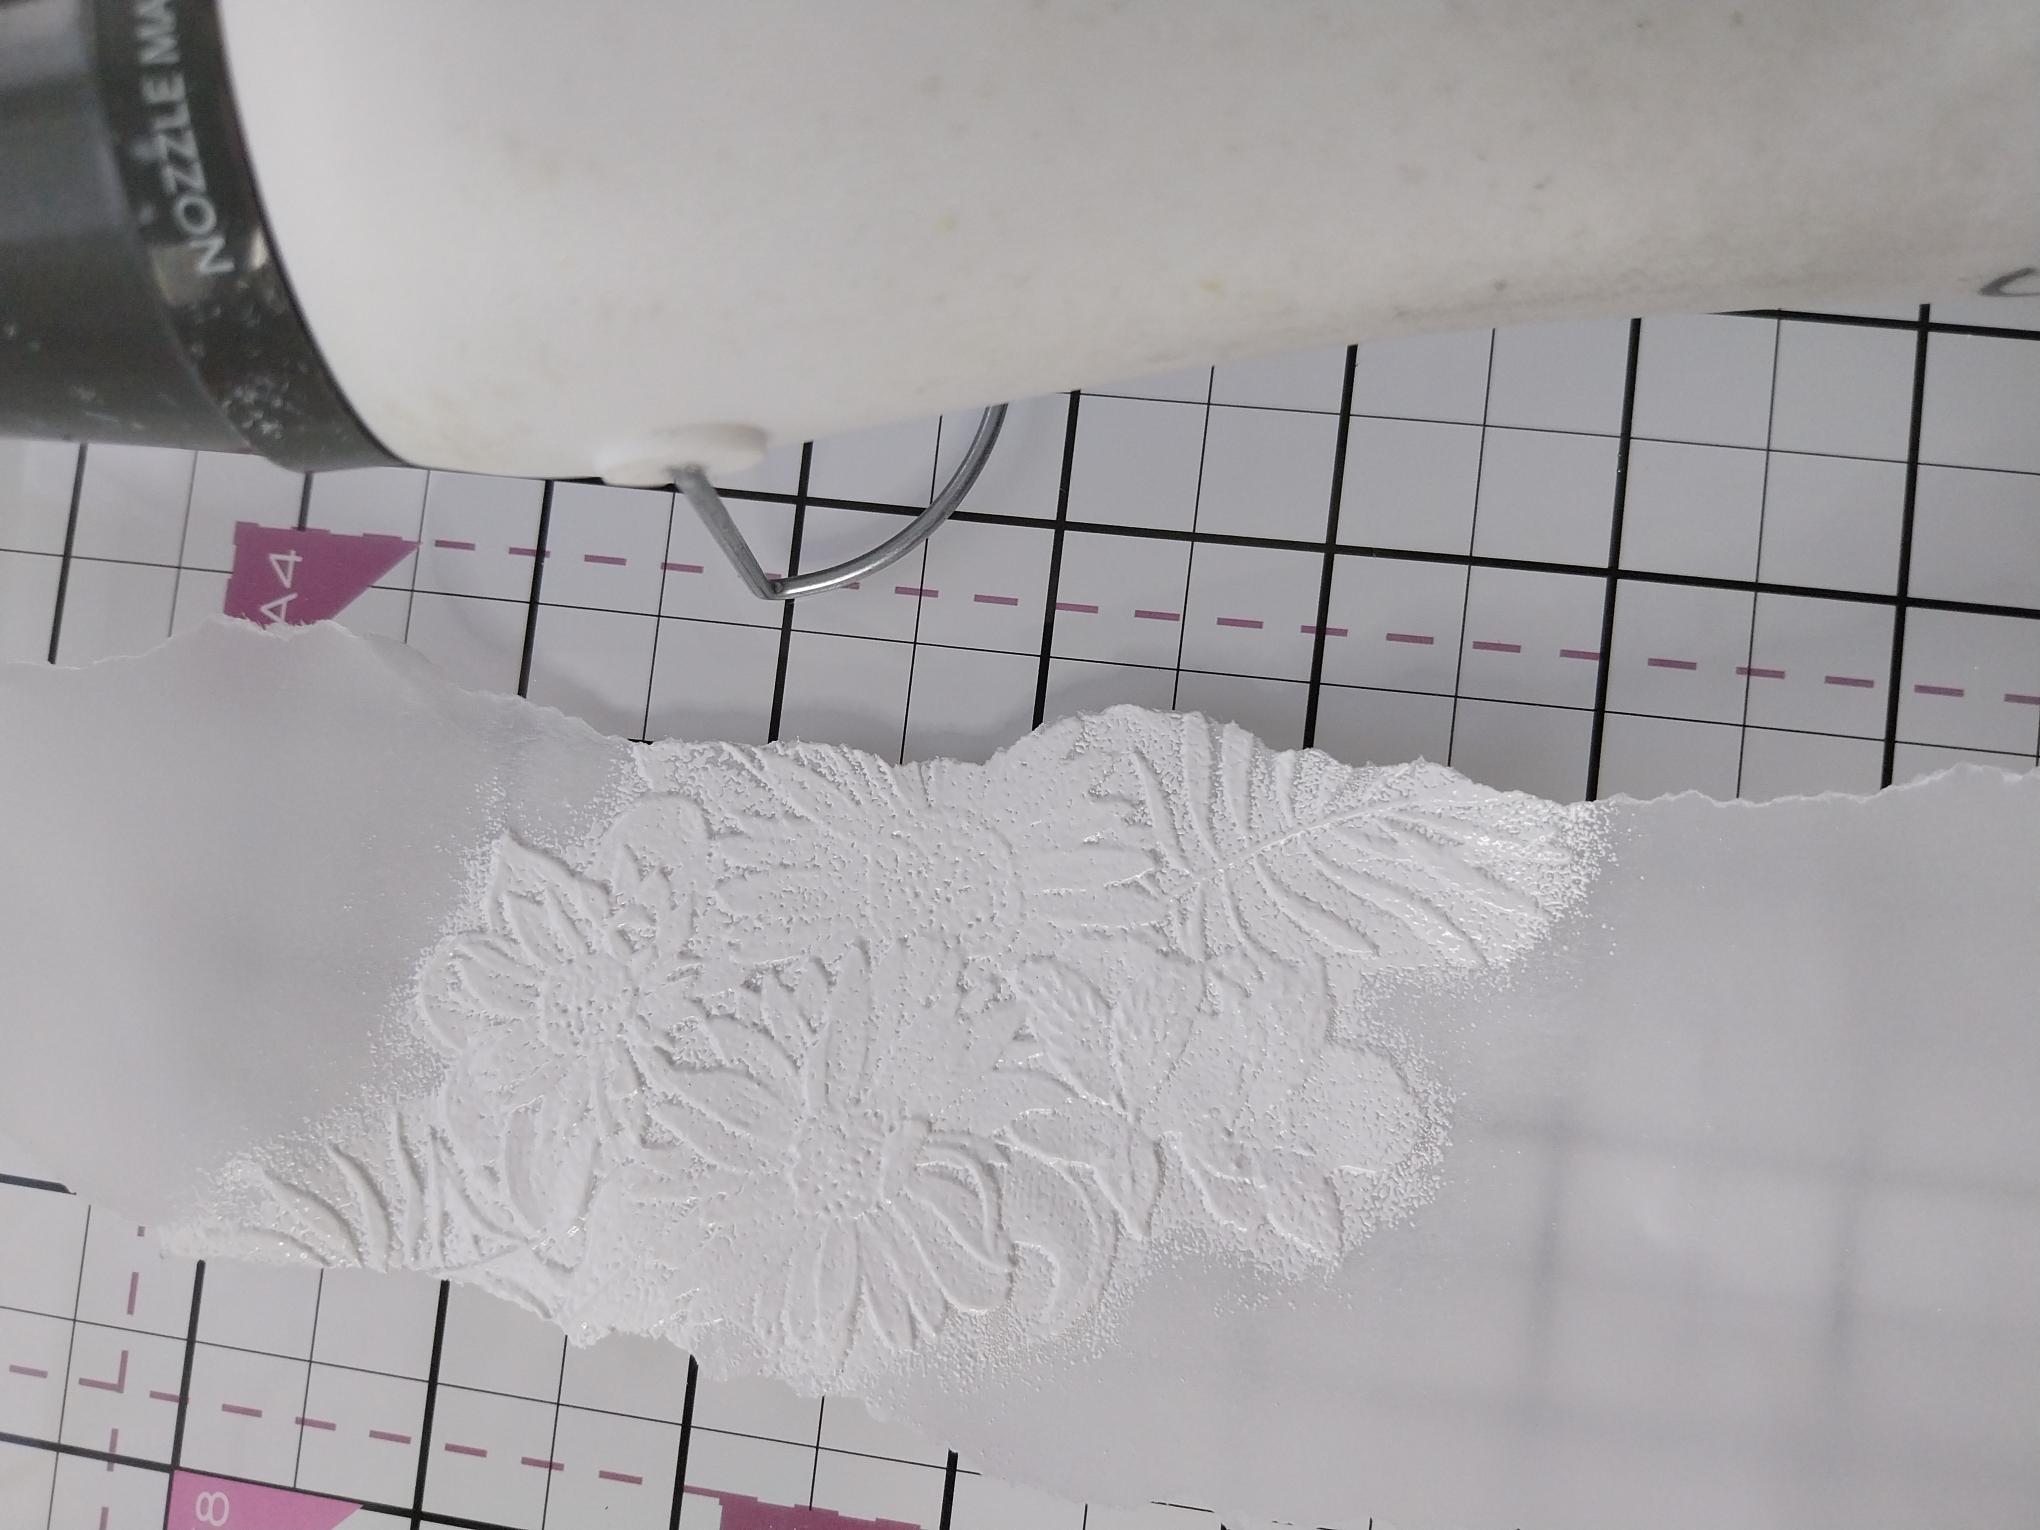
Get your heat tool really hot before you heat set the powder. Move the tool as soon as the powder starts to turn to avoid burning the vellum. |
|
Place down the right side of your painted mount and secure on the reverse with double-sided tape. |
|
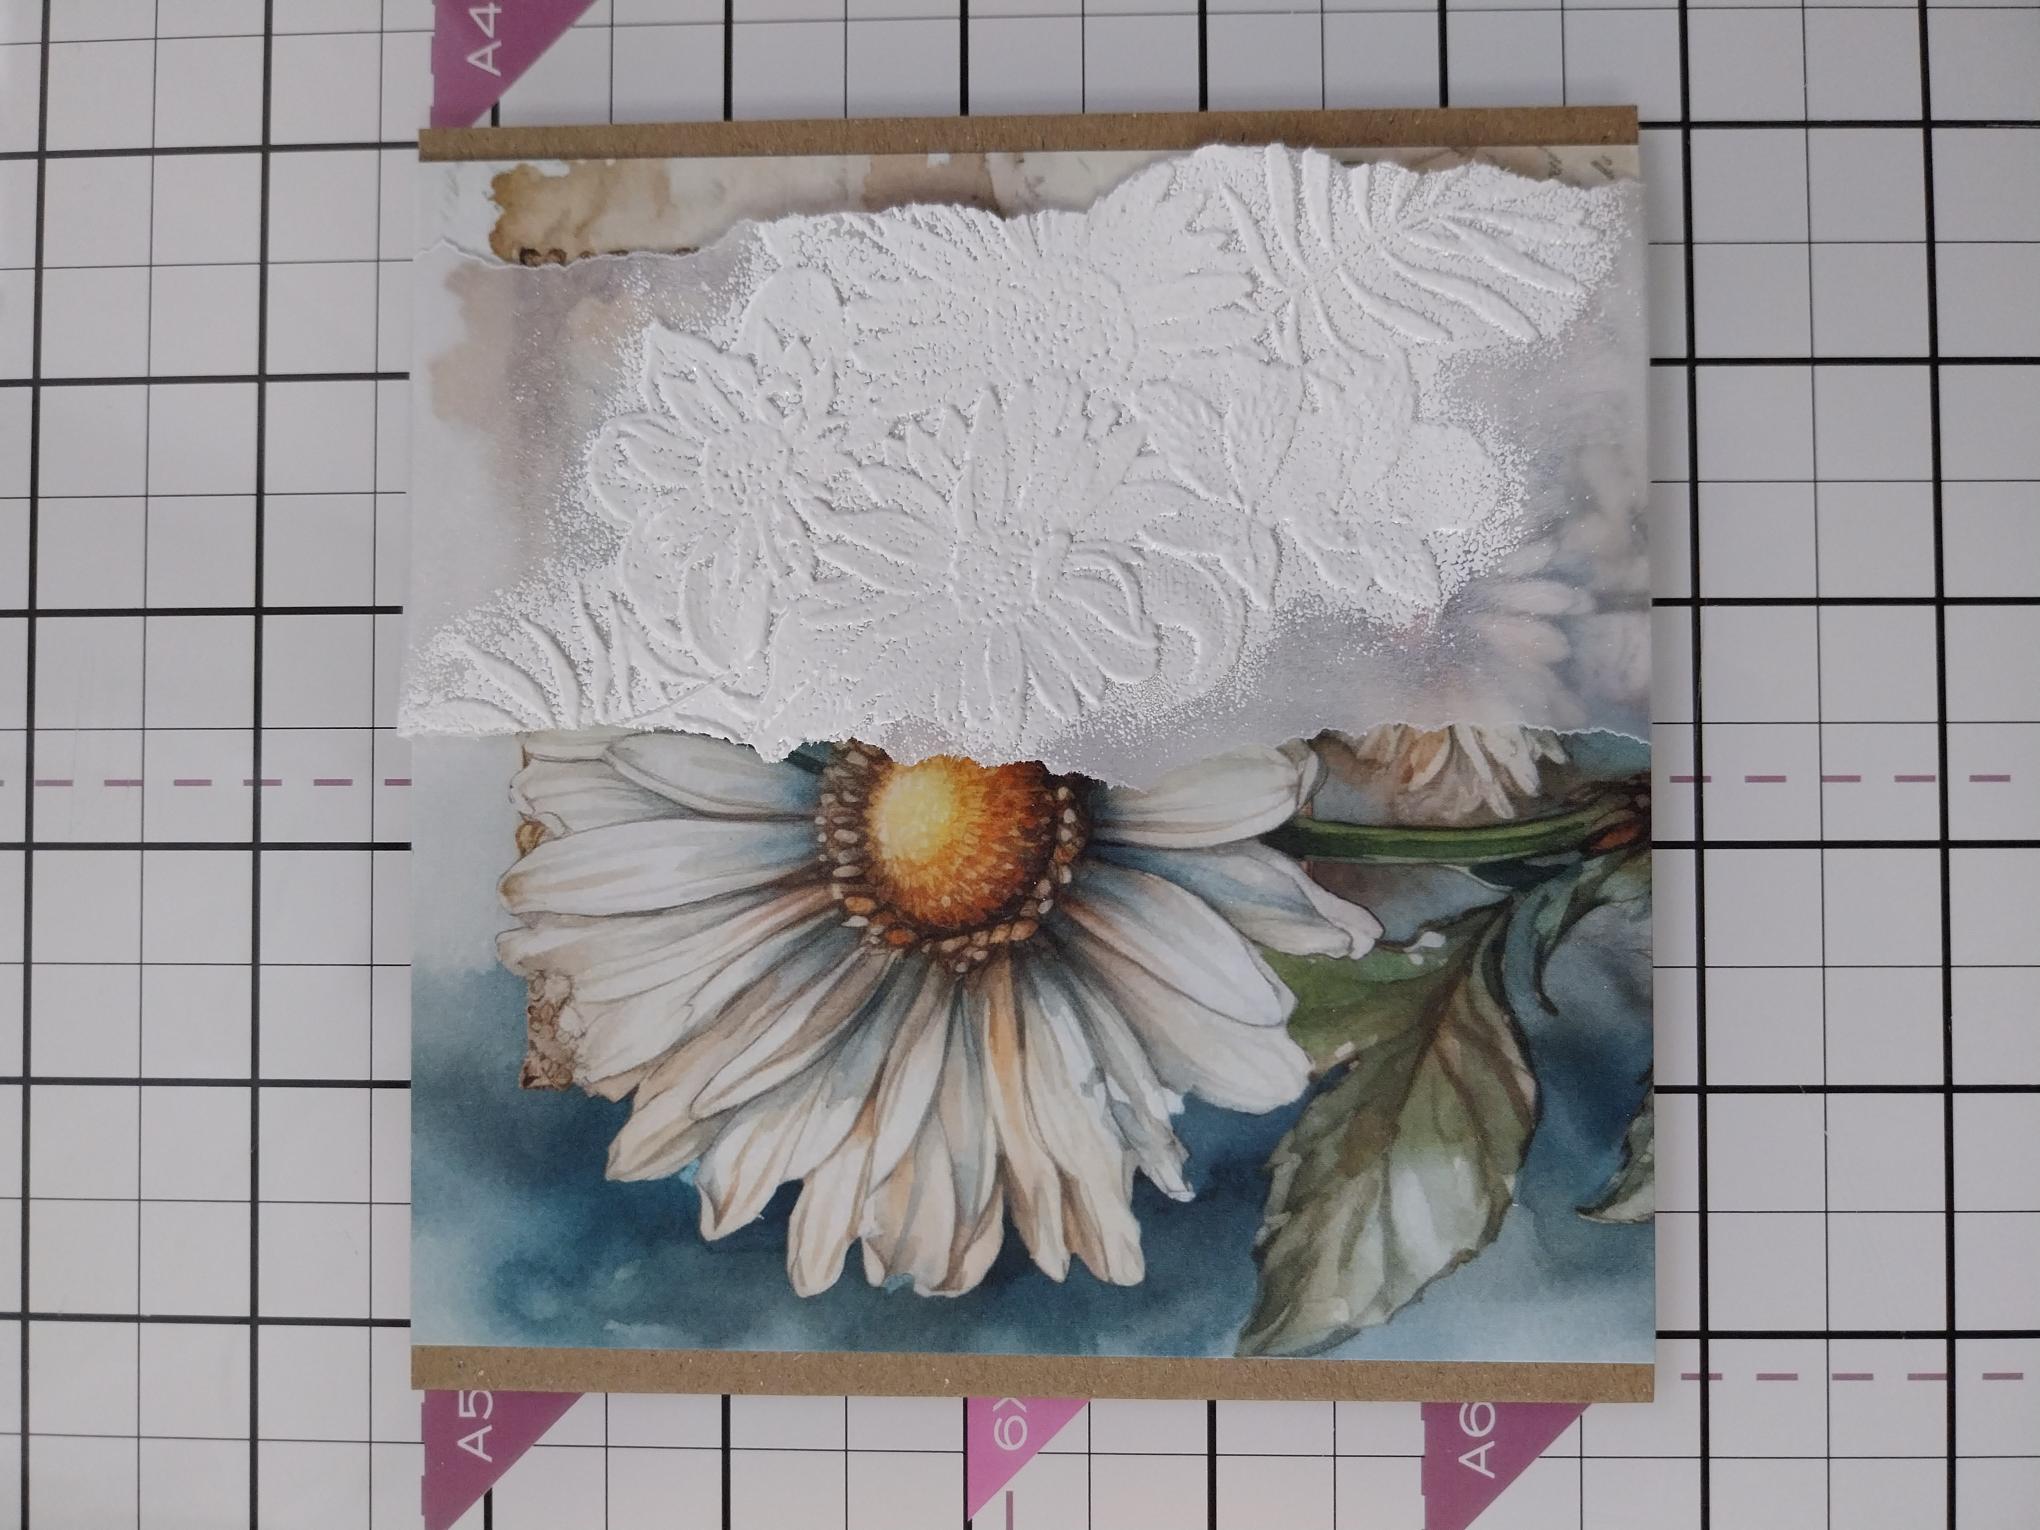
Mat onto kraft card trimmed to 5 1/4 x 5", leaving an equal amount of kraft card visible down the left and right sides. |
|
Stamp your sentiment in Midnight, to the left of the vellum panel. |
|
Finally, mat onto your landscape card blank. |