Give your friends $10 off their first order!
Refer a FRIEND


WHAT YOU WILL NEED:
White card blank 7 x 7"
Black/white cardstock
Set The Scene Die Set
Stylized Circle Stencil
Small circle mask (represent Moon/Sun)
To The Moon And Back Stamp Set
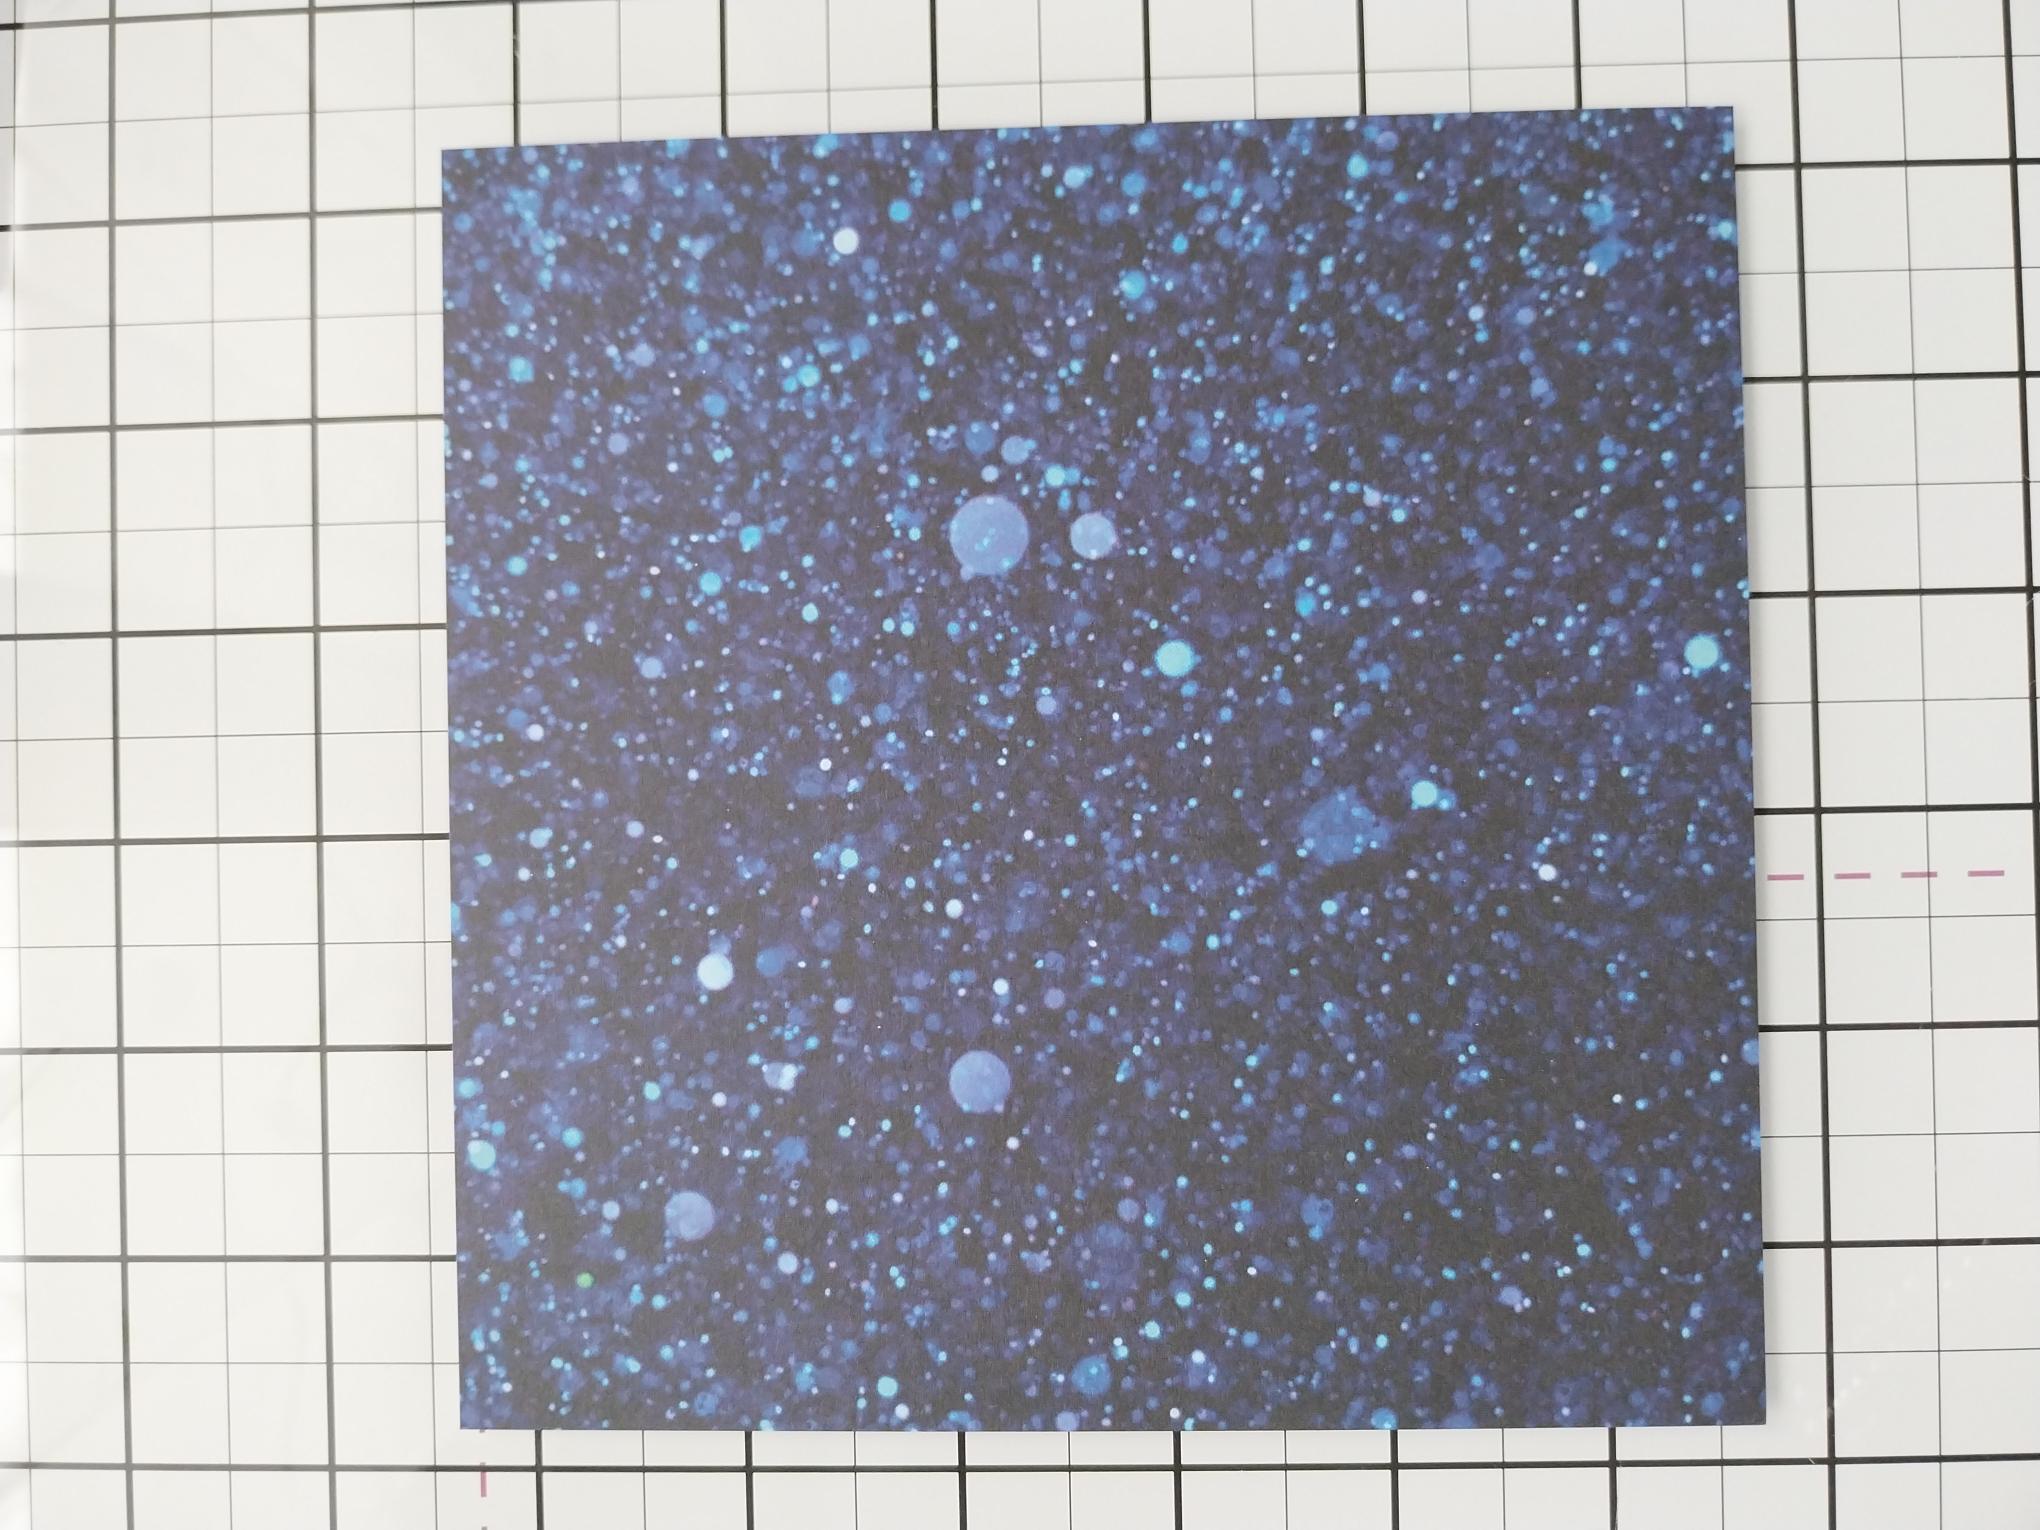
All Surfaces Royal Blue 8 x 8" Paper Pad
SBM Hybrid Ink Pad: Midnight
Distress ink/Oxide ink Pad: Hickory Smoke, Lost Shadow, Faded Jeans
Blending tool
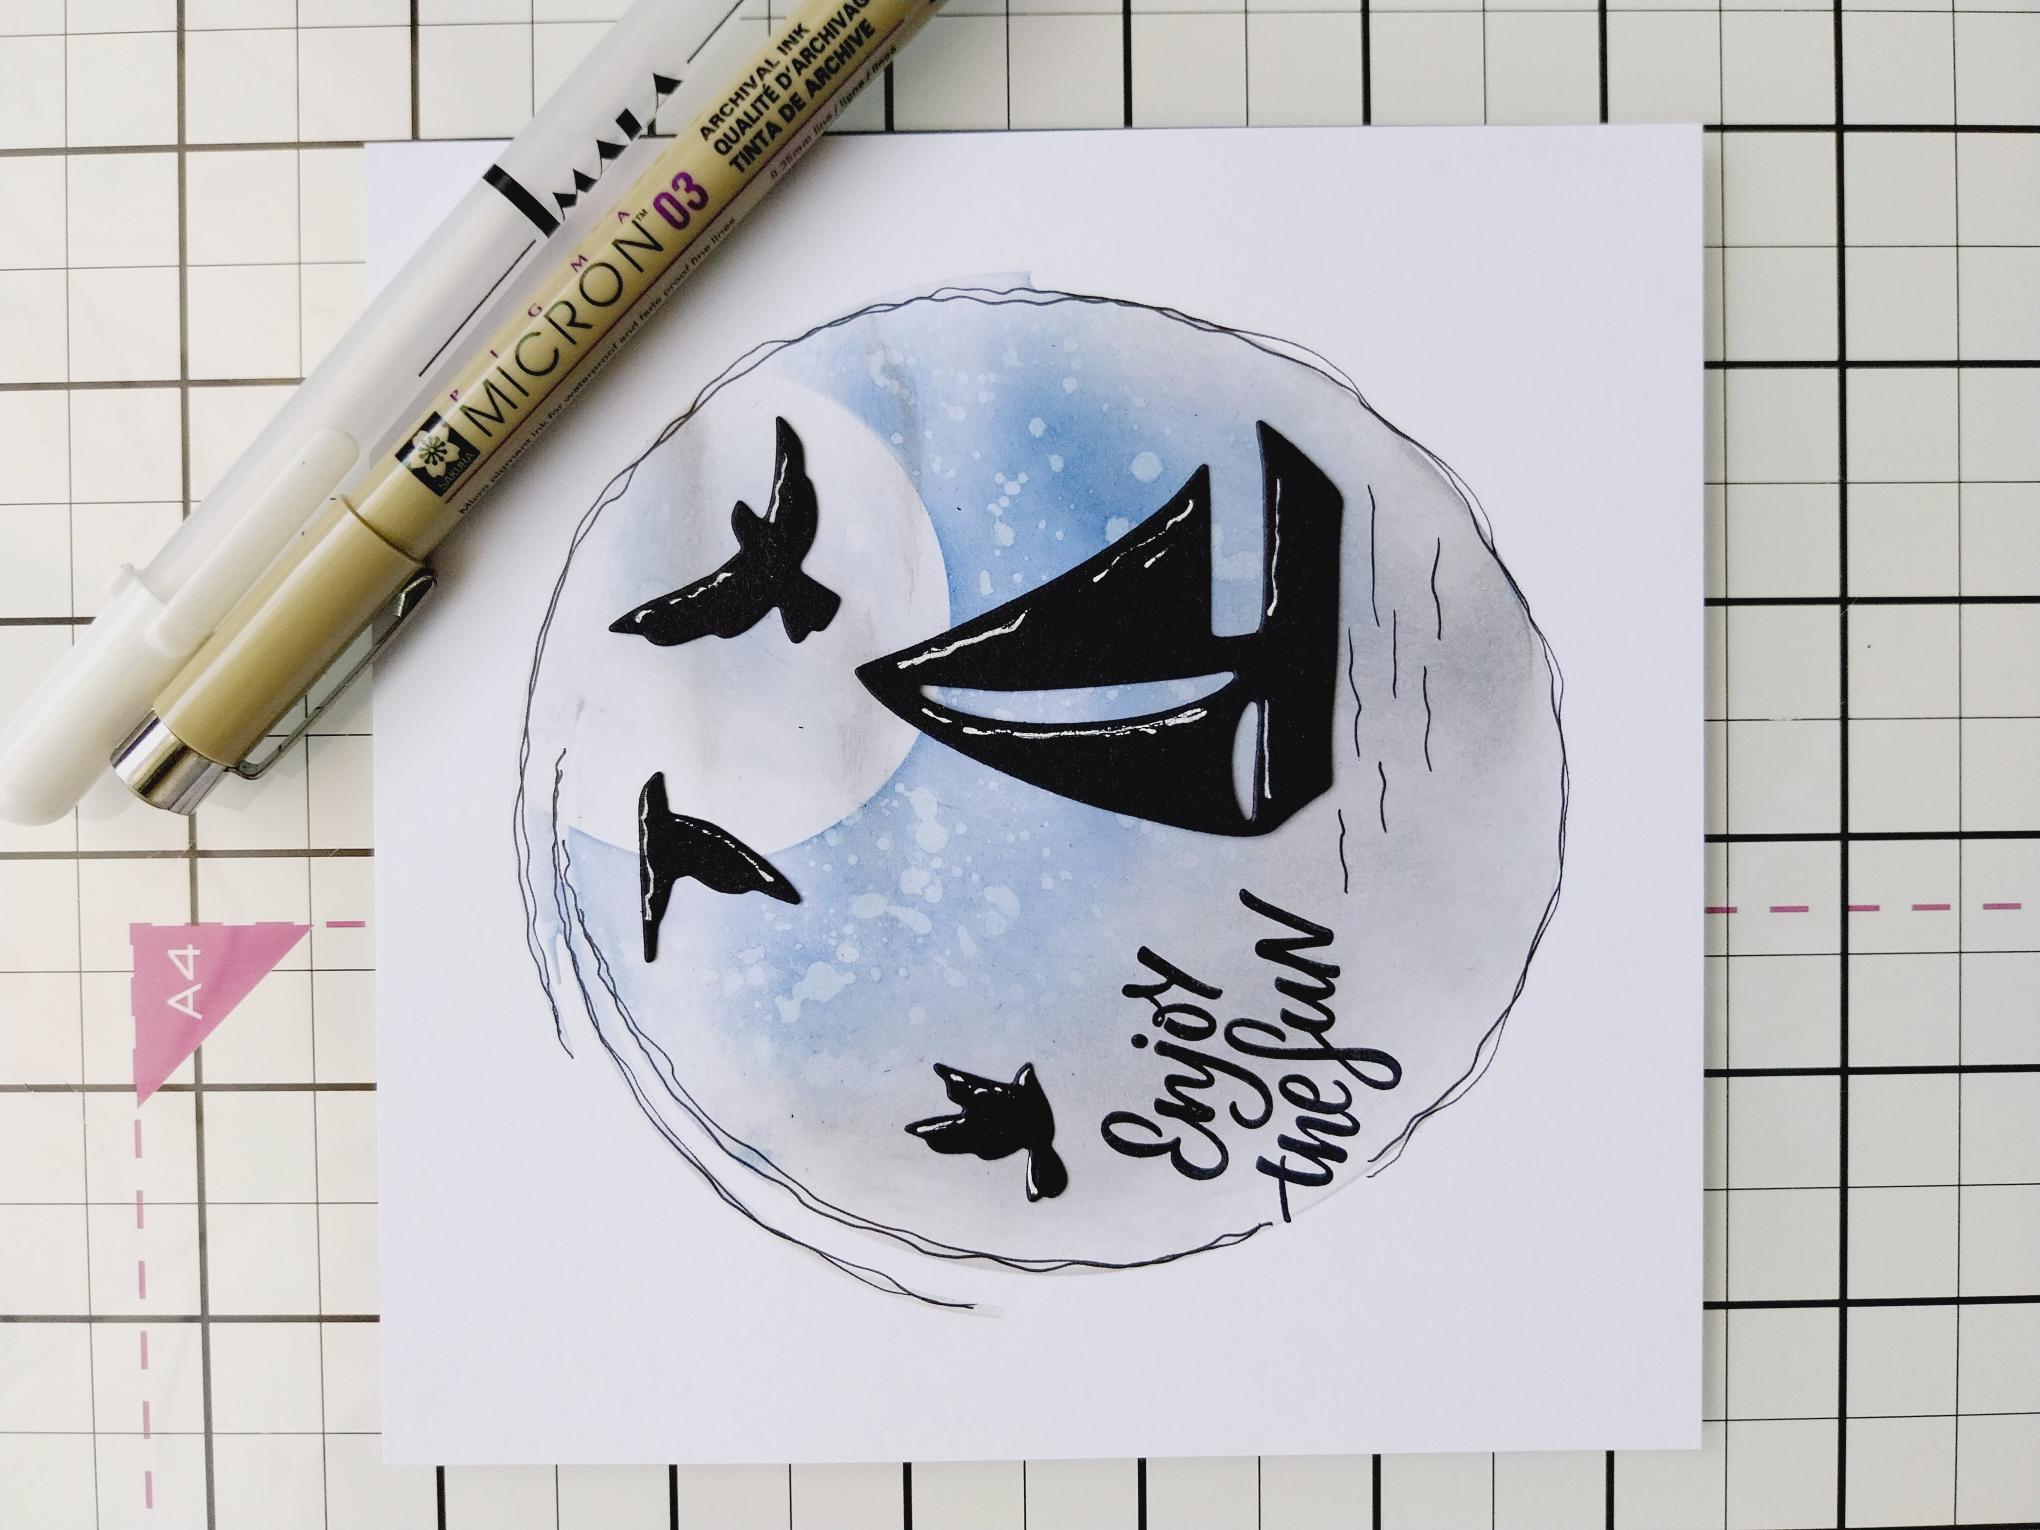
Black pen
Imala white gel pen
Paint brush
Eureka 101 Watercolour Tablet
SBM A3 Magnetic glass mat
Paper Trimmer
Glue
Die Cutting machine
[click image to enlarge] 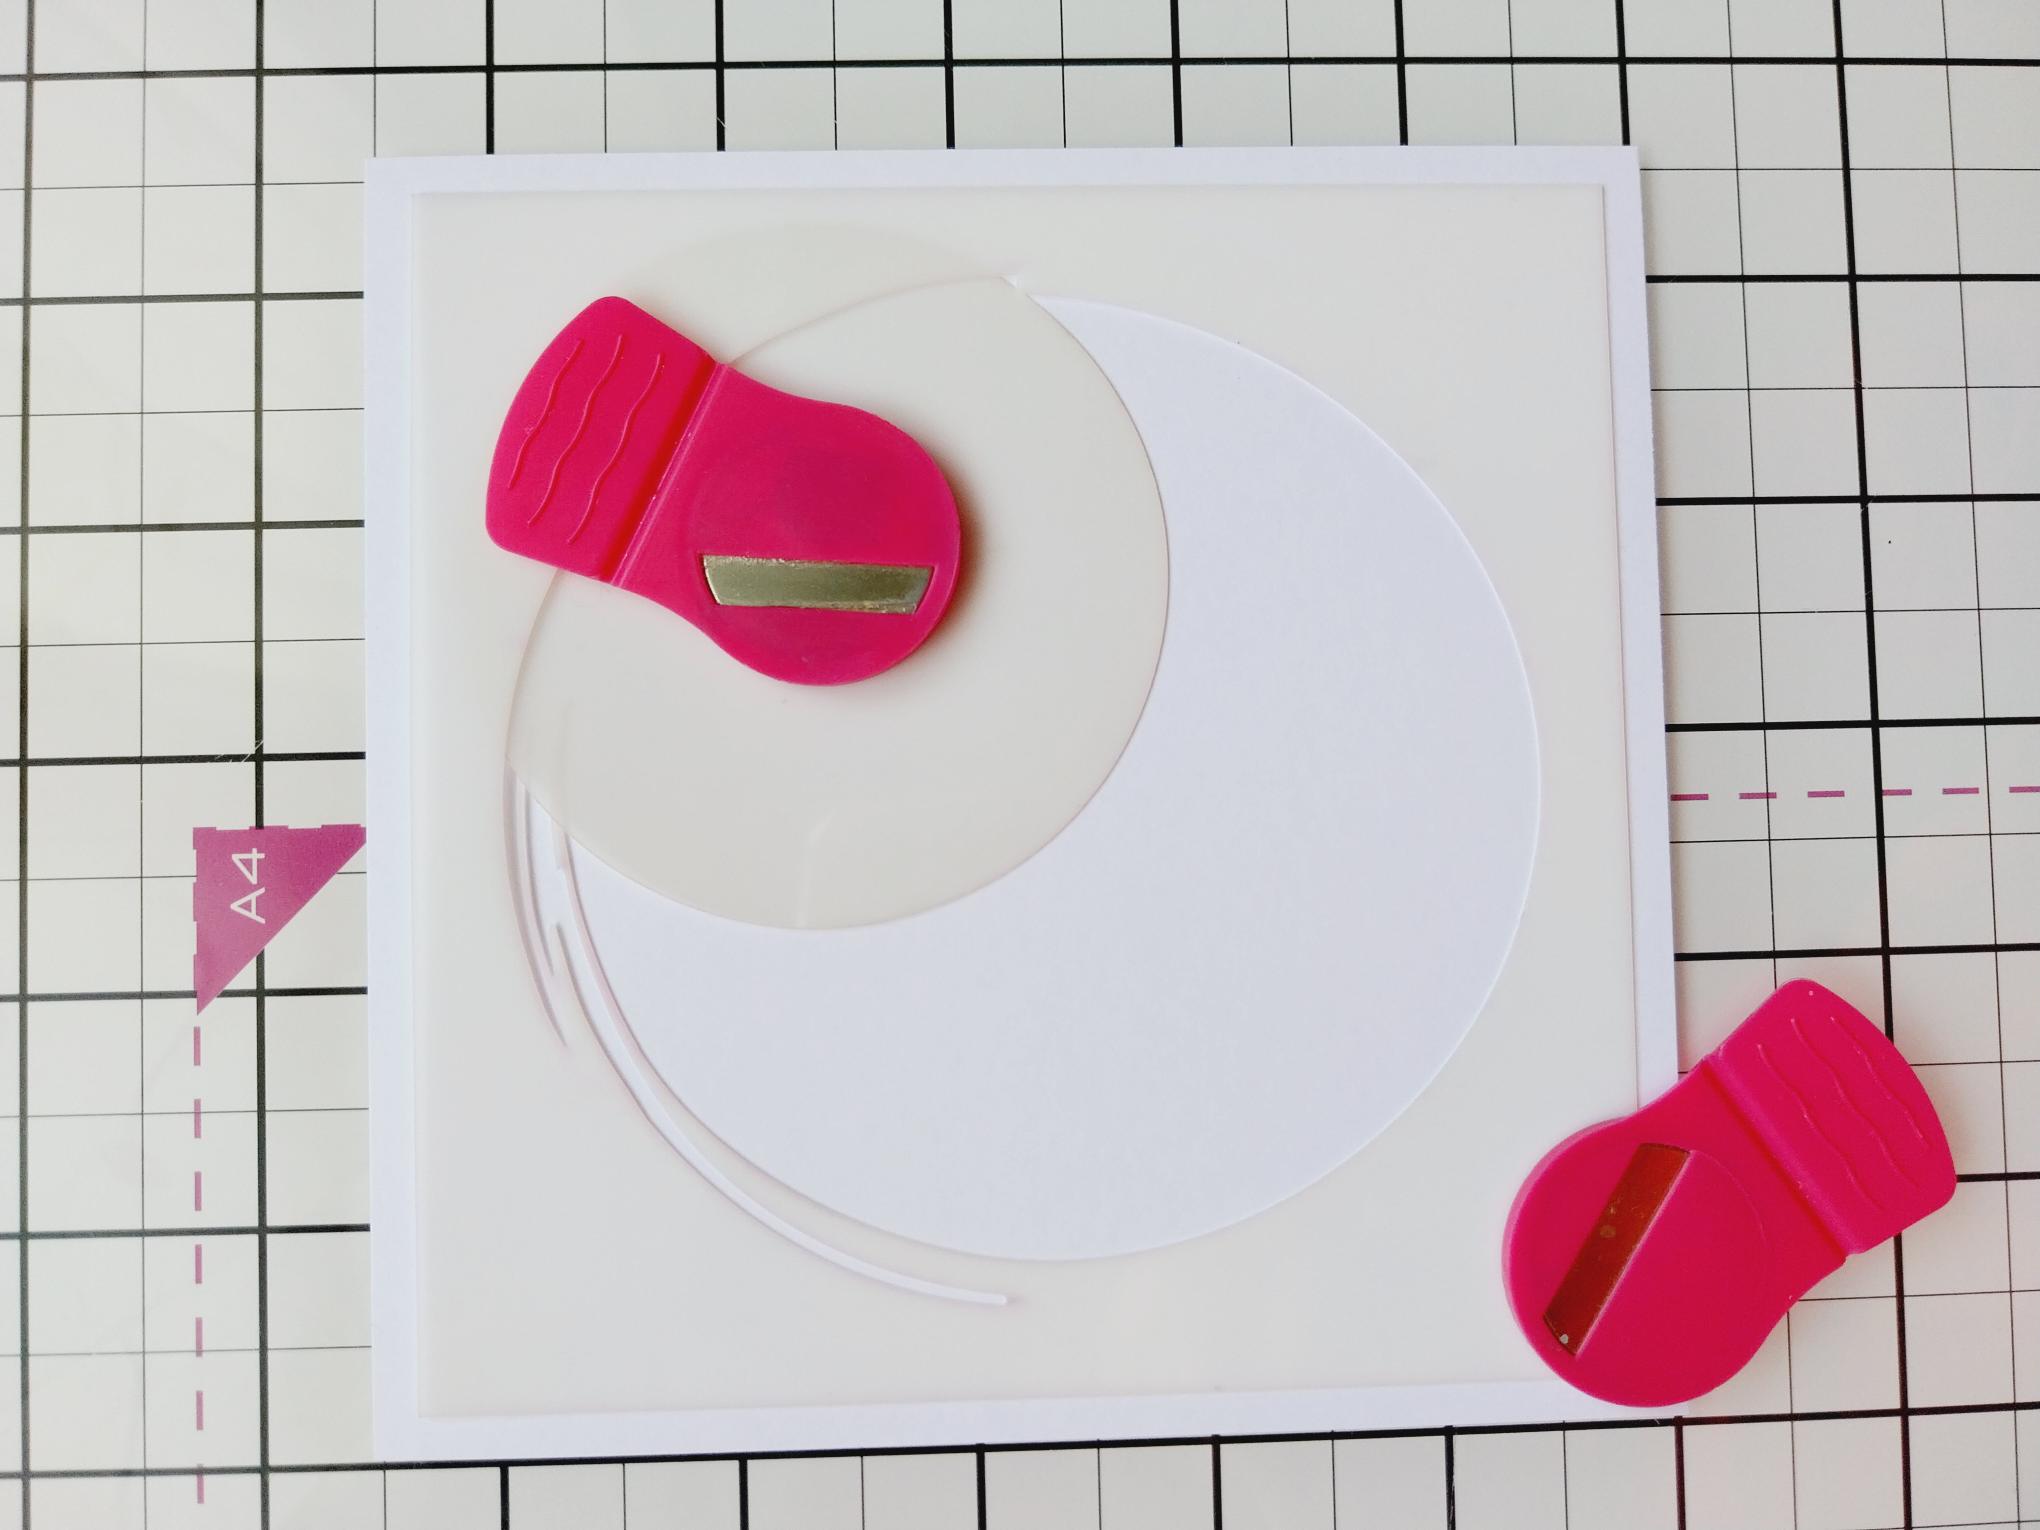
|
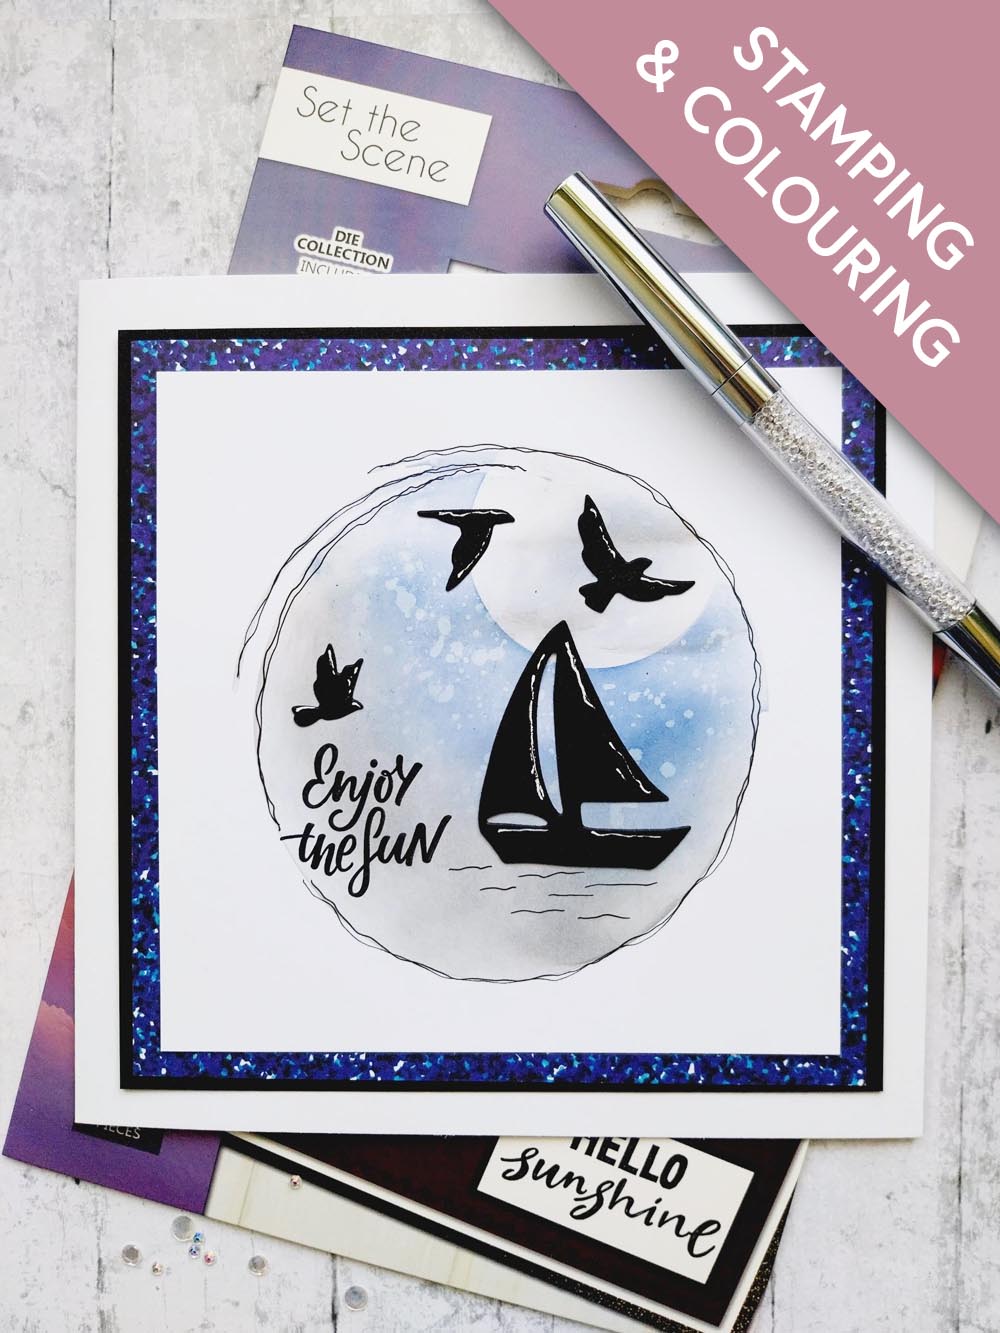
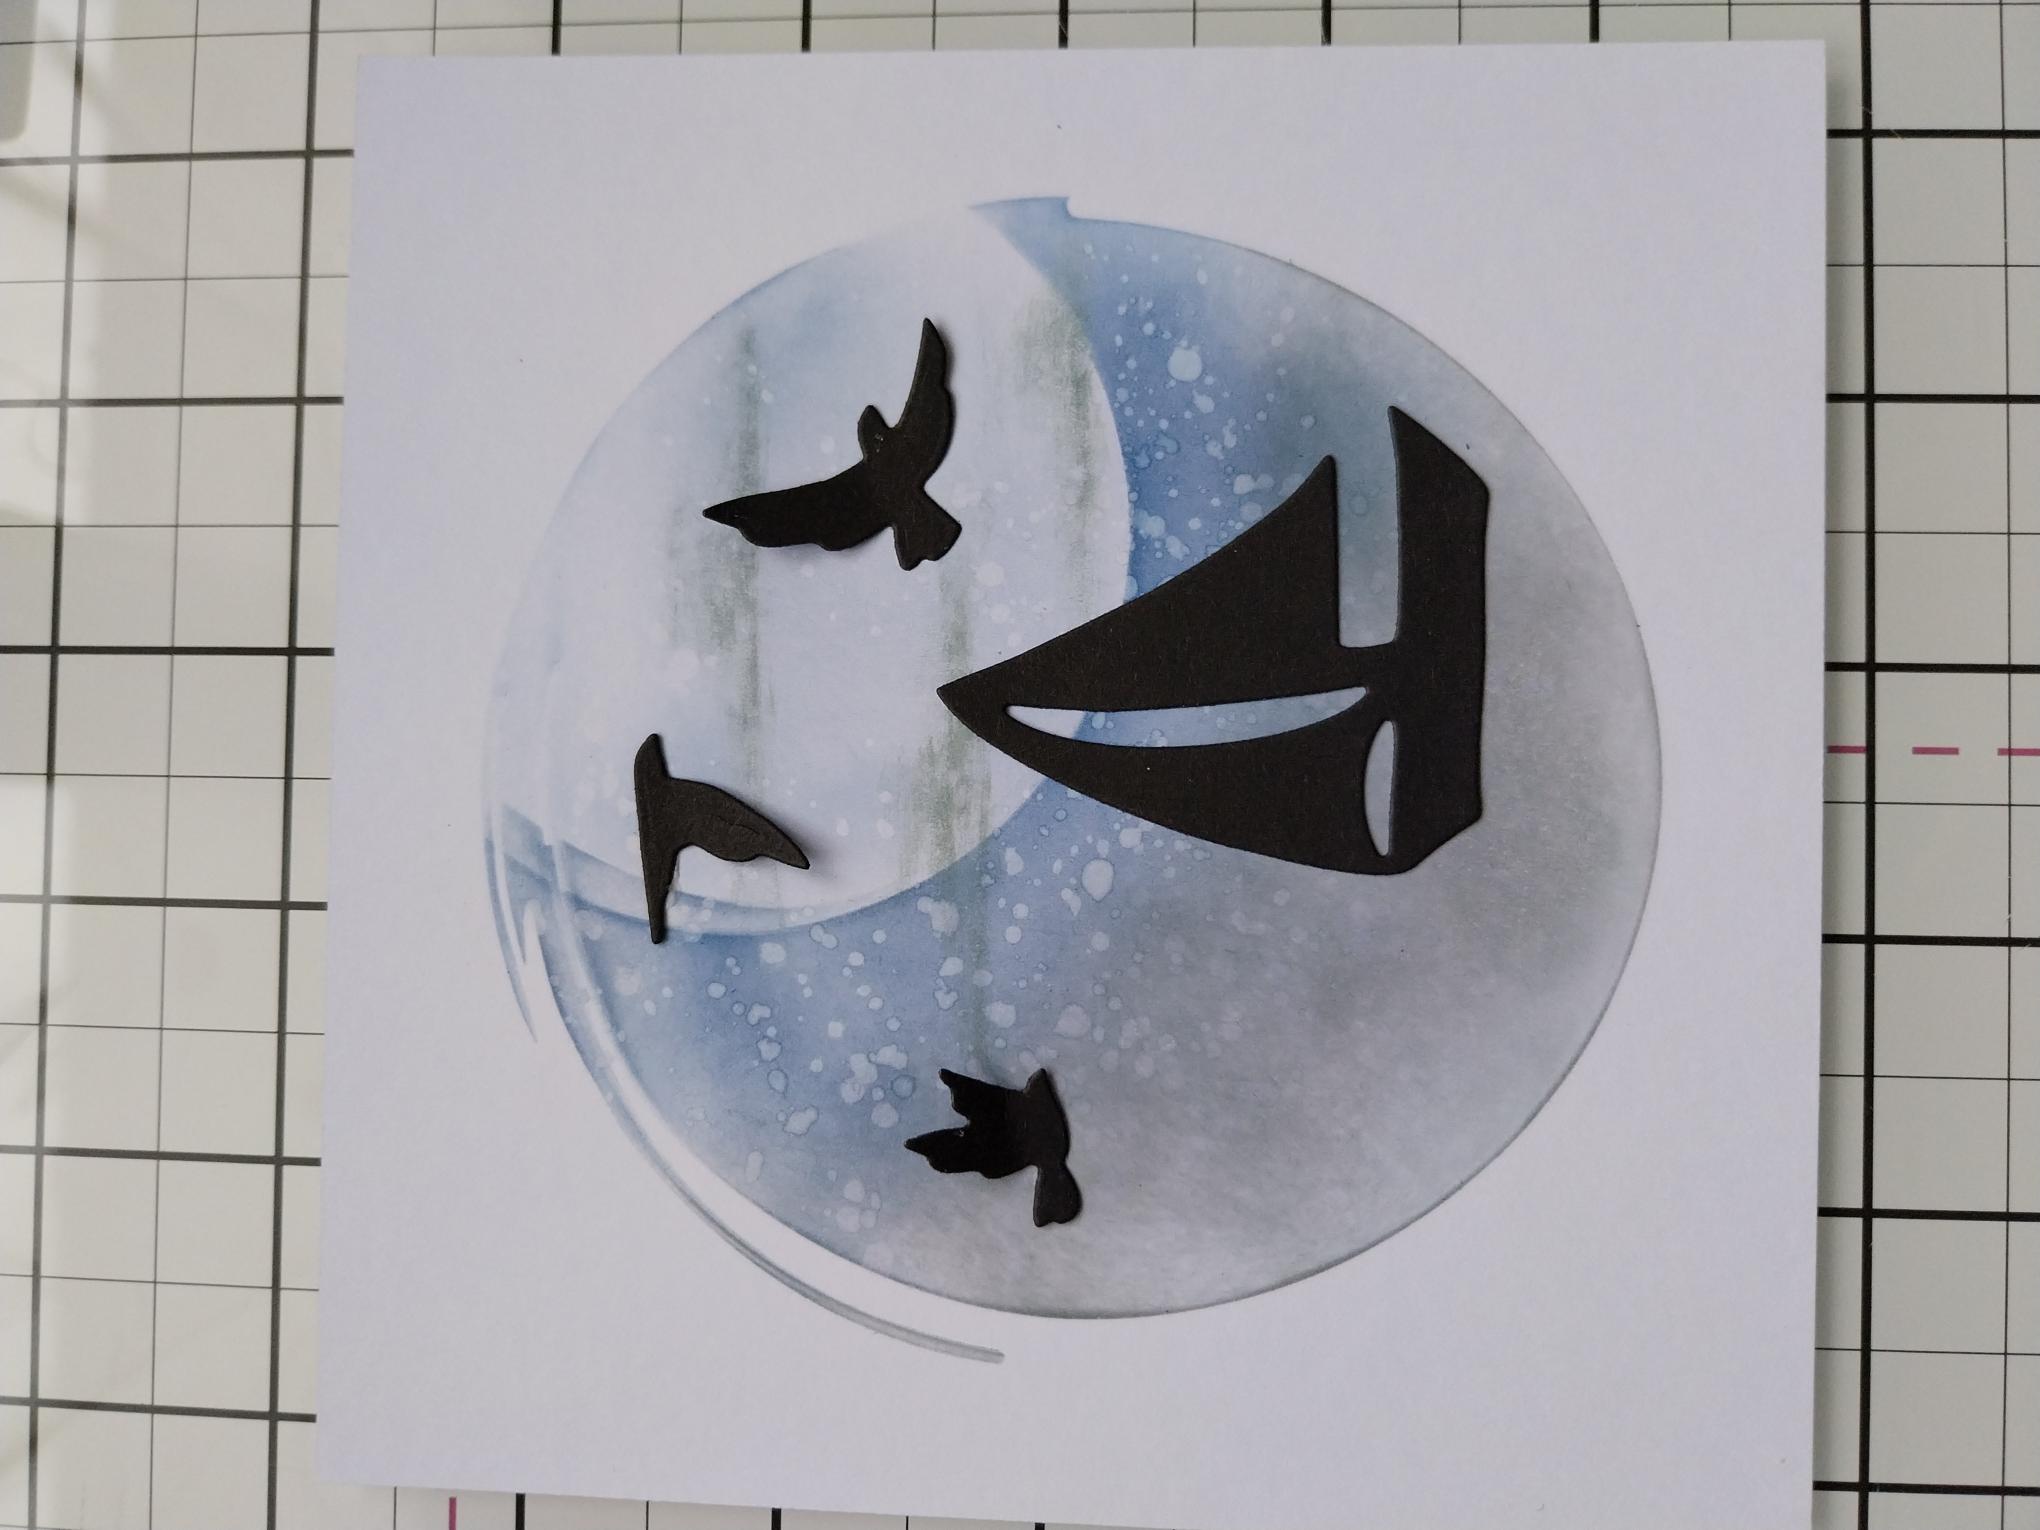
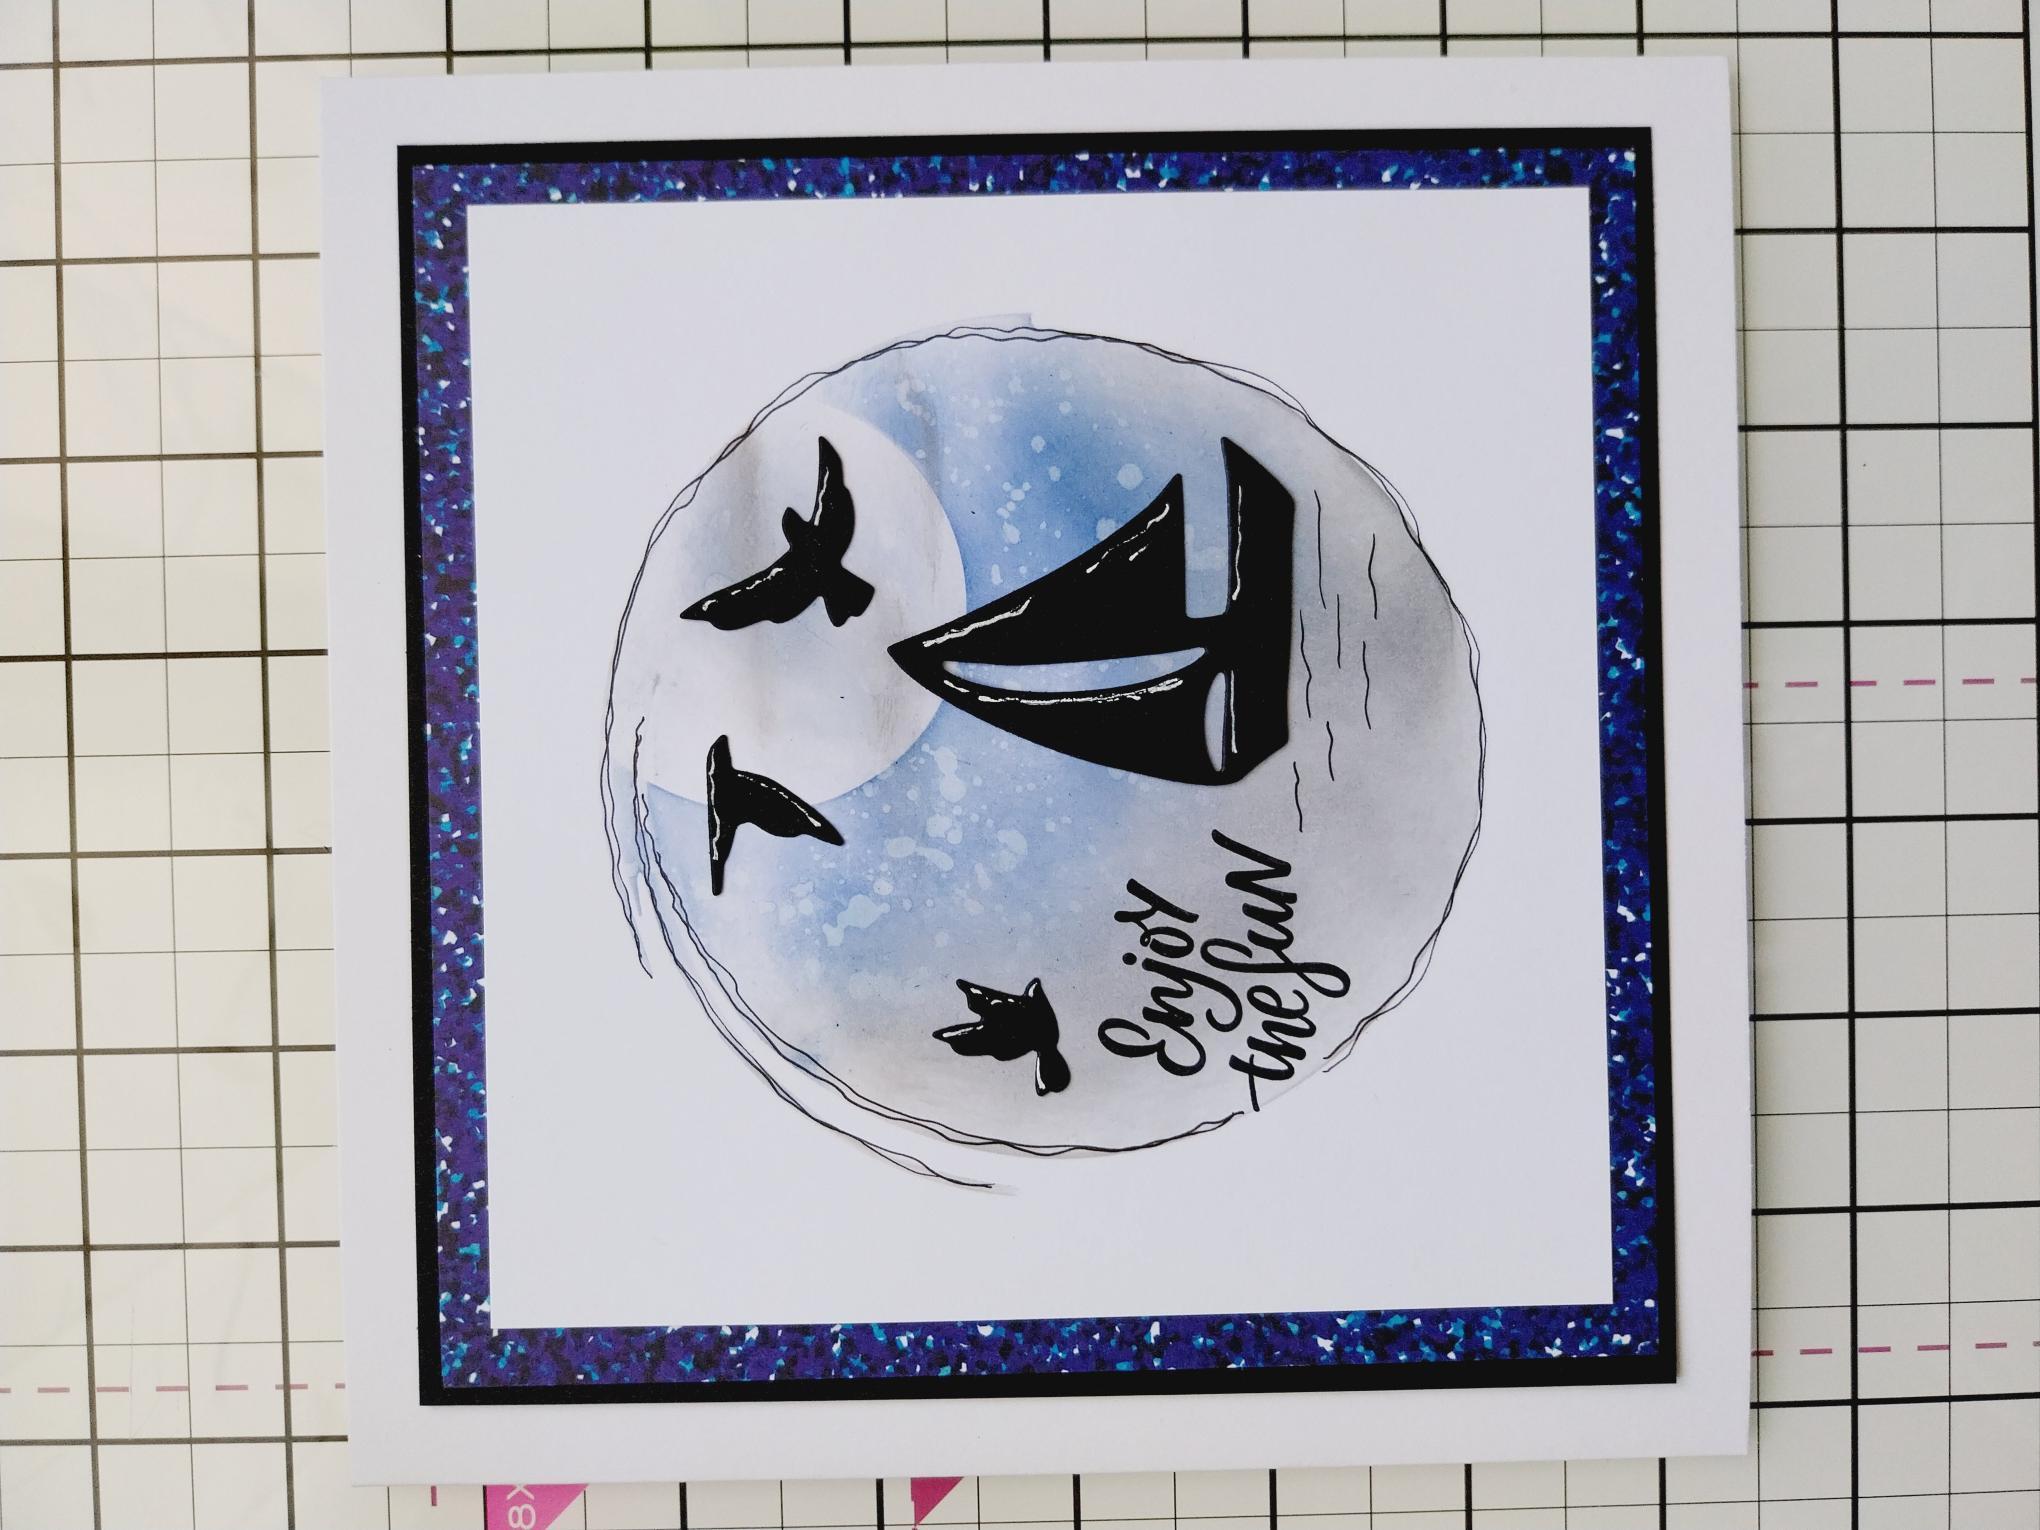
Cut a piece of white card to 5 1/2" square. Secure the Stylized circle stencil on your white card and the circle mask to the top right, as shown here. |
|
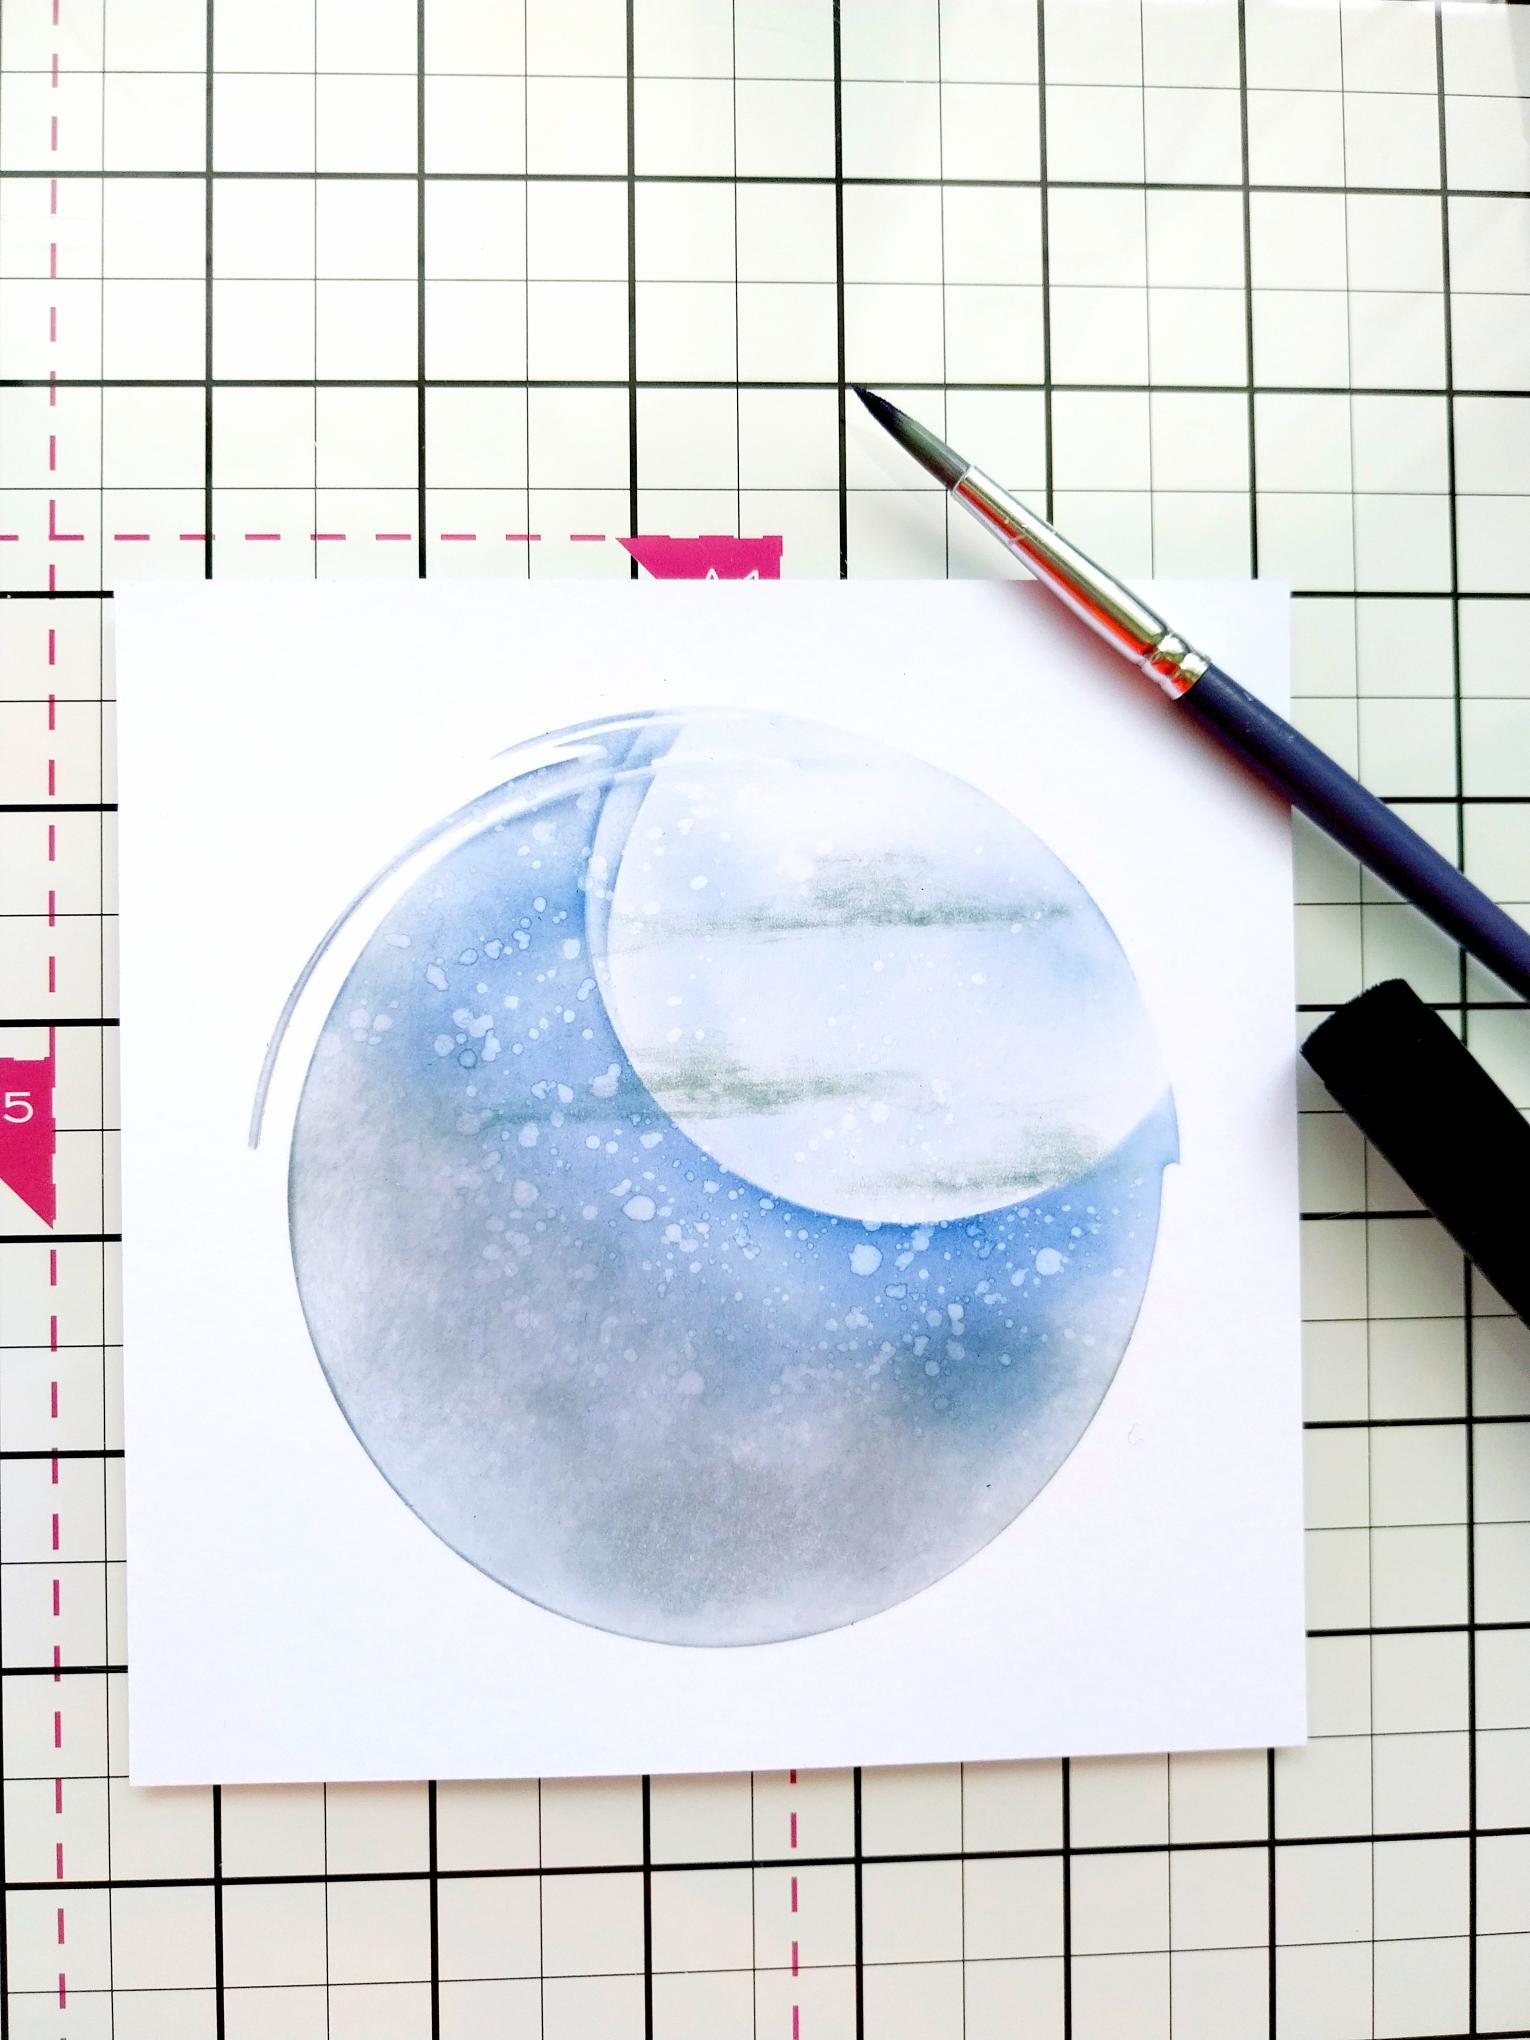
Blend your Distress inks within the stencil, blending the colours out with your blending tool. Splatter water on to your inky circle, mopping up excess water and ink with a paper towel. Remove circle mask and lightly blend ink within the Moon dragging ink to represent clouds drifting past! Remove stencil and allow to dry. |
|
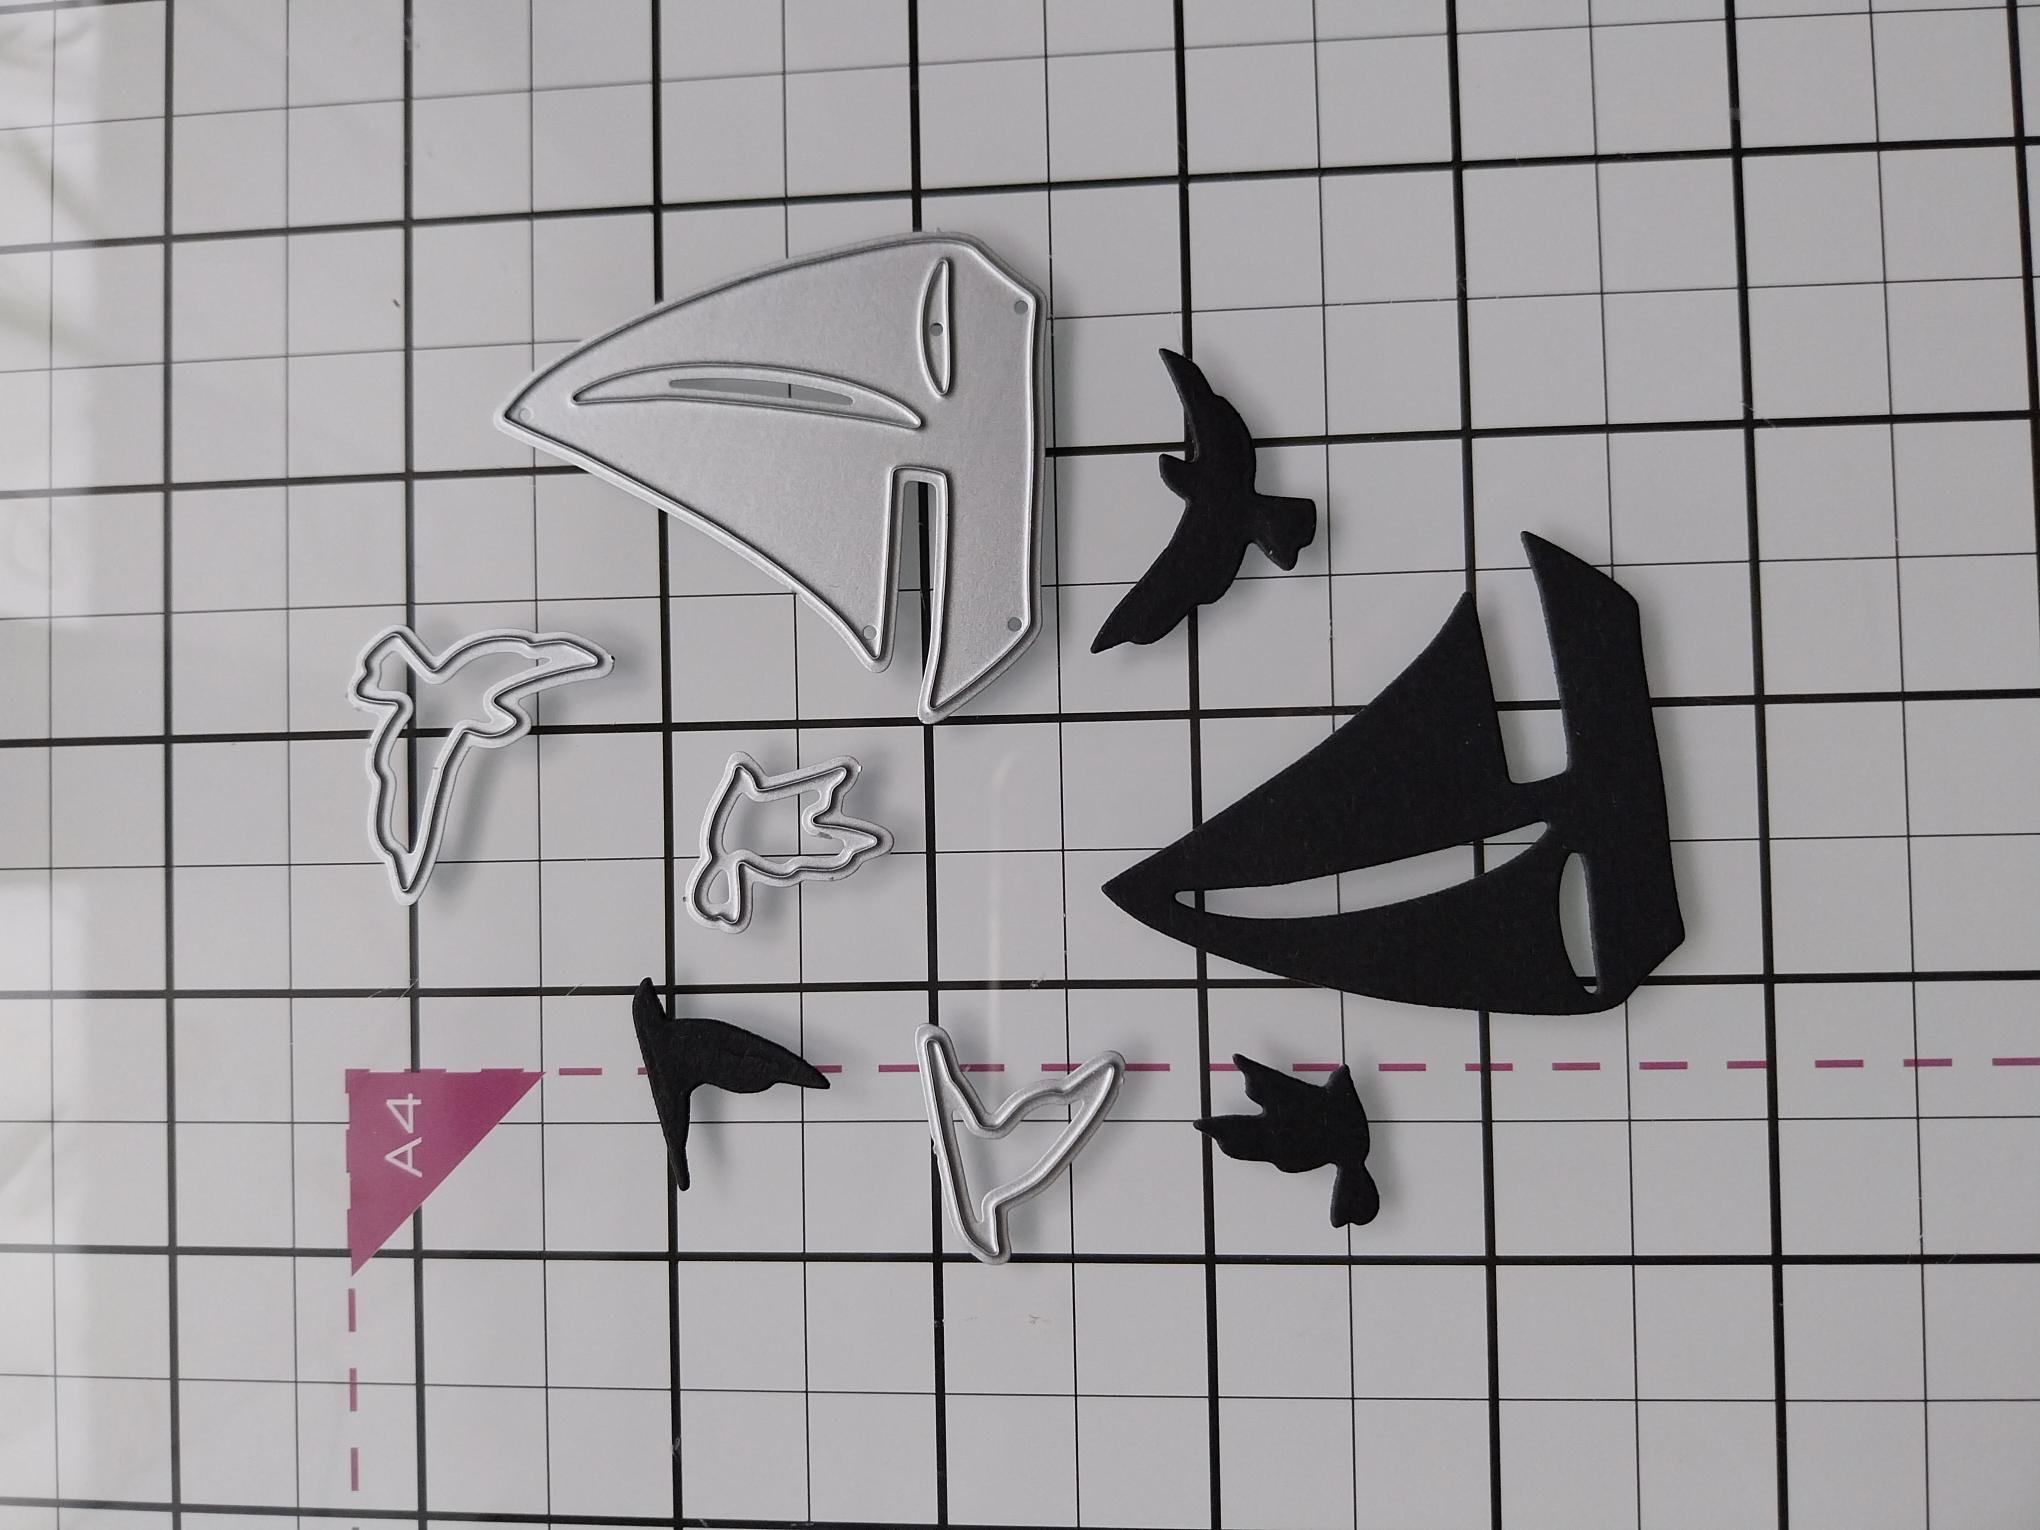
Die cut a boat and a few of the birds from black cardstock. |
|
Adhere your die cut elements in place, where required. |
|
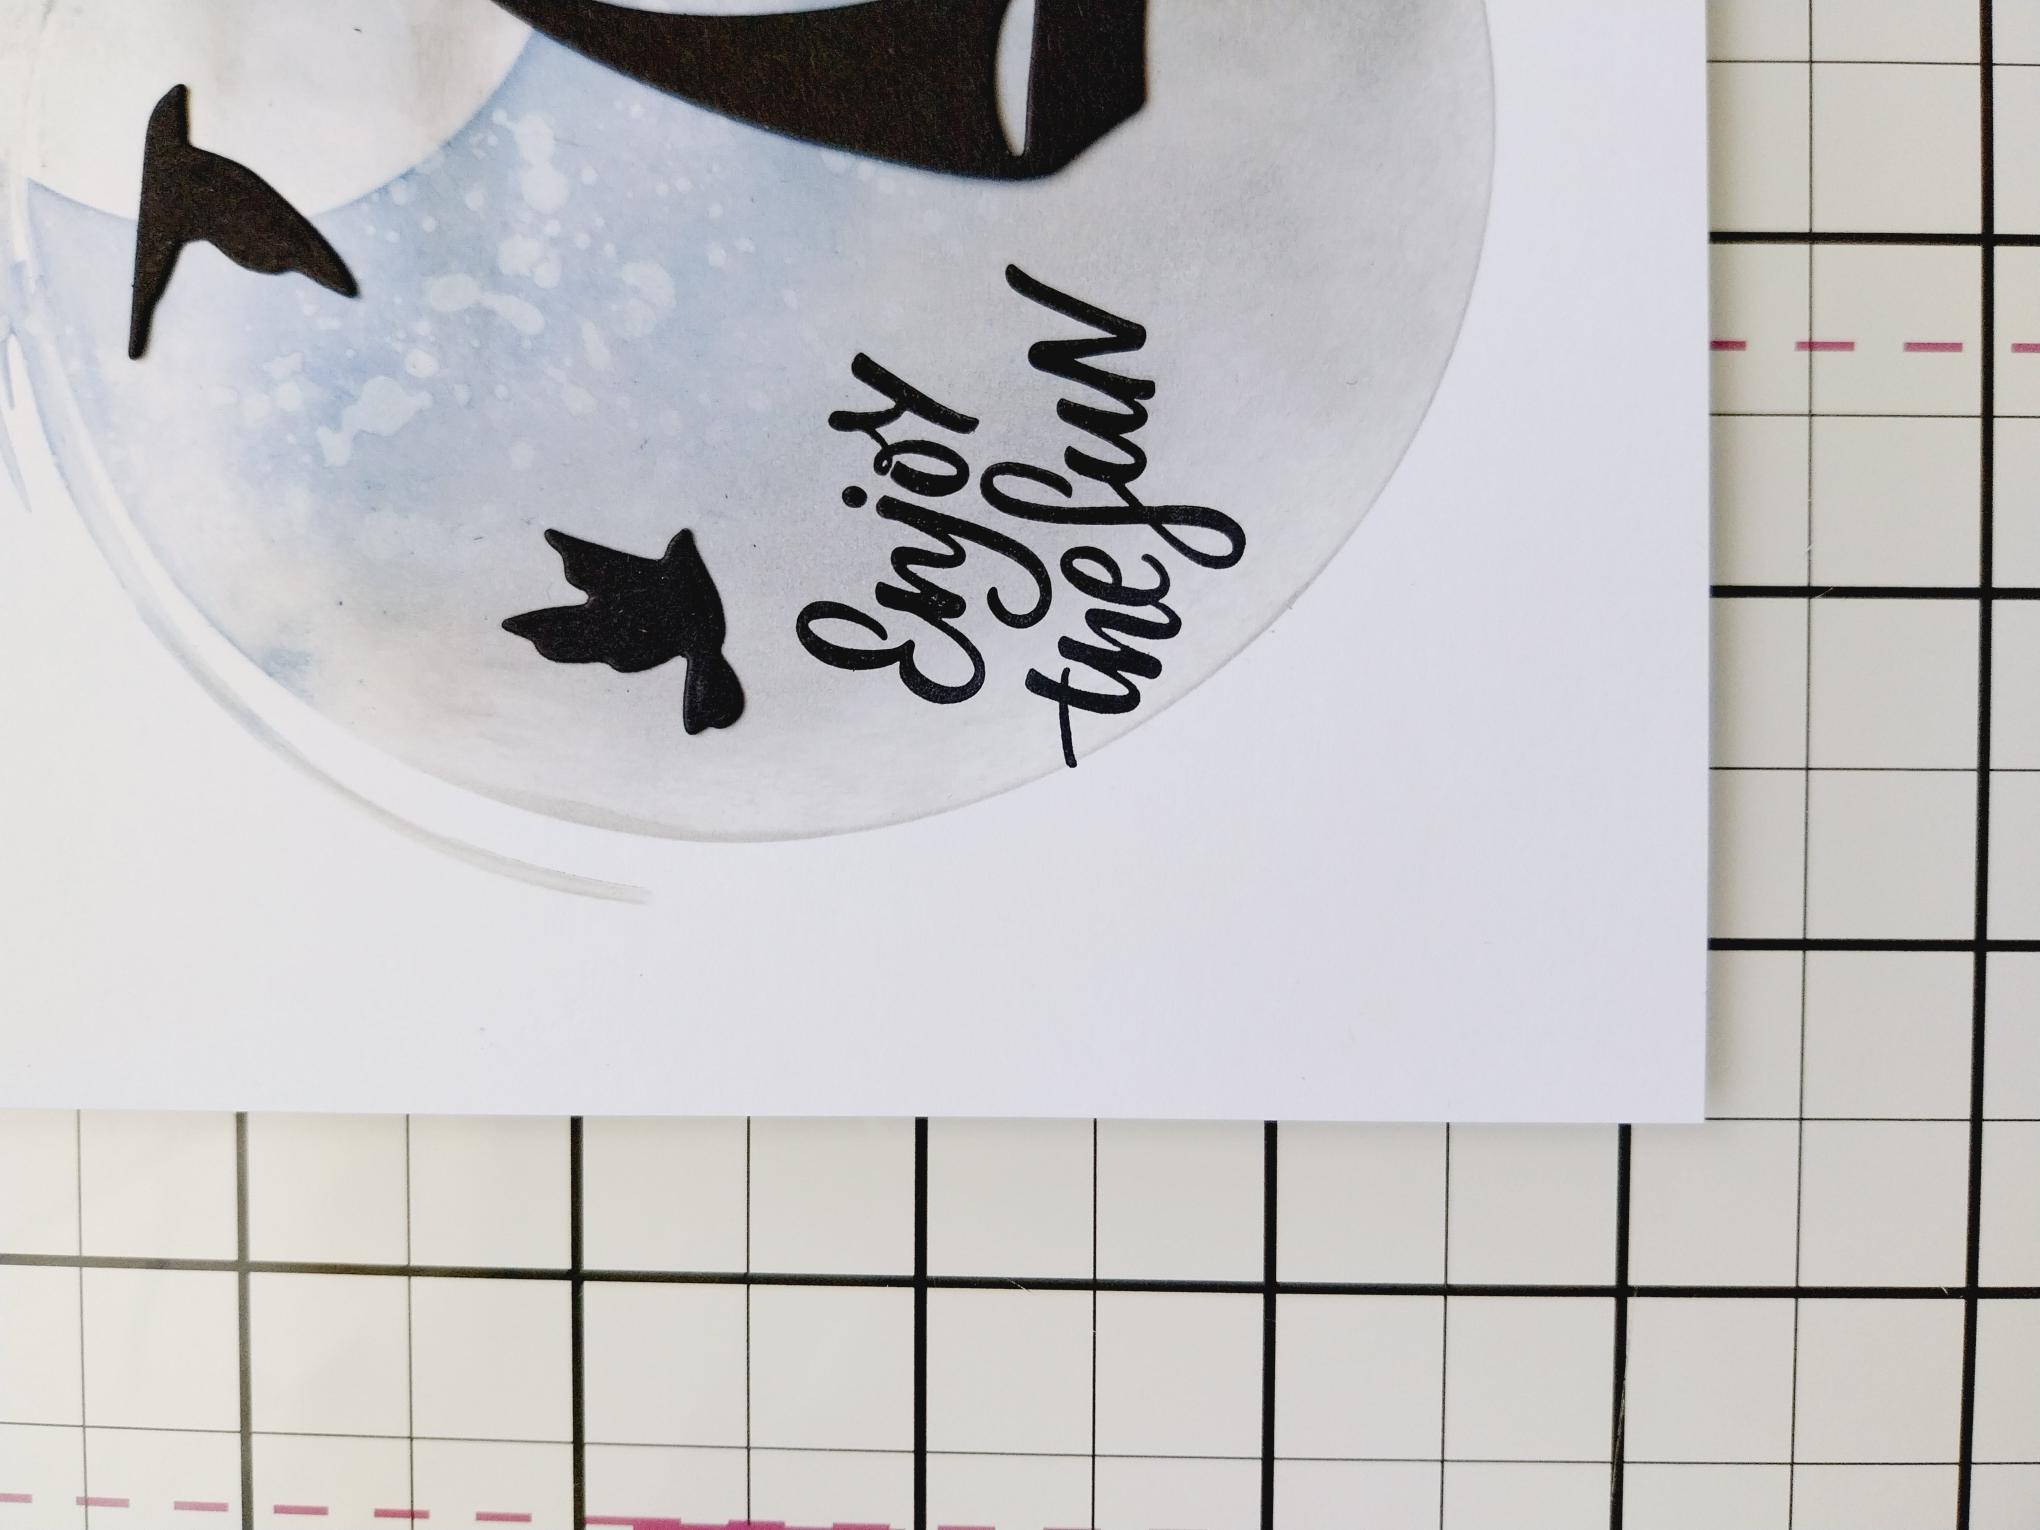
Stamp the sentiment in the Midnight ink, to the bottom left of your artwork. |
|
Use a fine line pen to accentuate the stencilled circle. |
|
Trim one of the royal blue decorative sheets to 6" square. |
|
Mat your artwork on to the decorative paper and then on to a black card "mat" cut to 6 1/4" square. Finally, adhere to the front of your white card blank. |