Give your friends $10 off their first order!
Refer a FRIEND


WHAT YOU WILL NEED:
White card blank 5 x 7"
White cardstock
To The Moon And Back Stamp Set
We Can Dream 5 x 7 Paper Pad
Moonlit Sky Dies
Versafine Ink Pad: Smokey Gray
Confetti Ink: Graphite, Mushroom
Distress Ink/Oxide Ink Pad: Hickory Smoke
Blending tool
Eureka 101 Watercolour Tablet
SBM A3 Magnetic glass mat
Paper Trimmer
Glue
Die Cutting machine
[click image to enlarge] 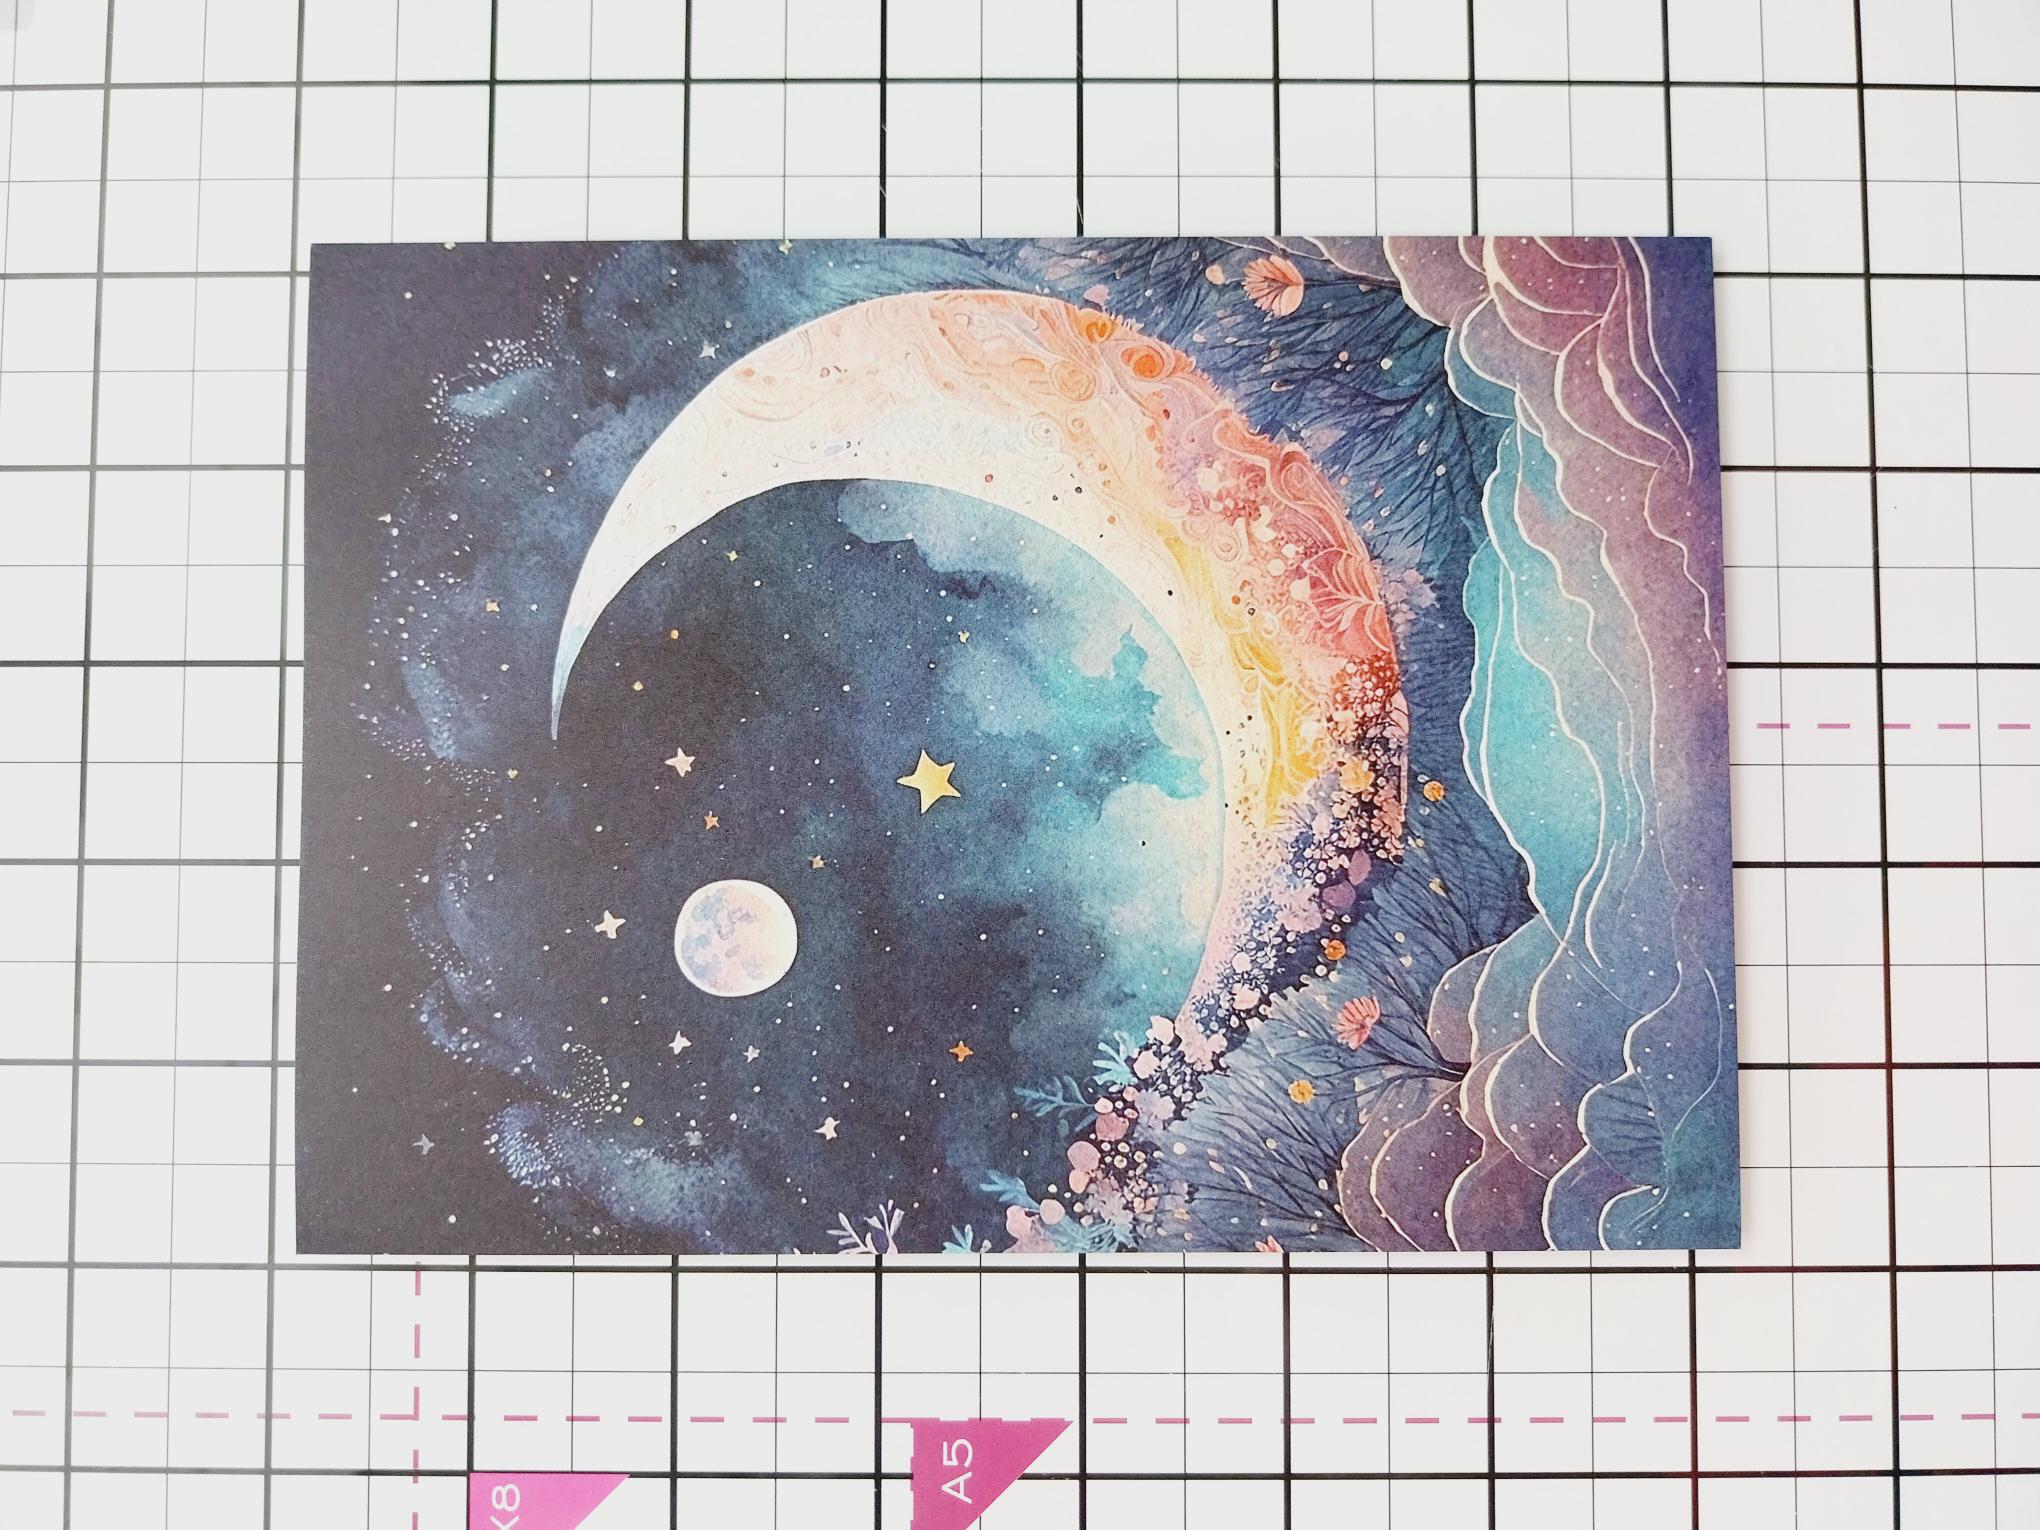
|
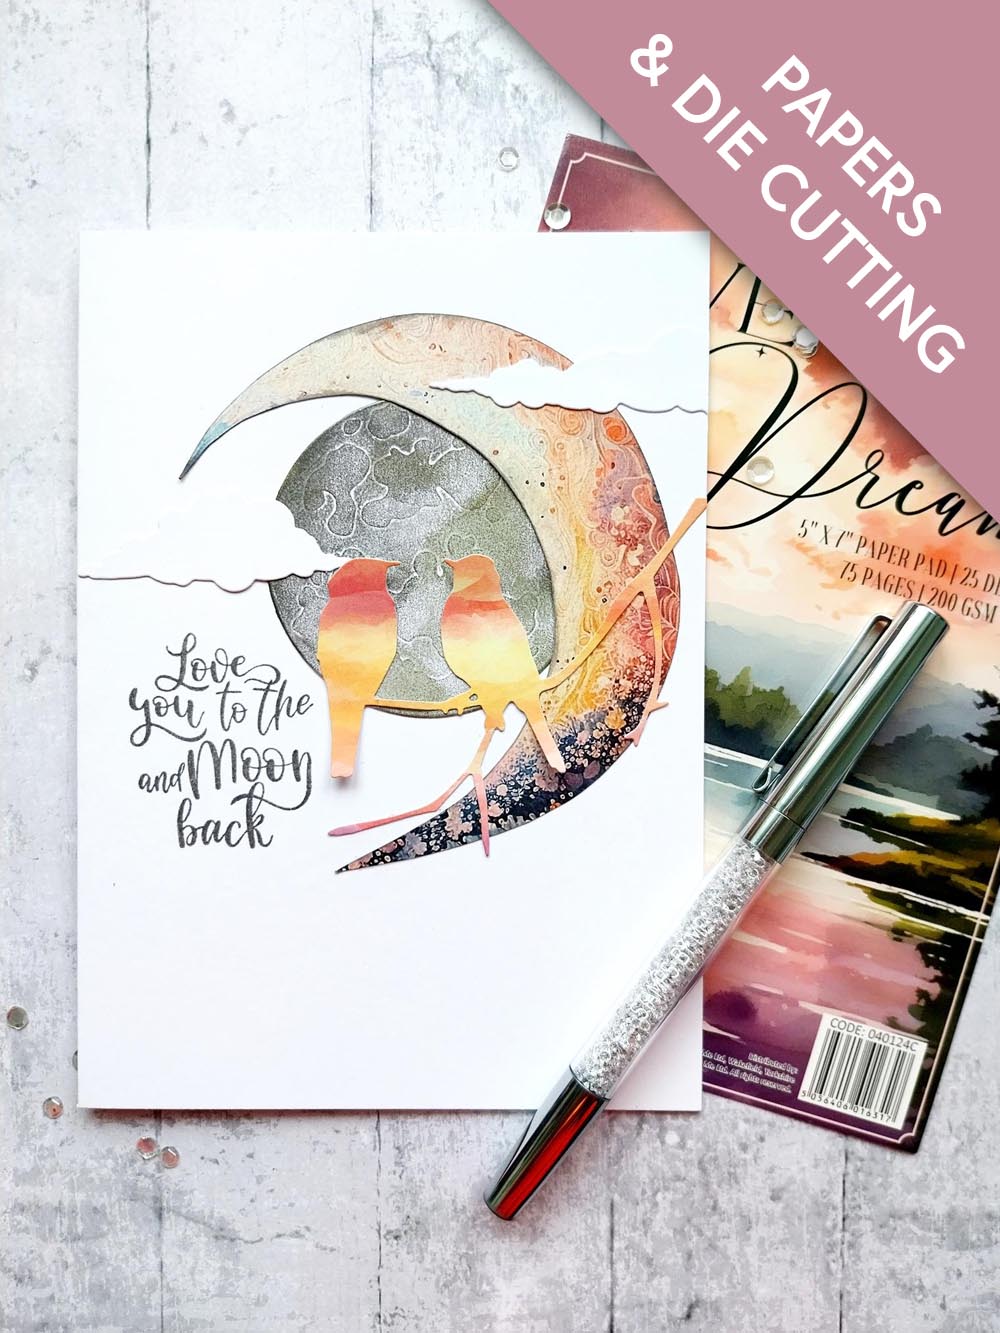
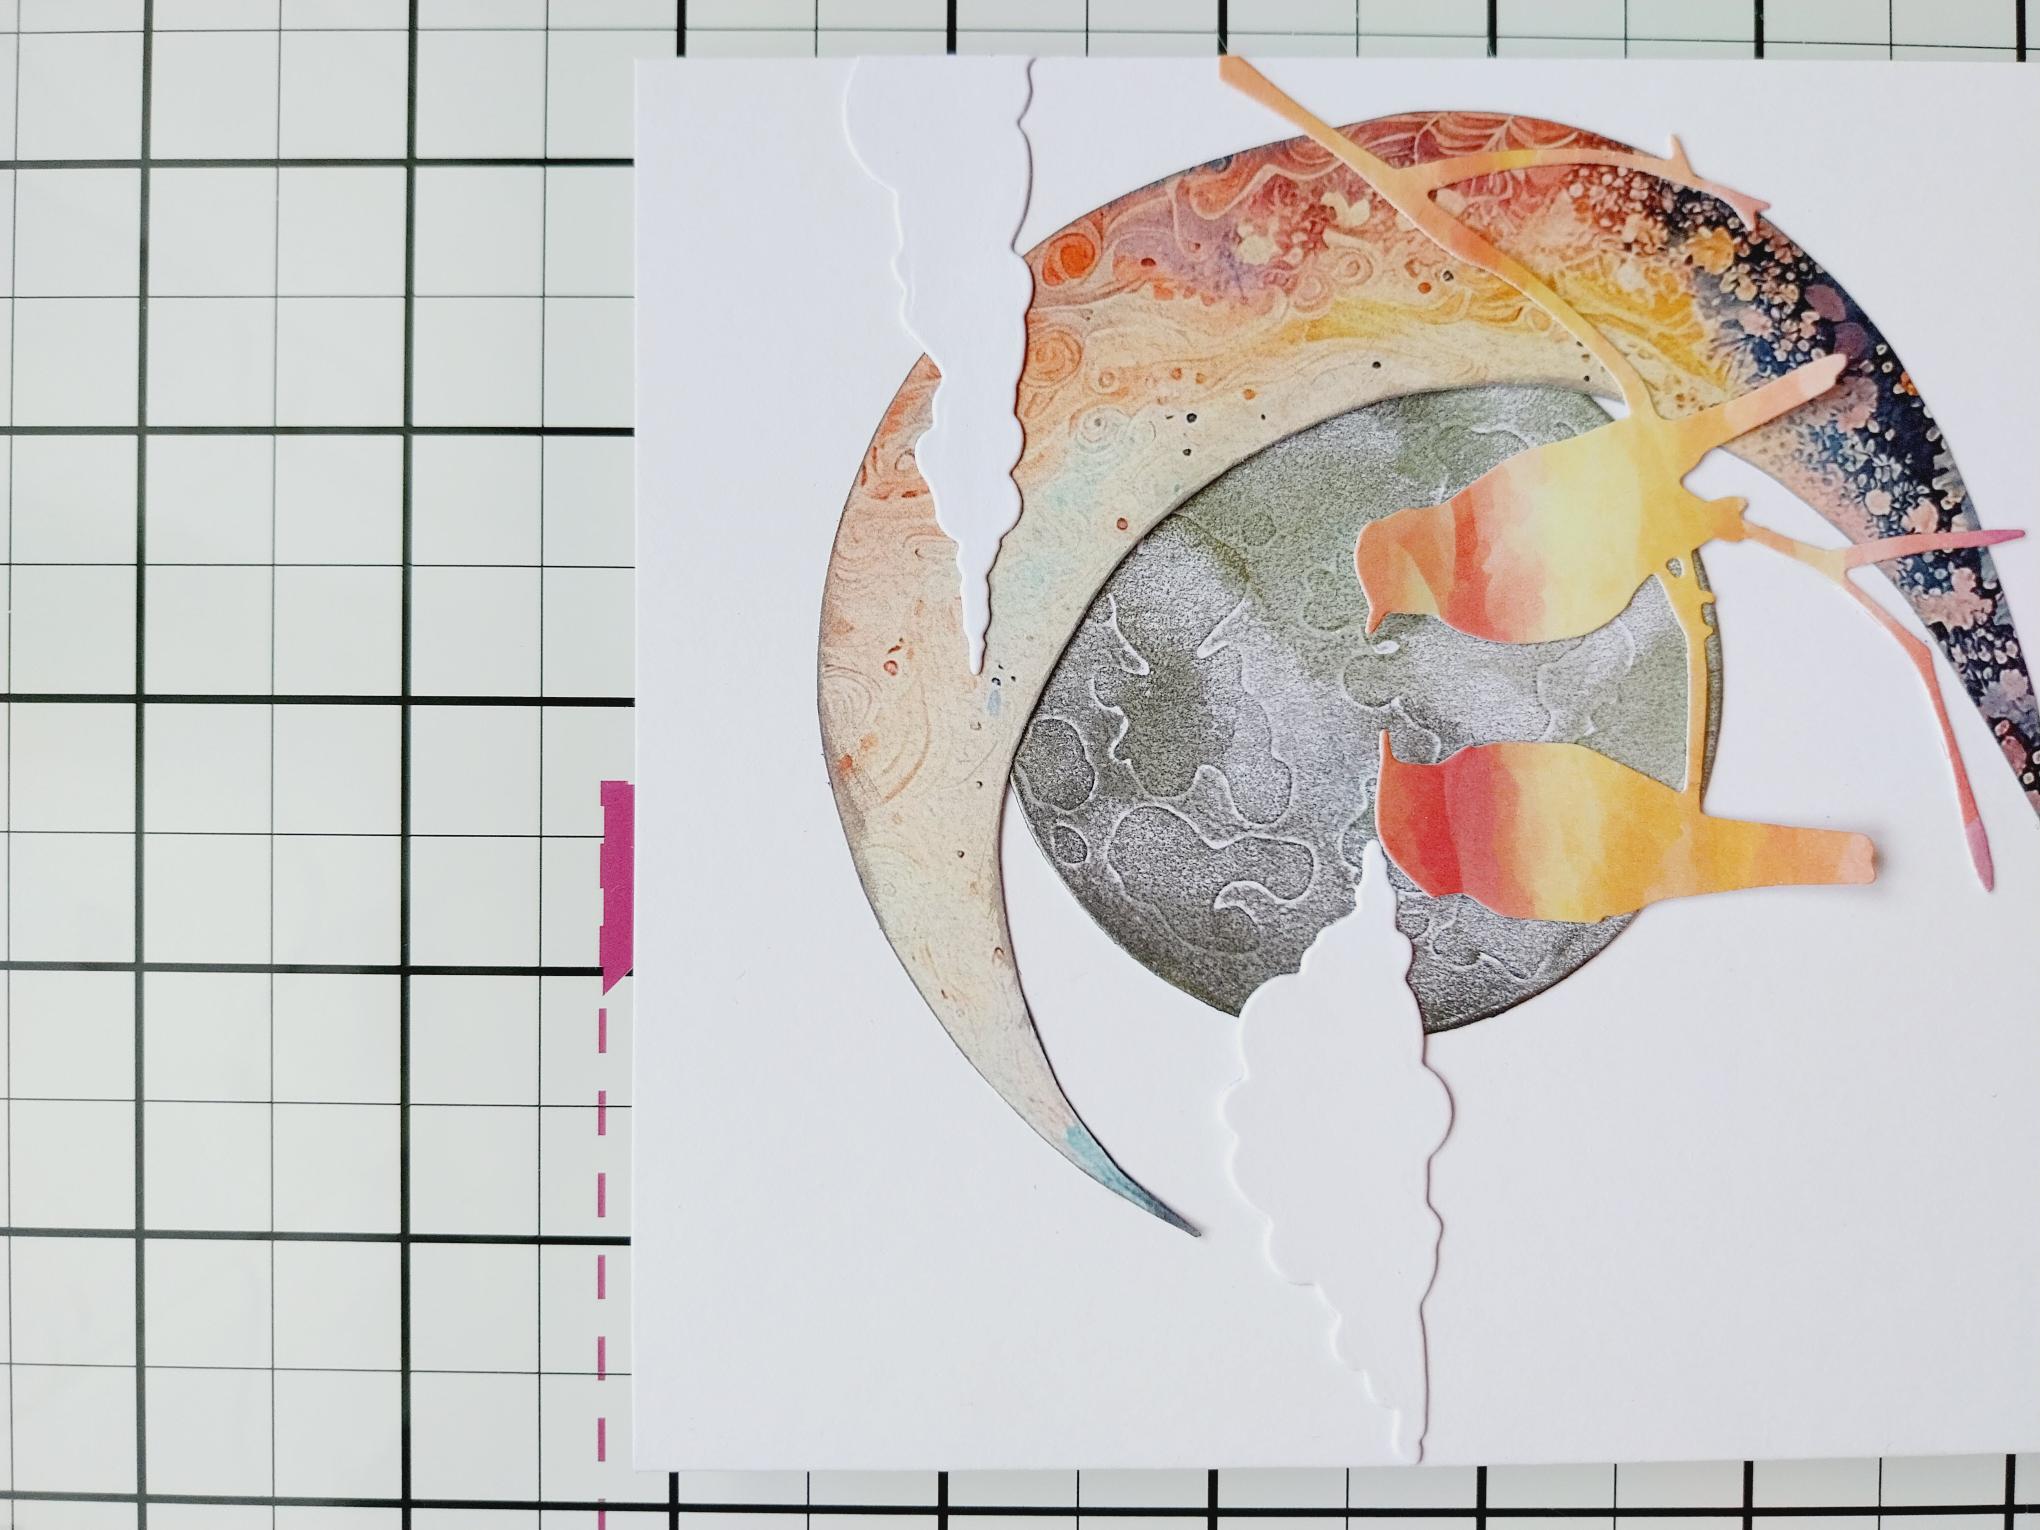
Remove this decorative sheet from We Can Dream paper pack. |
|
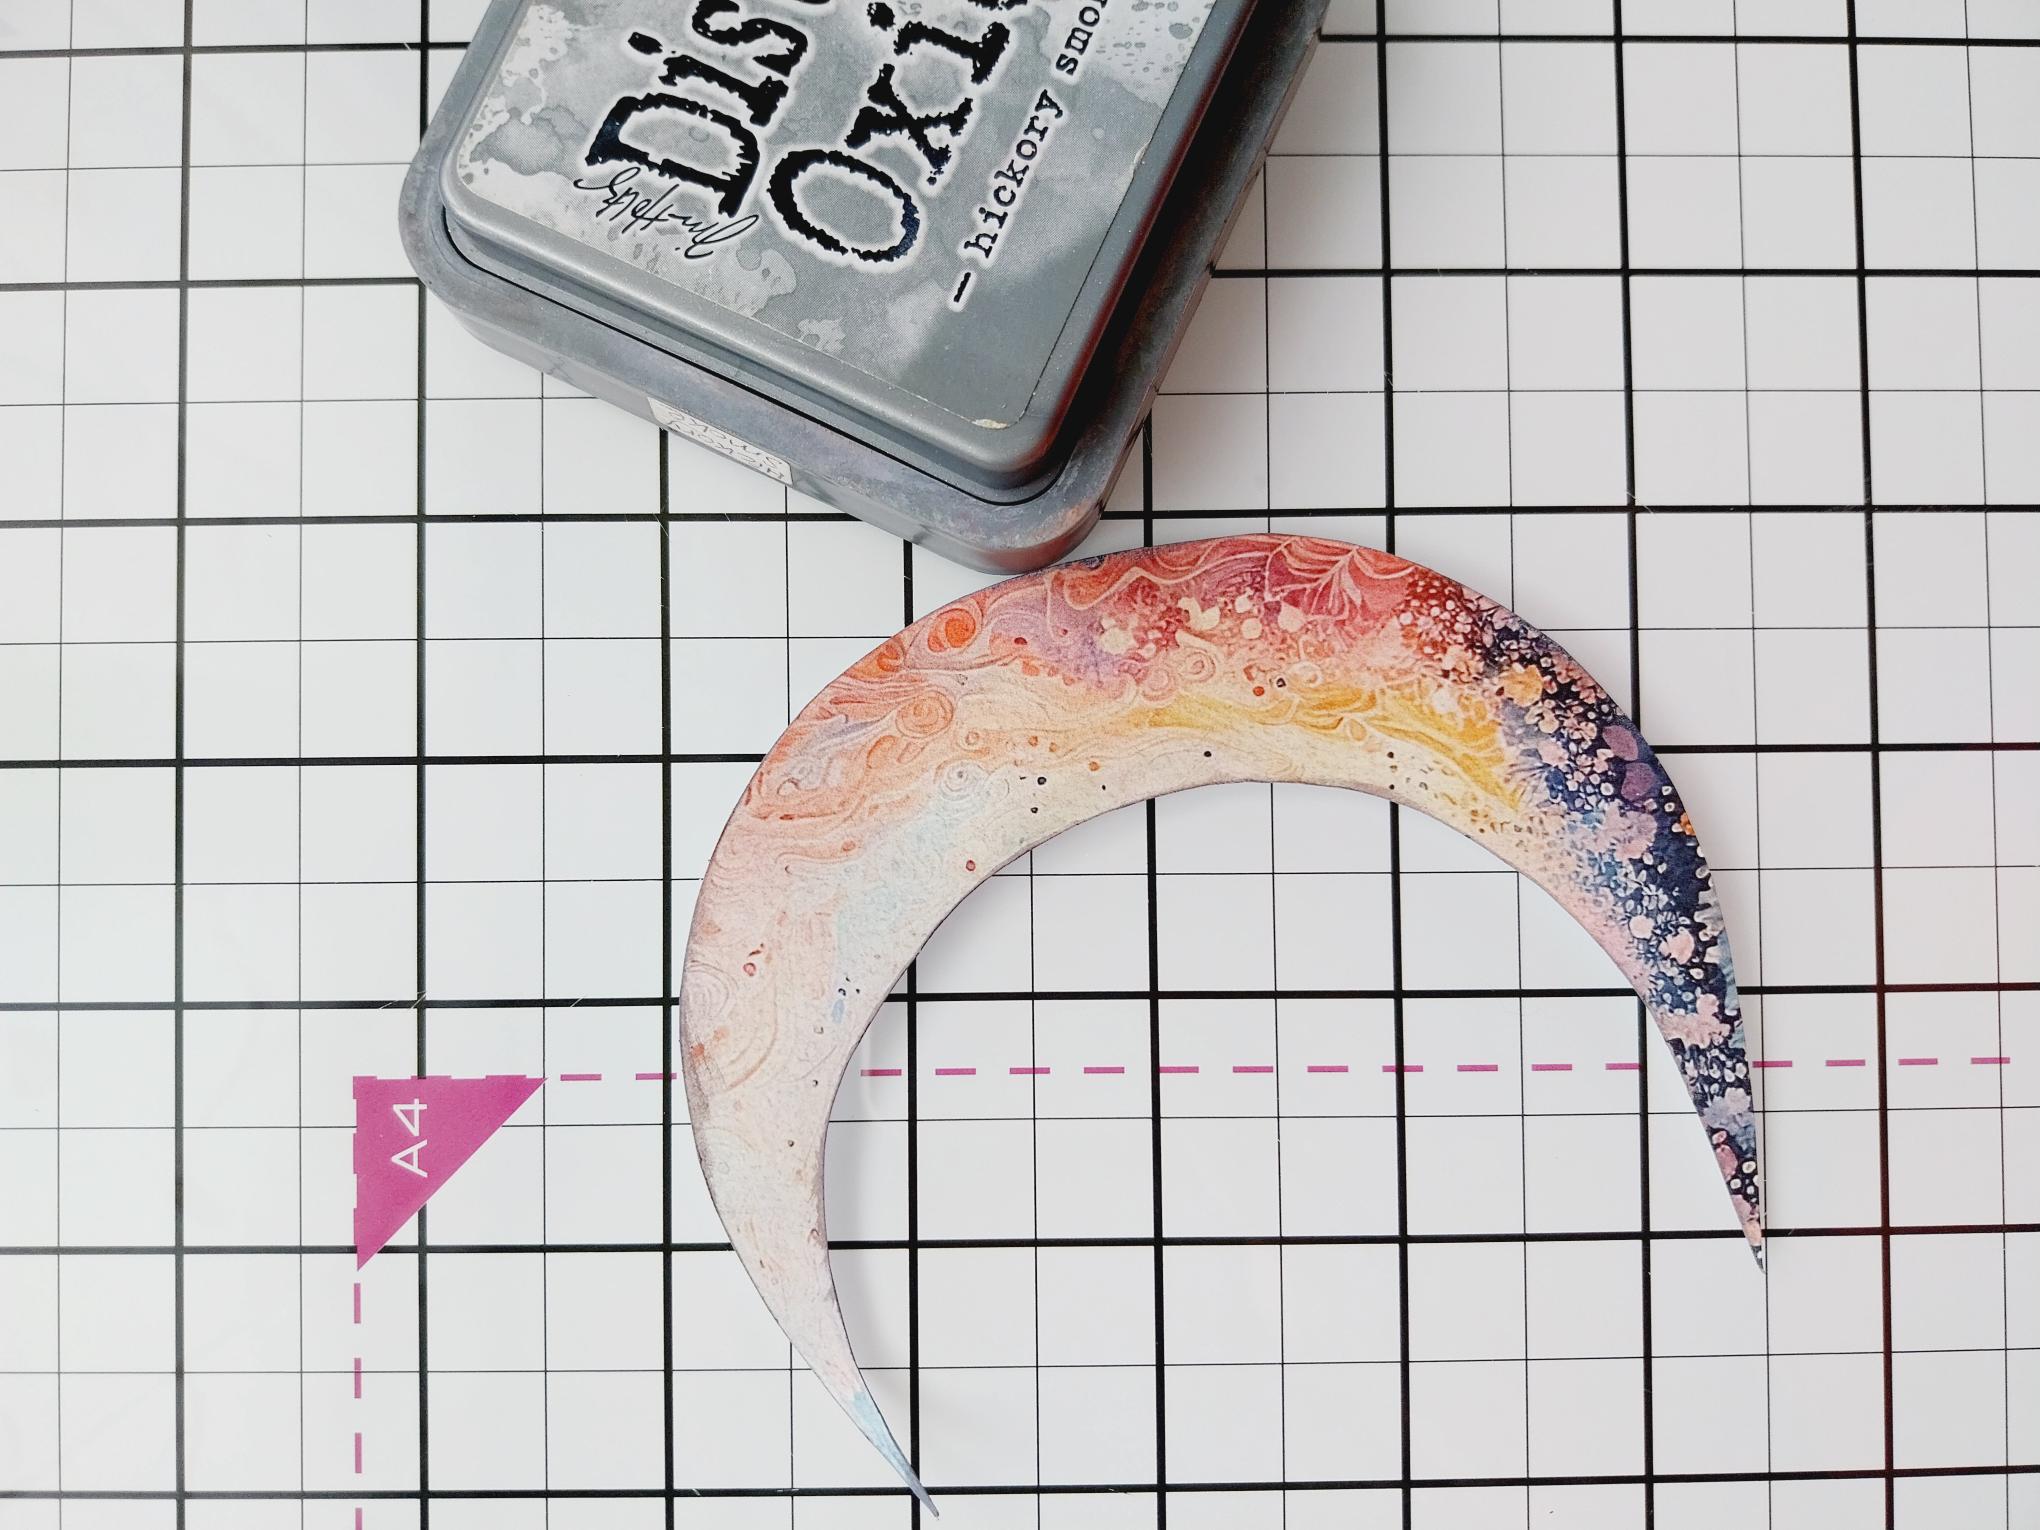
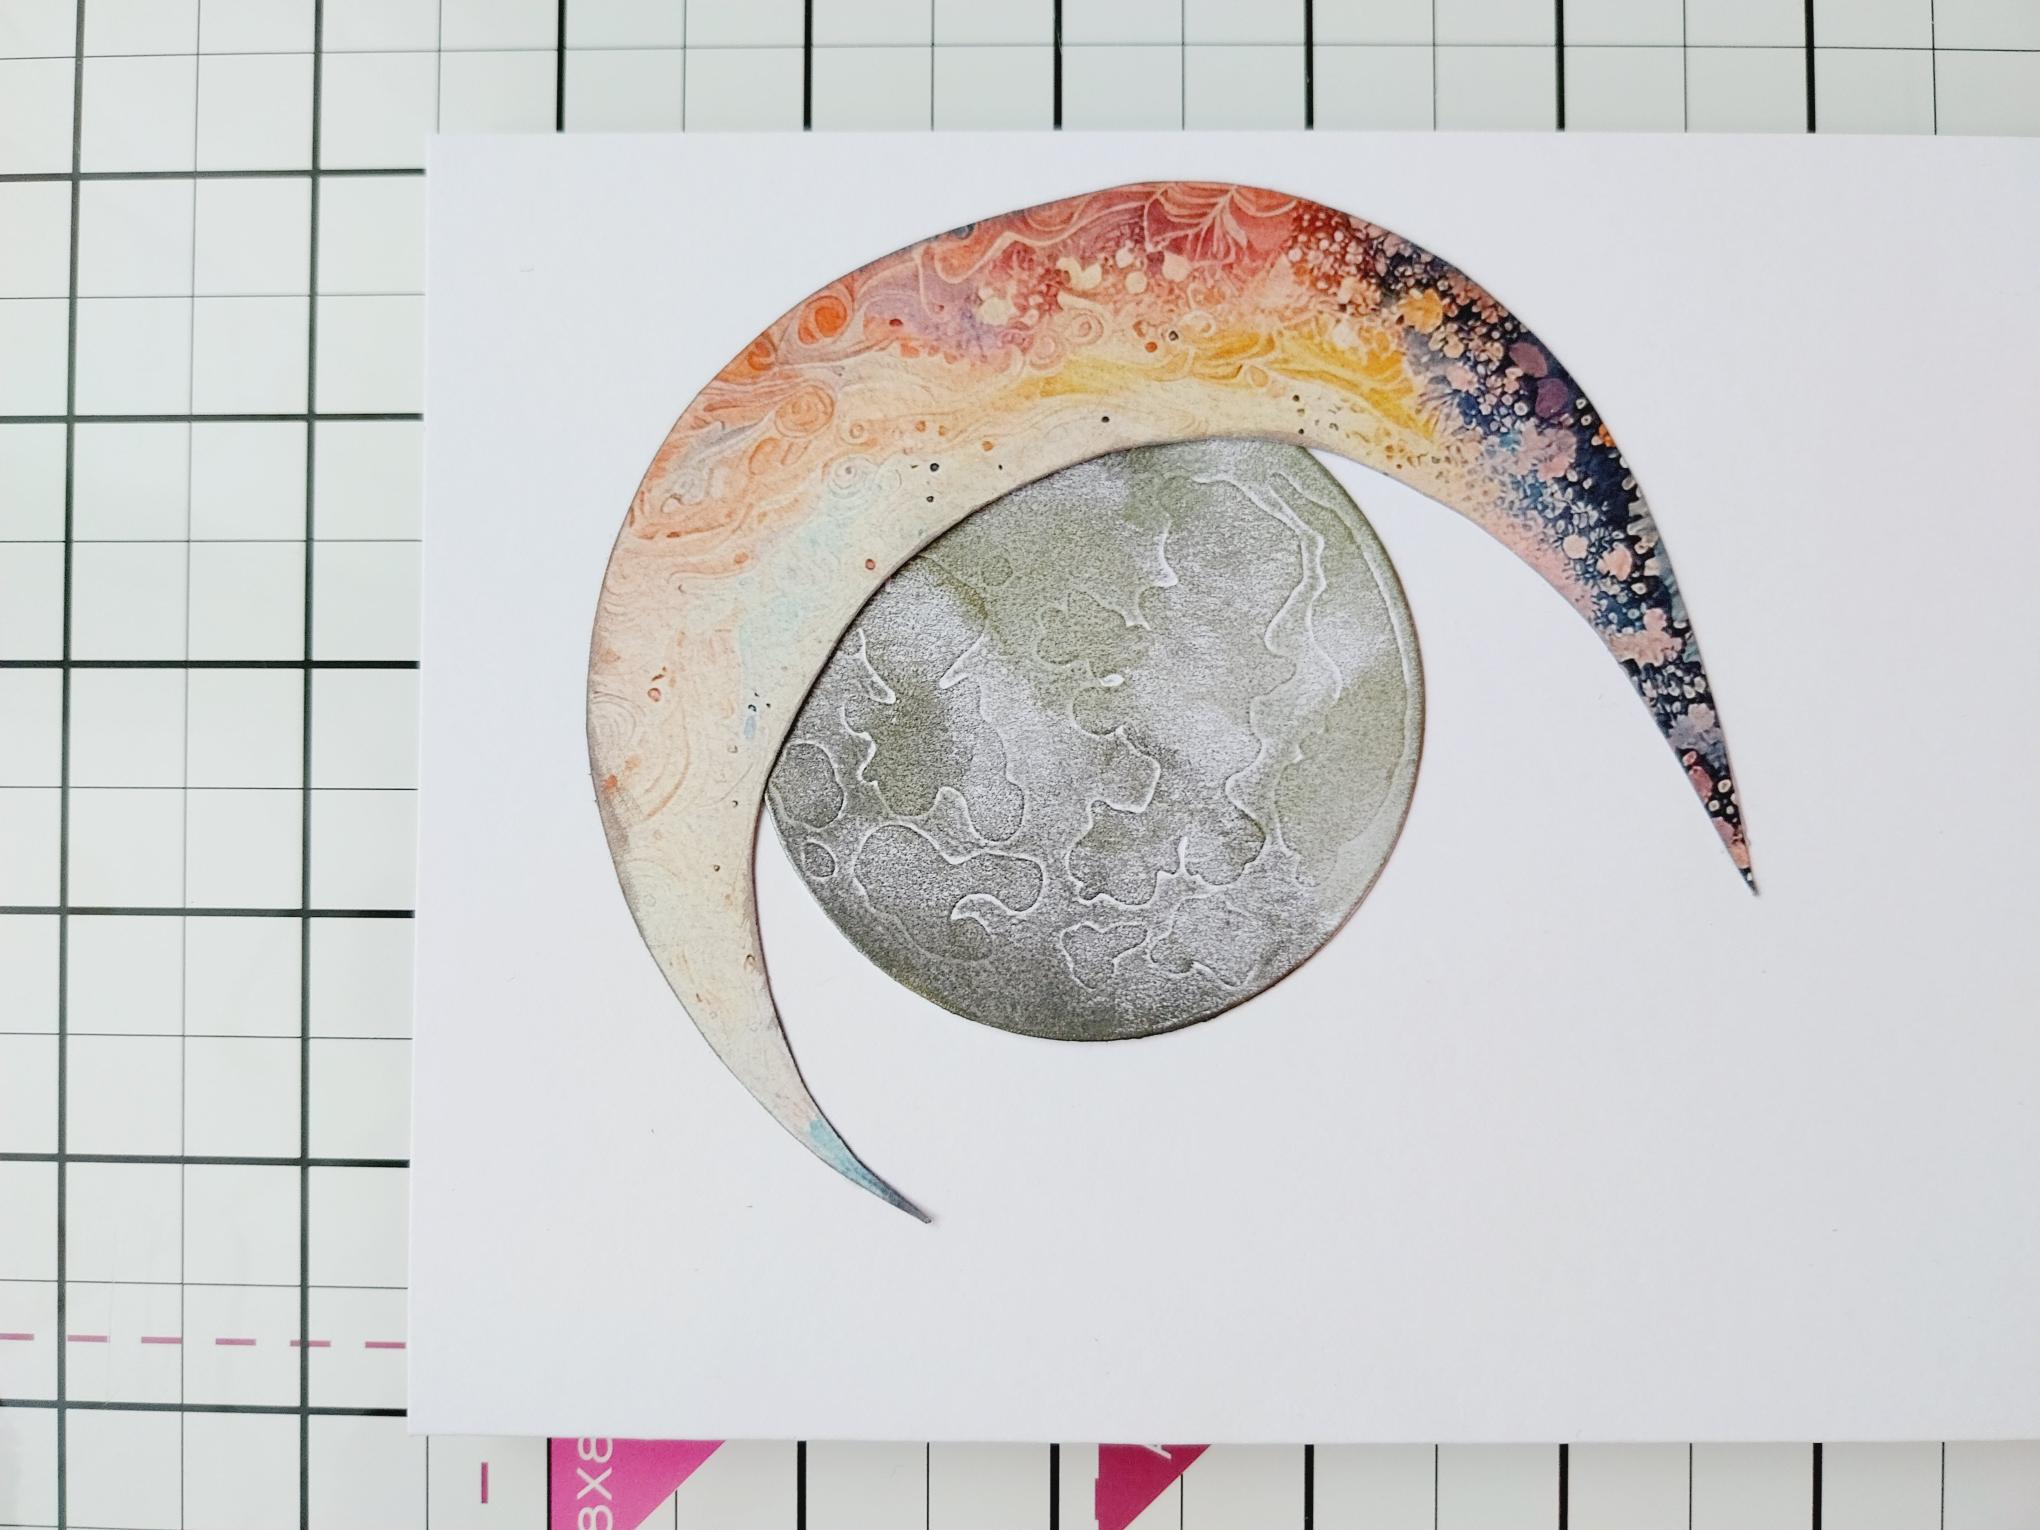
Fussy cut the Moon and ink around the edges with the Hickory Smoke Distress ink. |
|
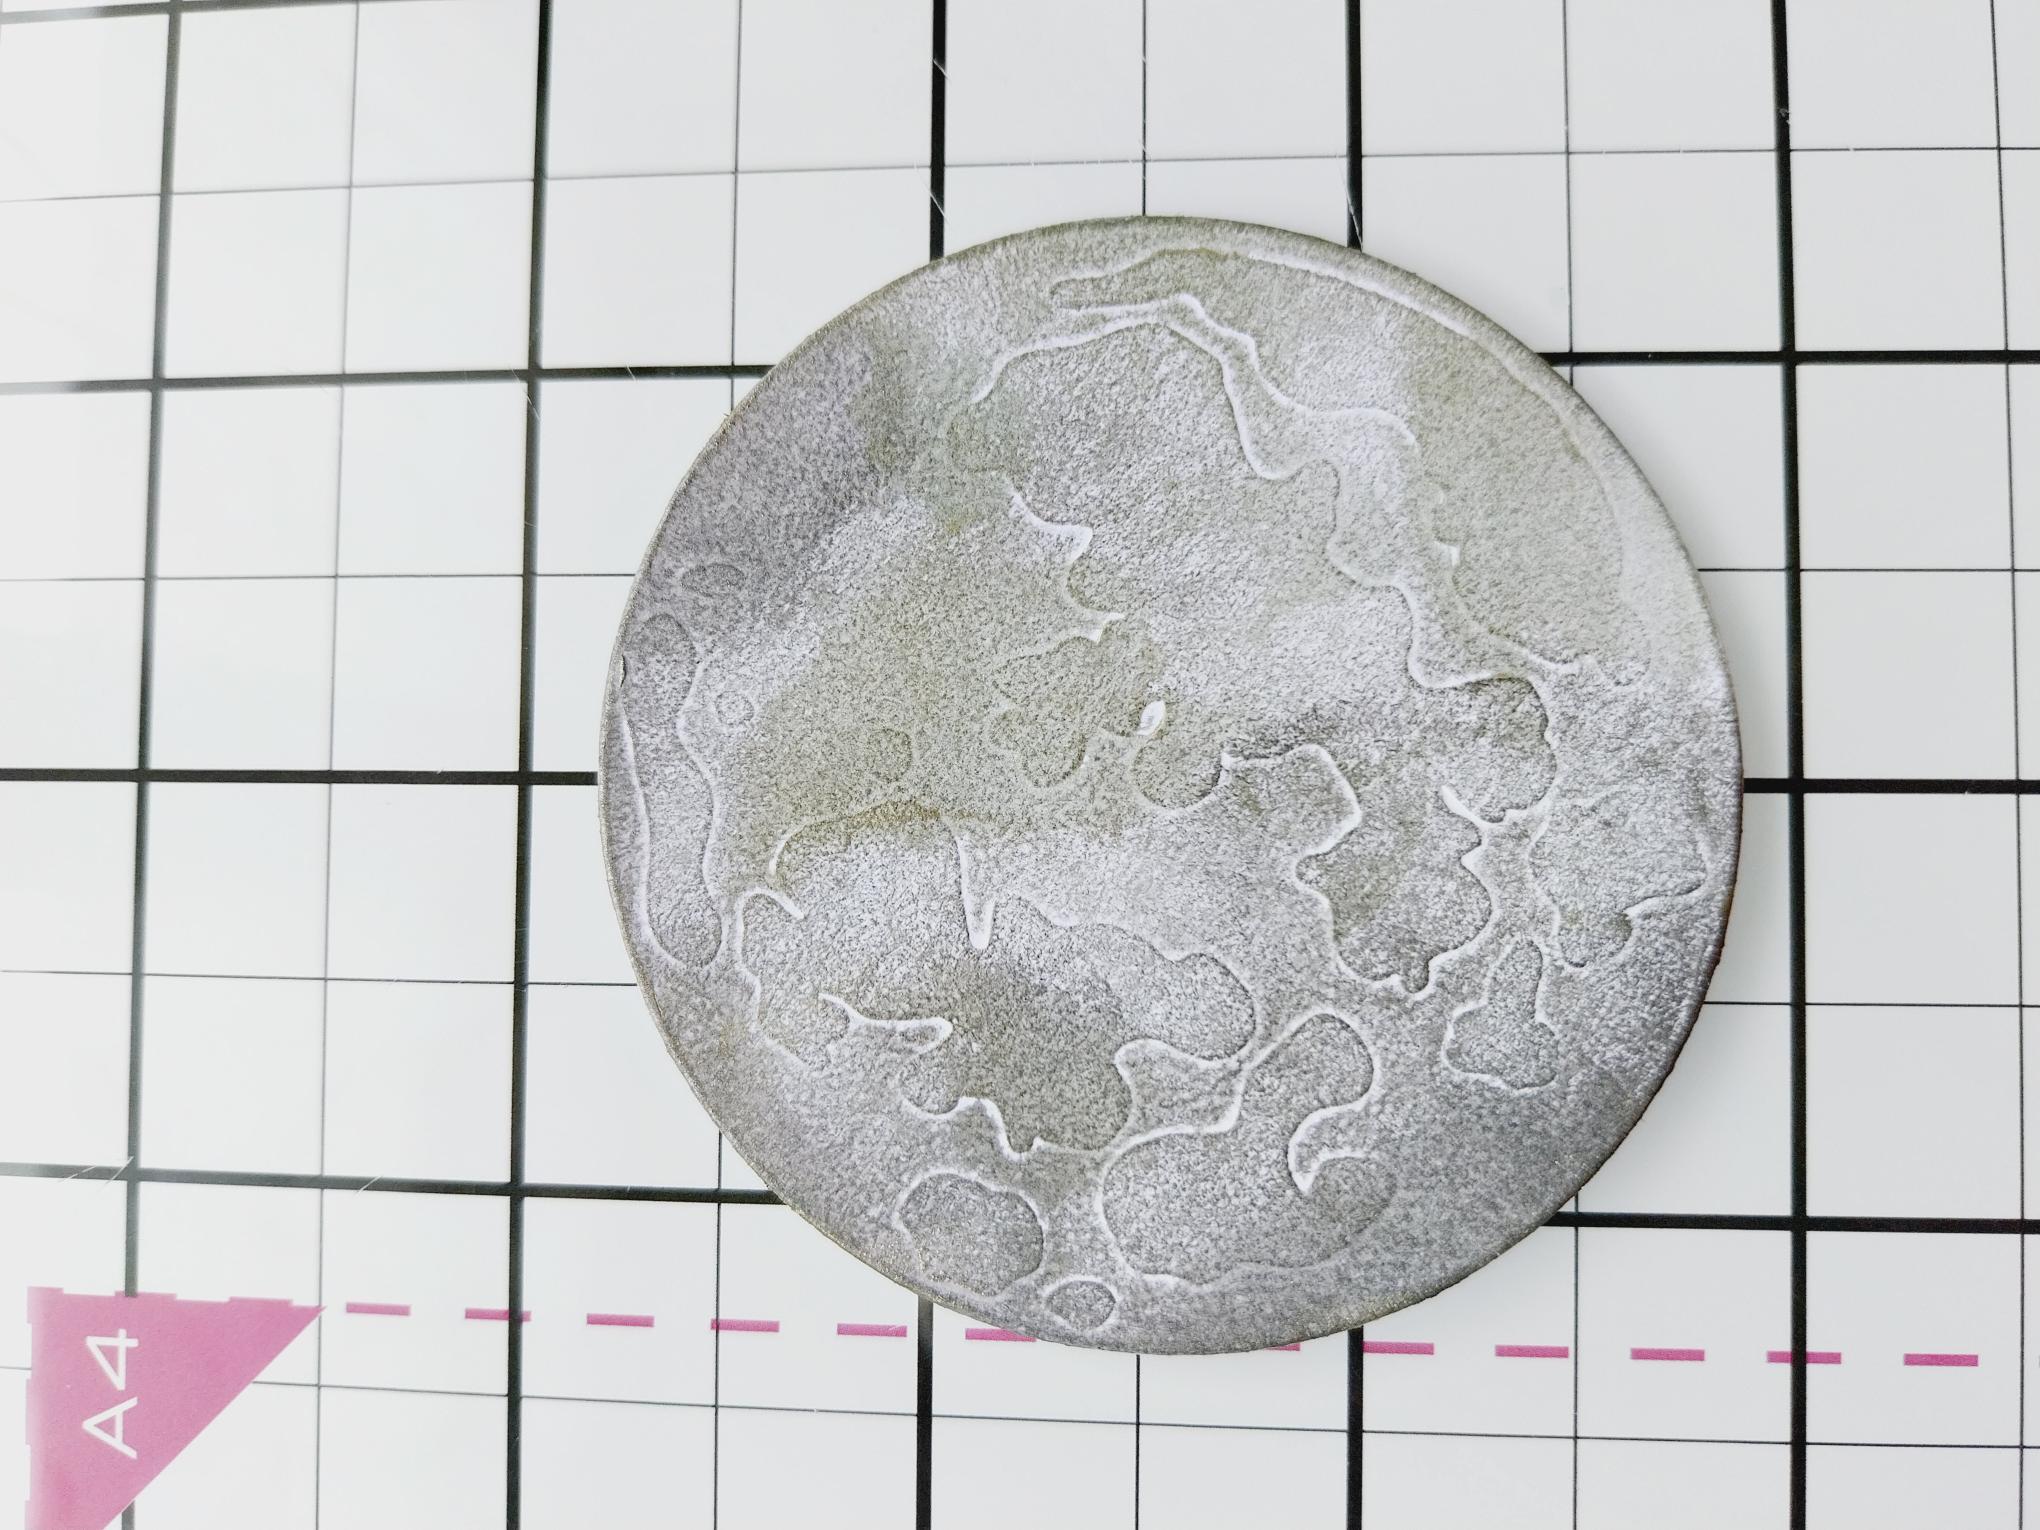
Die cut the Moon using the die from Moonlit Skies. Use a blending tool to apply Hickory Smoke all over the embossed element. Blend the Graphite and Mushroom Confetti inks in random areas to highlight the rise and fall of the embossed lines. |
|
Adhere the embossed Moon to the right of your card blank and the fussy cut decorative Moon around it. |
|
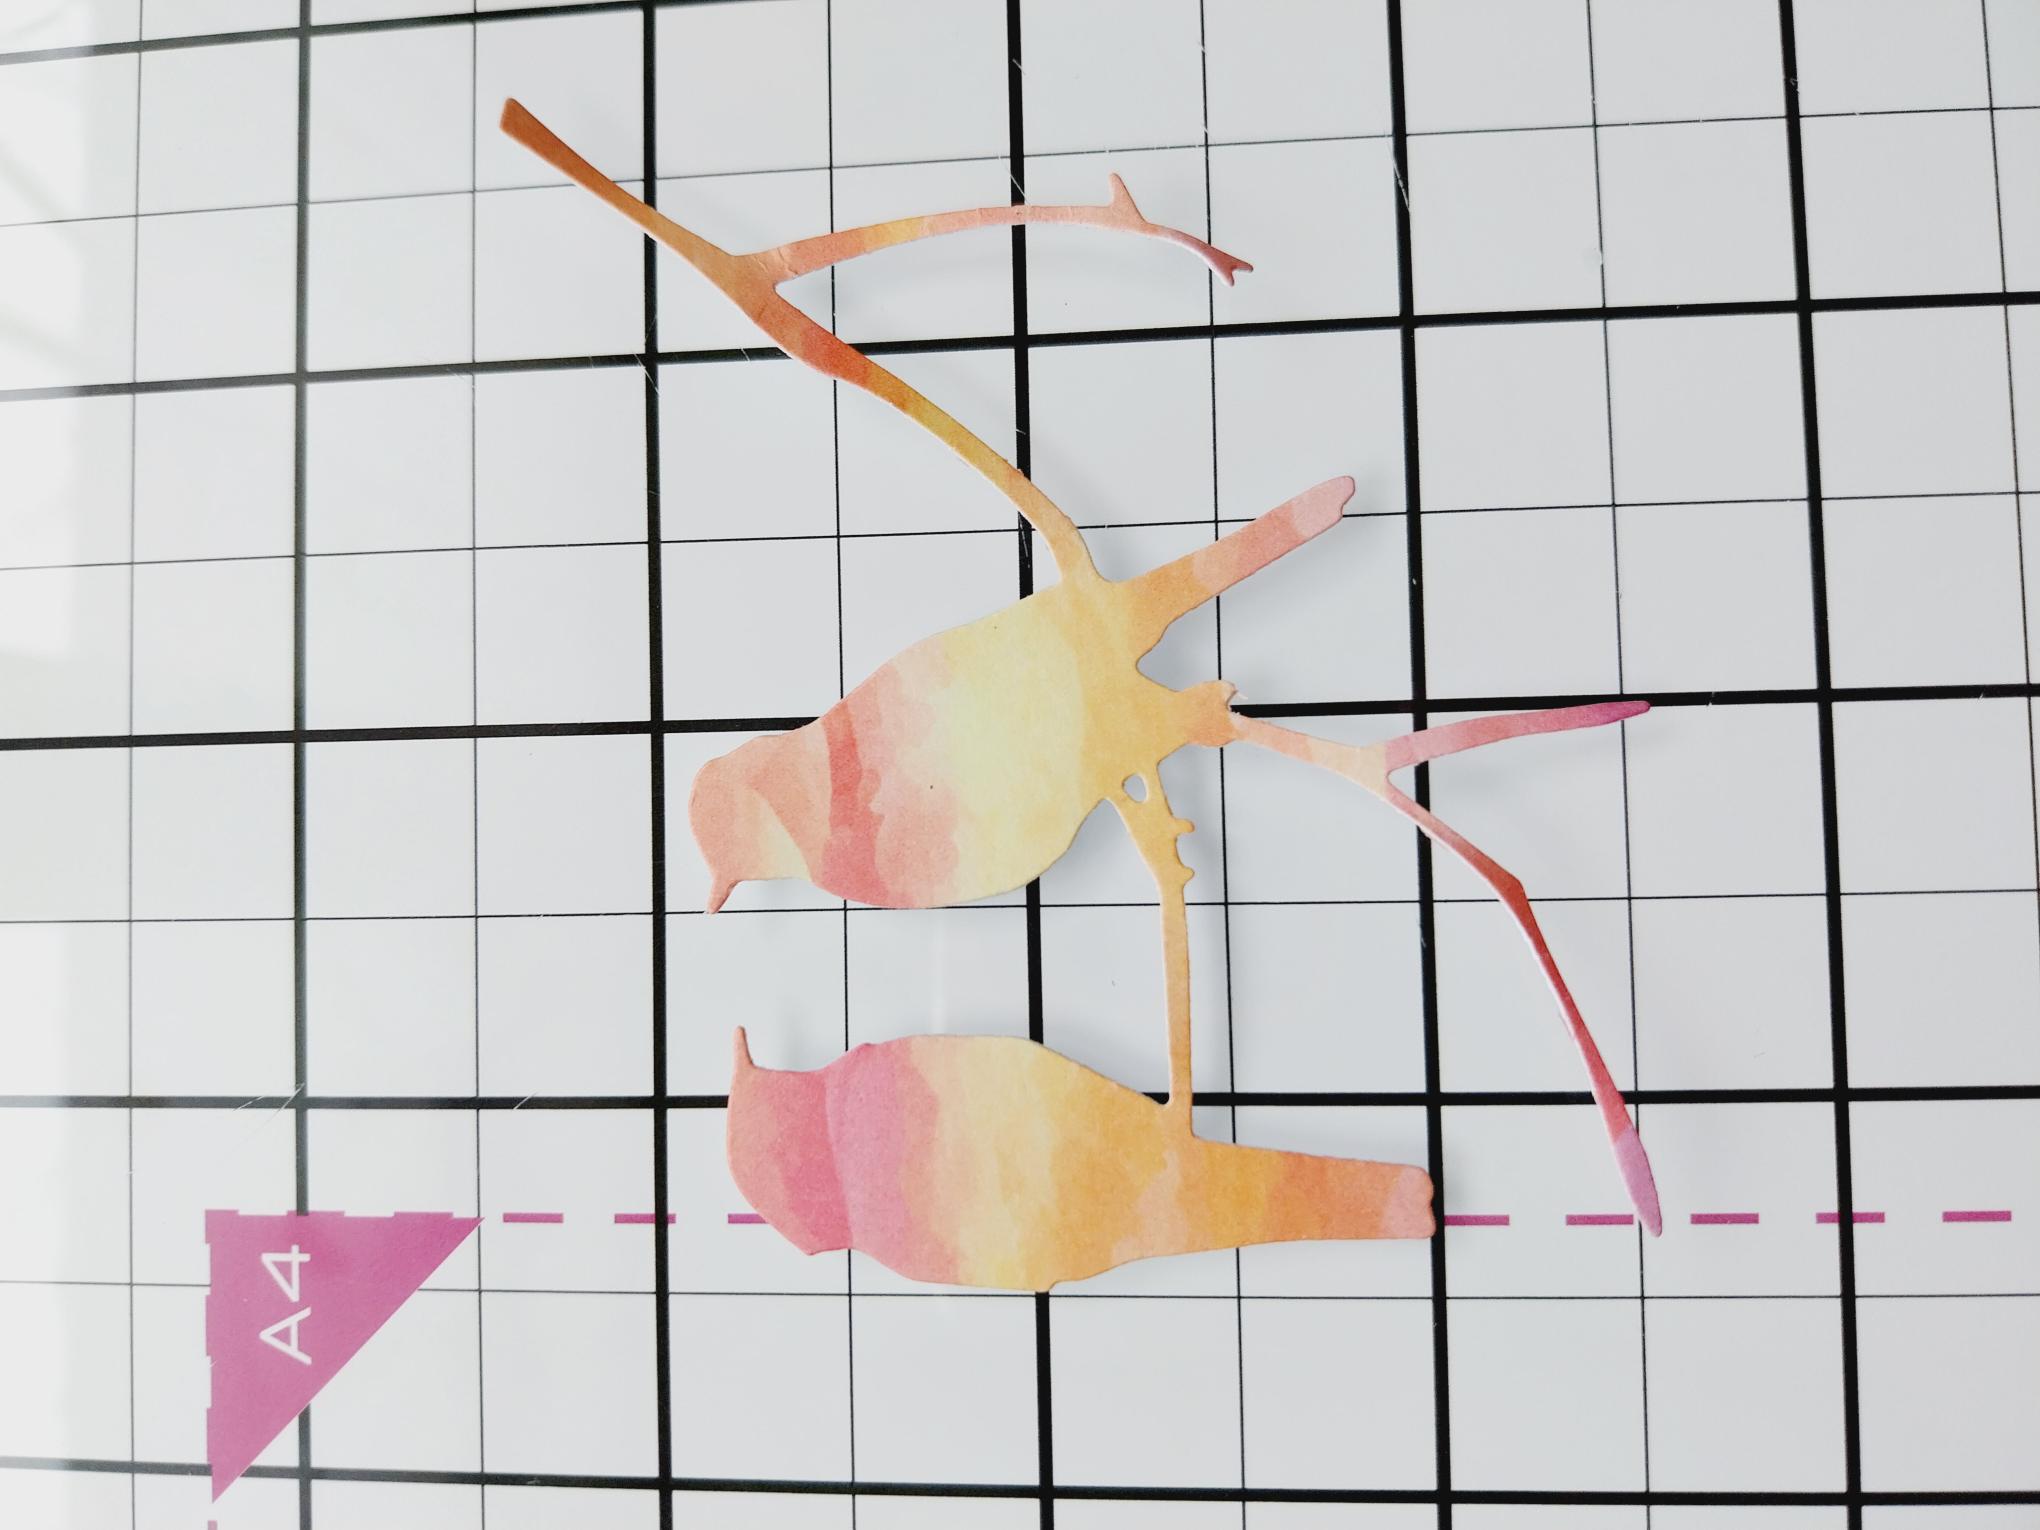
Fussy cut the silhouette birds from one of the papers, then trim to leave two of the birds sitting together on the branch. |
|
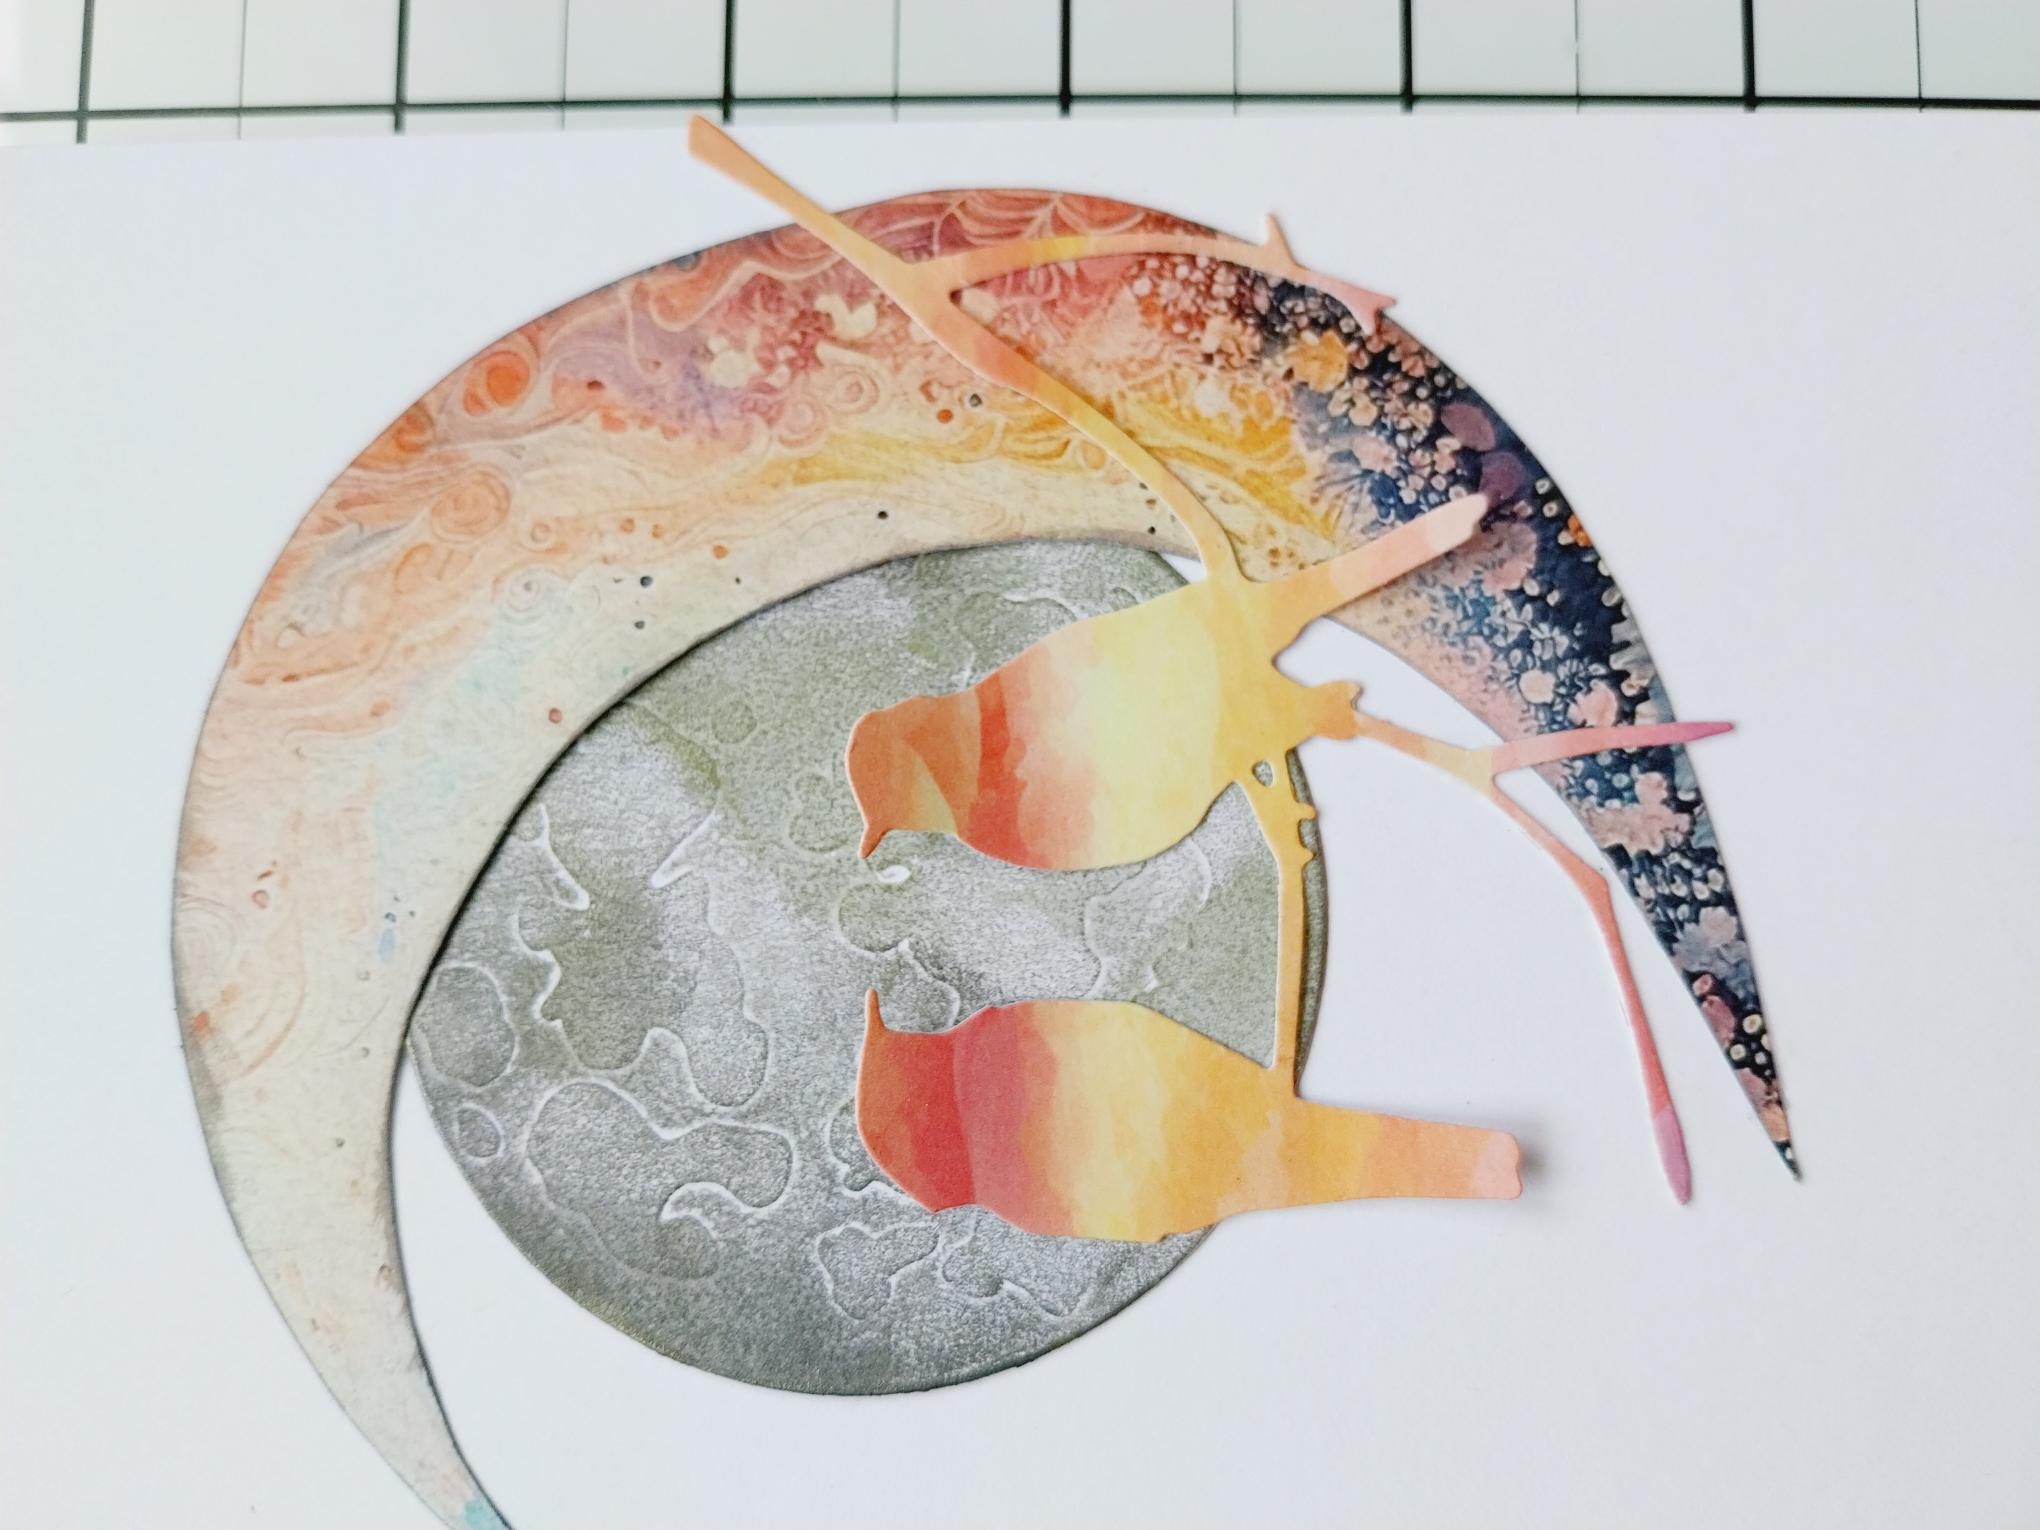
Adhere the love birds across your Moon. |
|
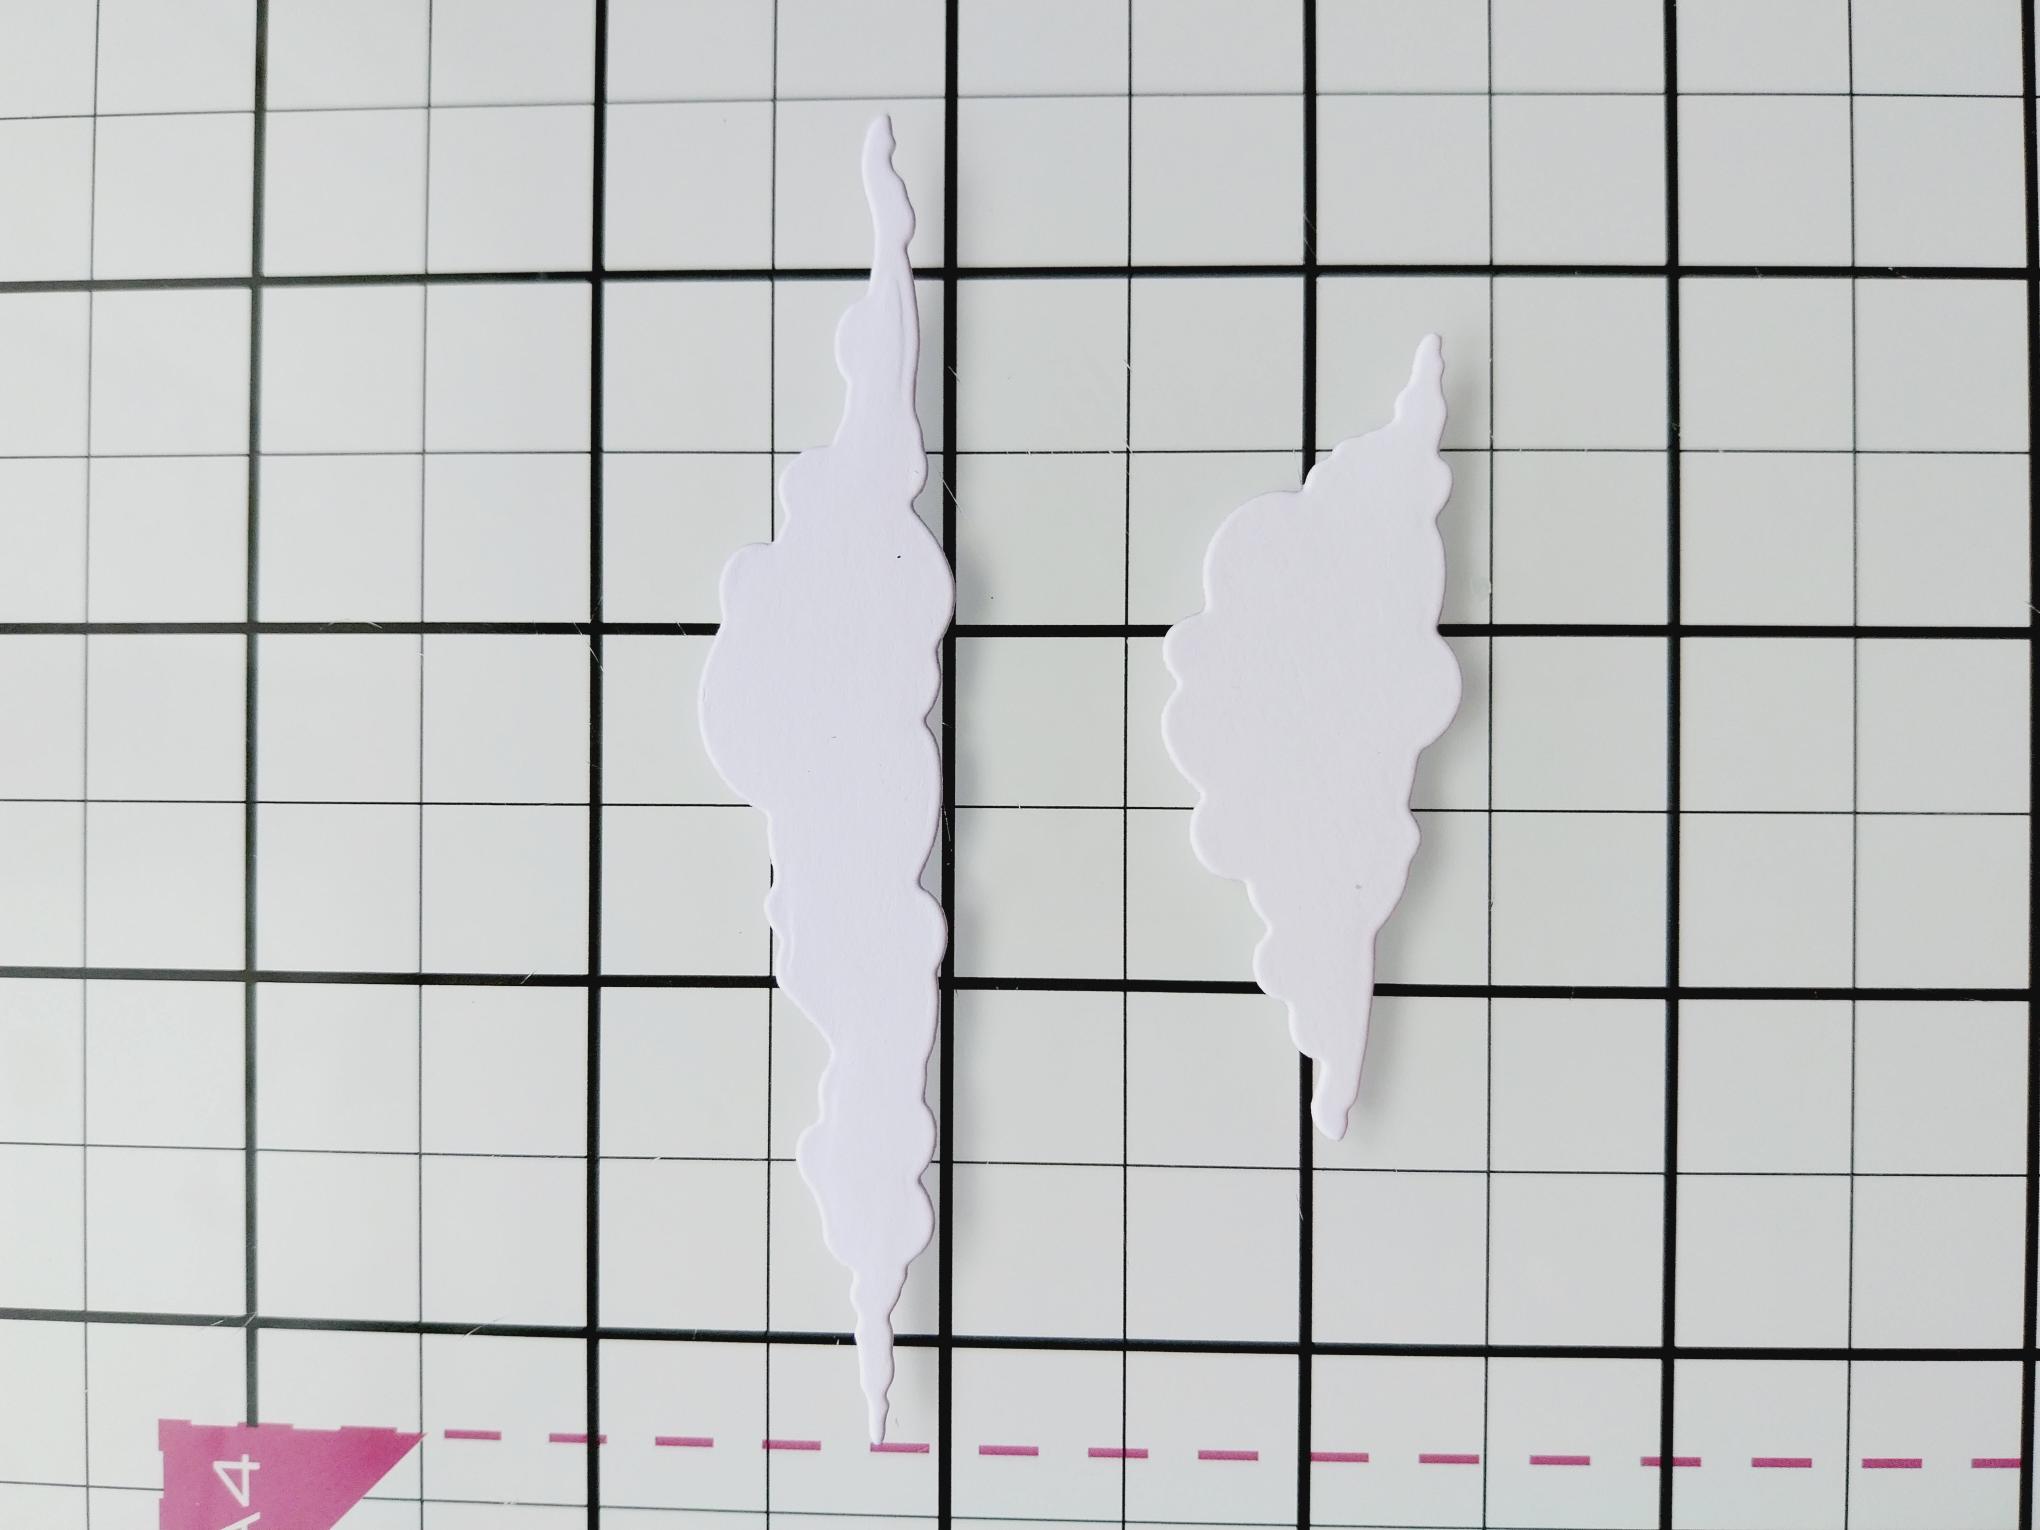
Die cut several clouds from white cardstock. |
|
Adhere your clouds where required. |
|
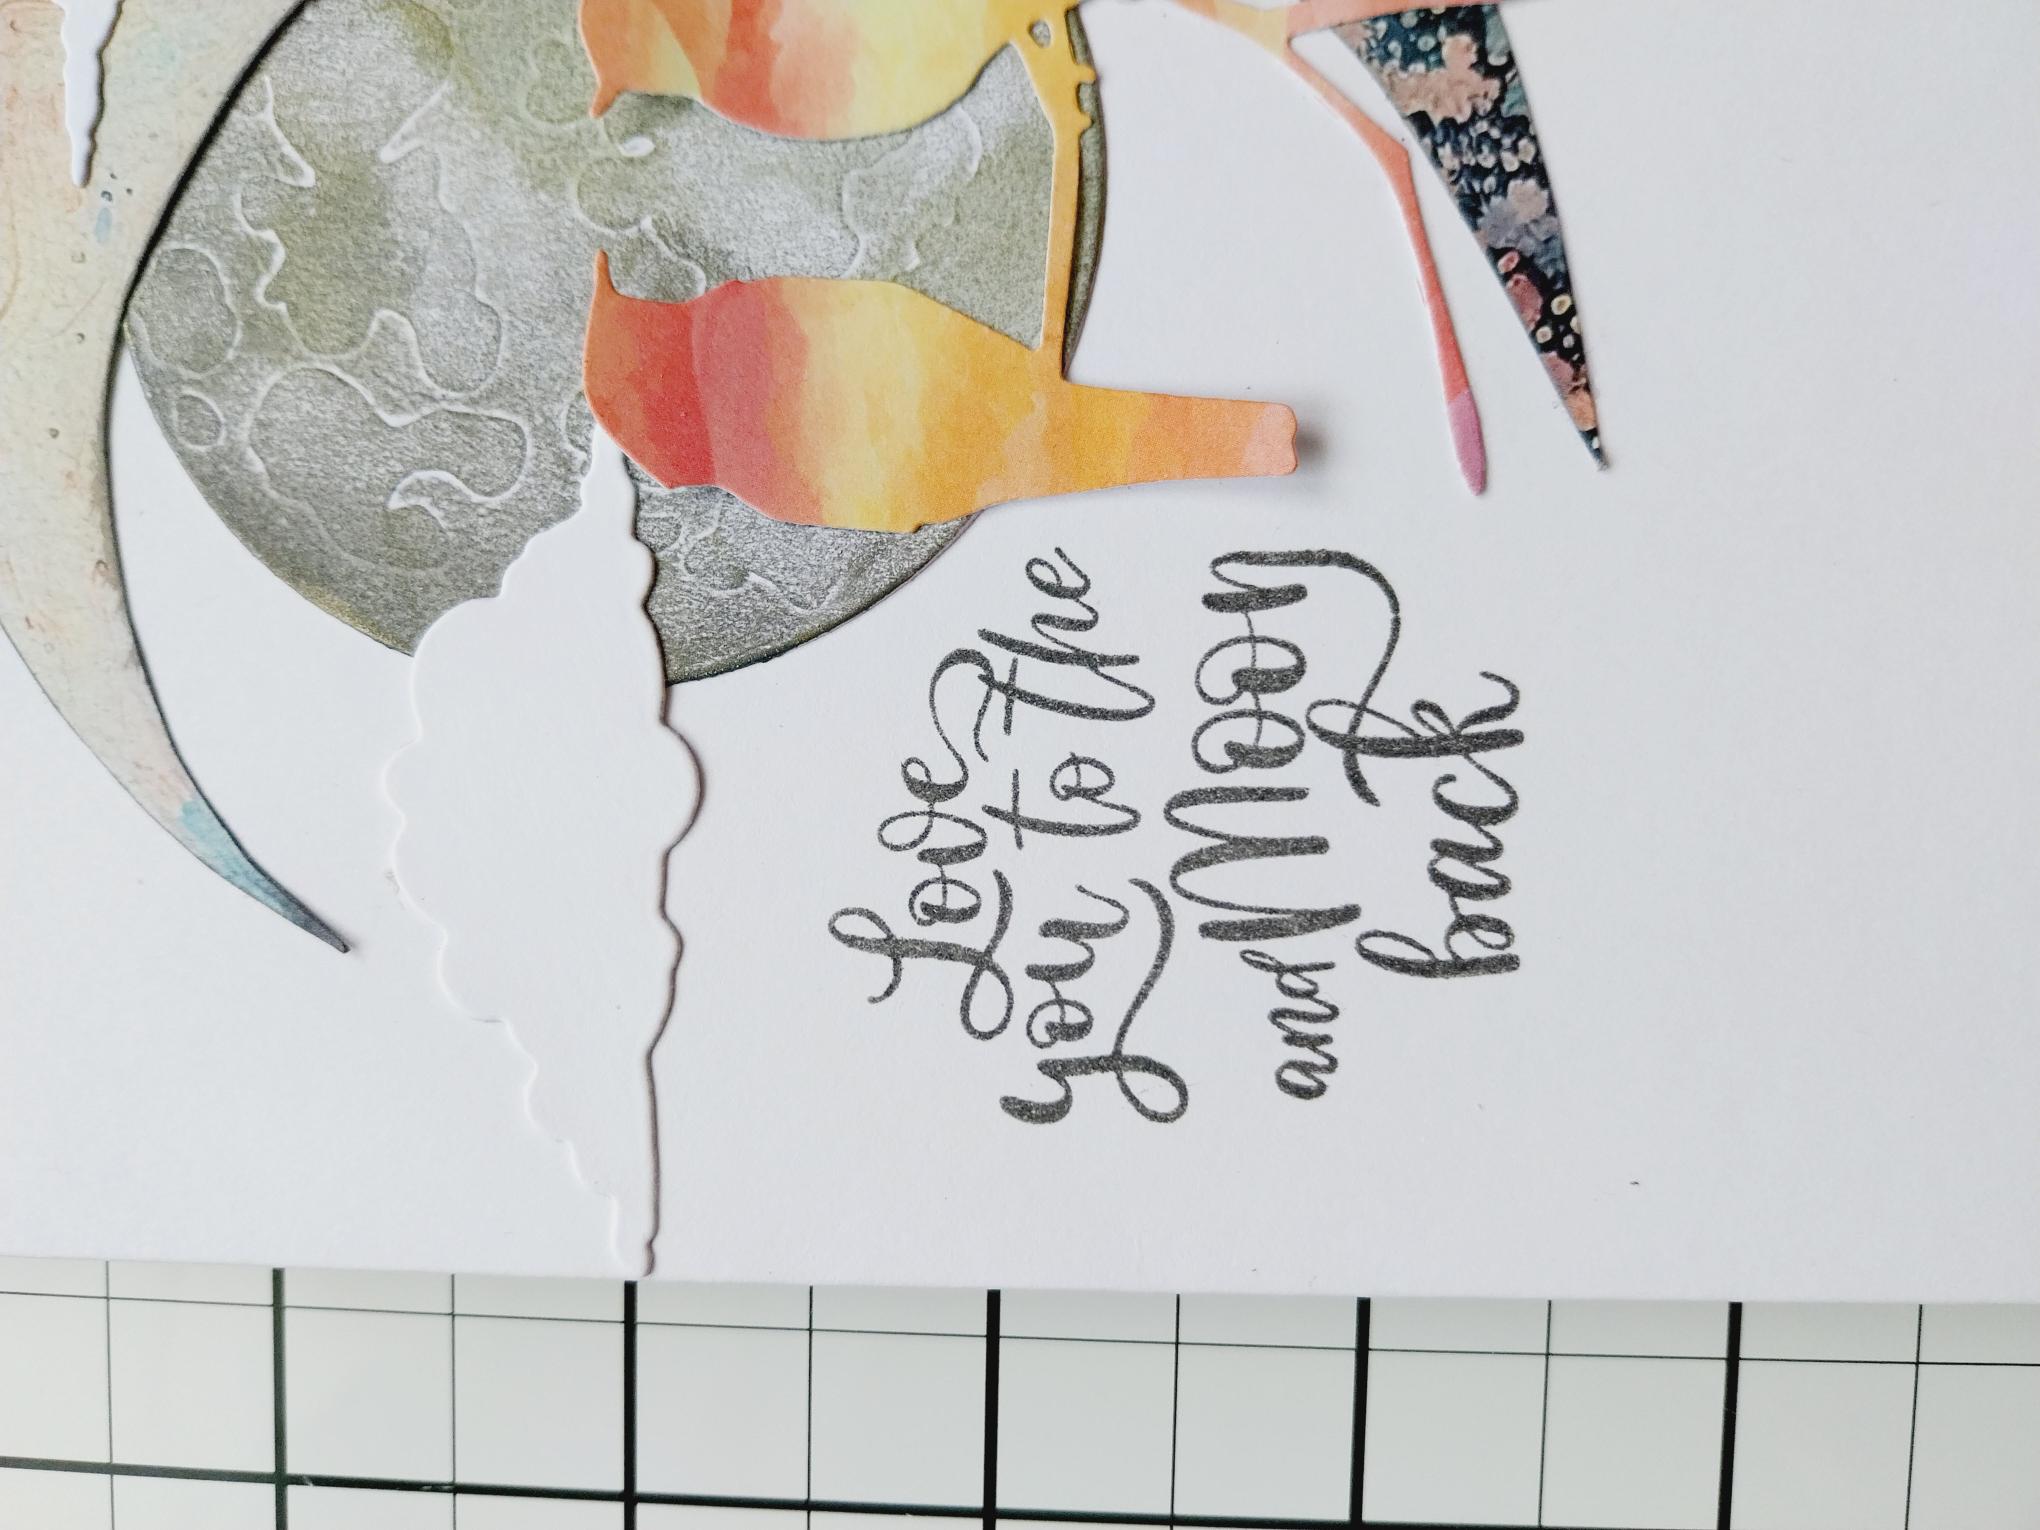
Finally, stamp the sentiment in the Versafine, to the left of your die cut design. |