Give your friends $10 off their first order!
Refer a FRIEND


WHAT YOU WILL NEED:
White card blank 4 x 6"
White cardstock
Inspirational Crafted With Love Bookazine Kit
Versafine Ink Pad: Smoky Grey
Distress Ink/Oxide ink pad: Salvaged Patina, Hickory Smoke, Faded Jeans
Paintbrush
Eureka 101 Watercolour Tablet
SBM A3 Magnetic glass mat
Die Cutting machine
[click image to enlarge] 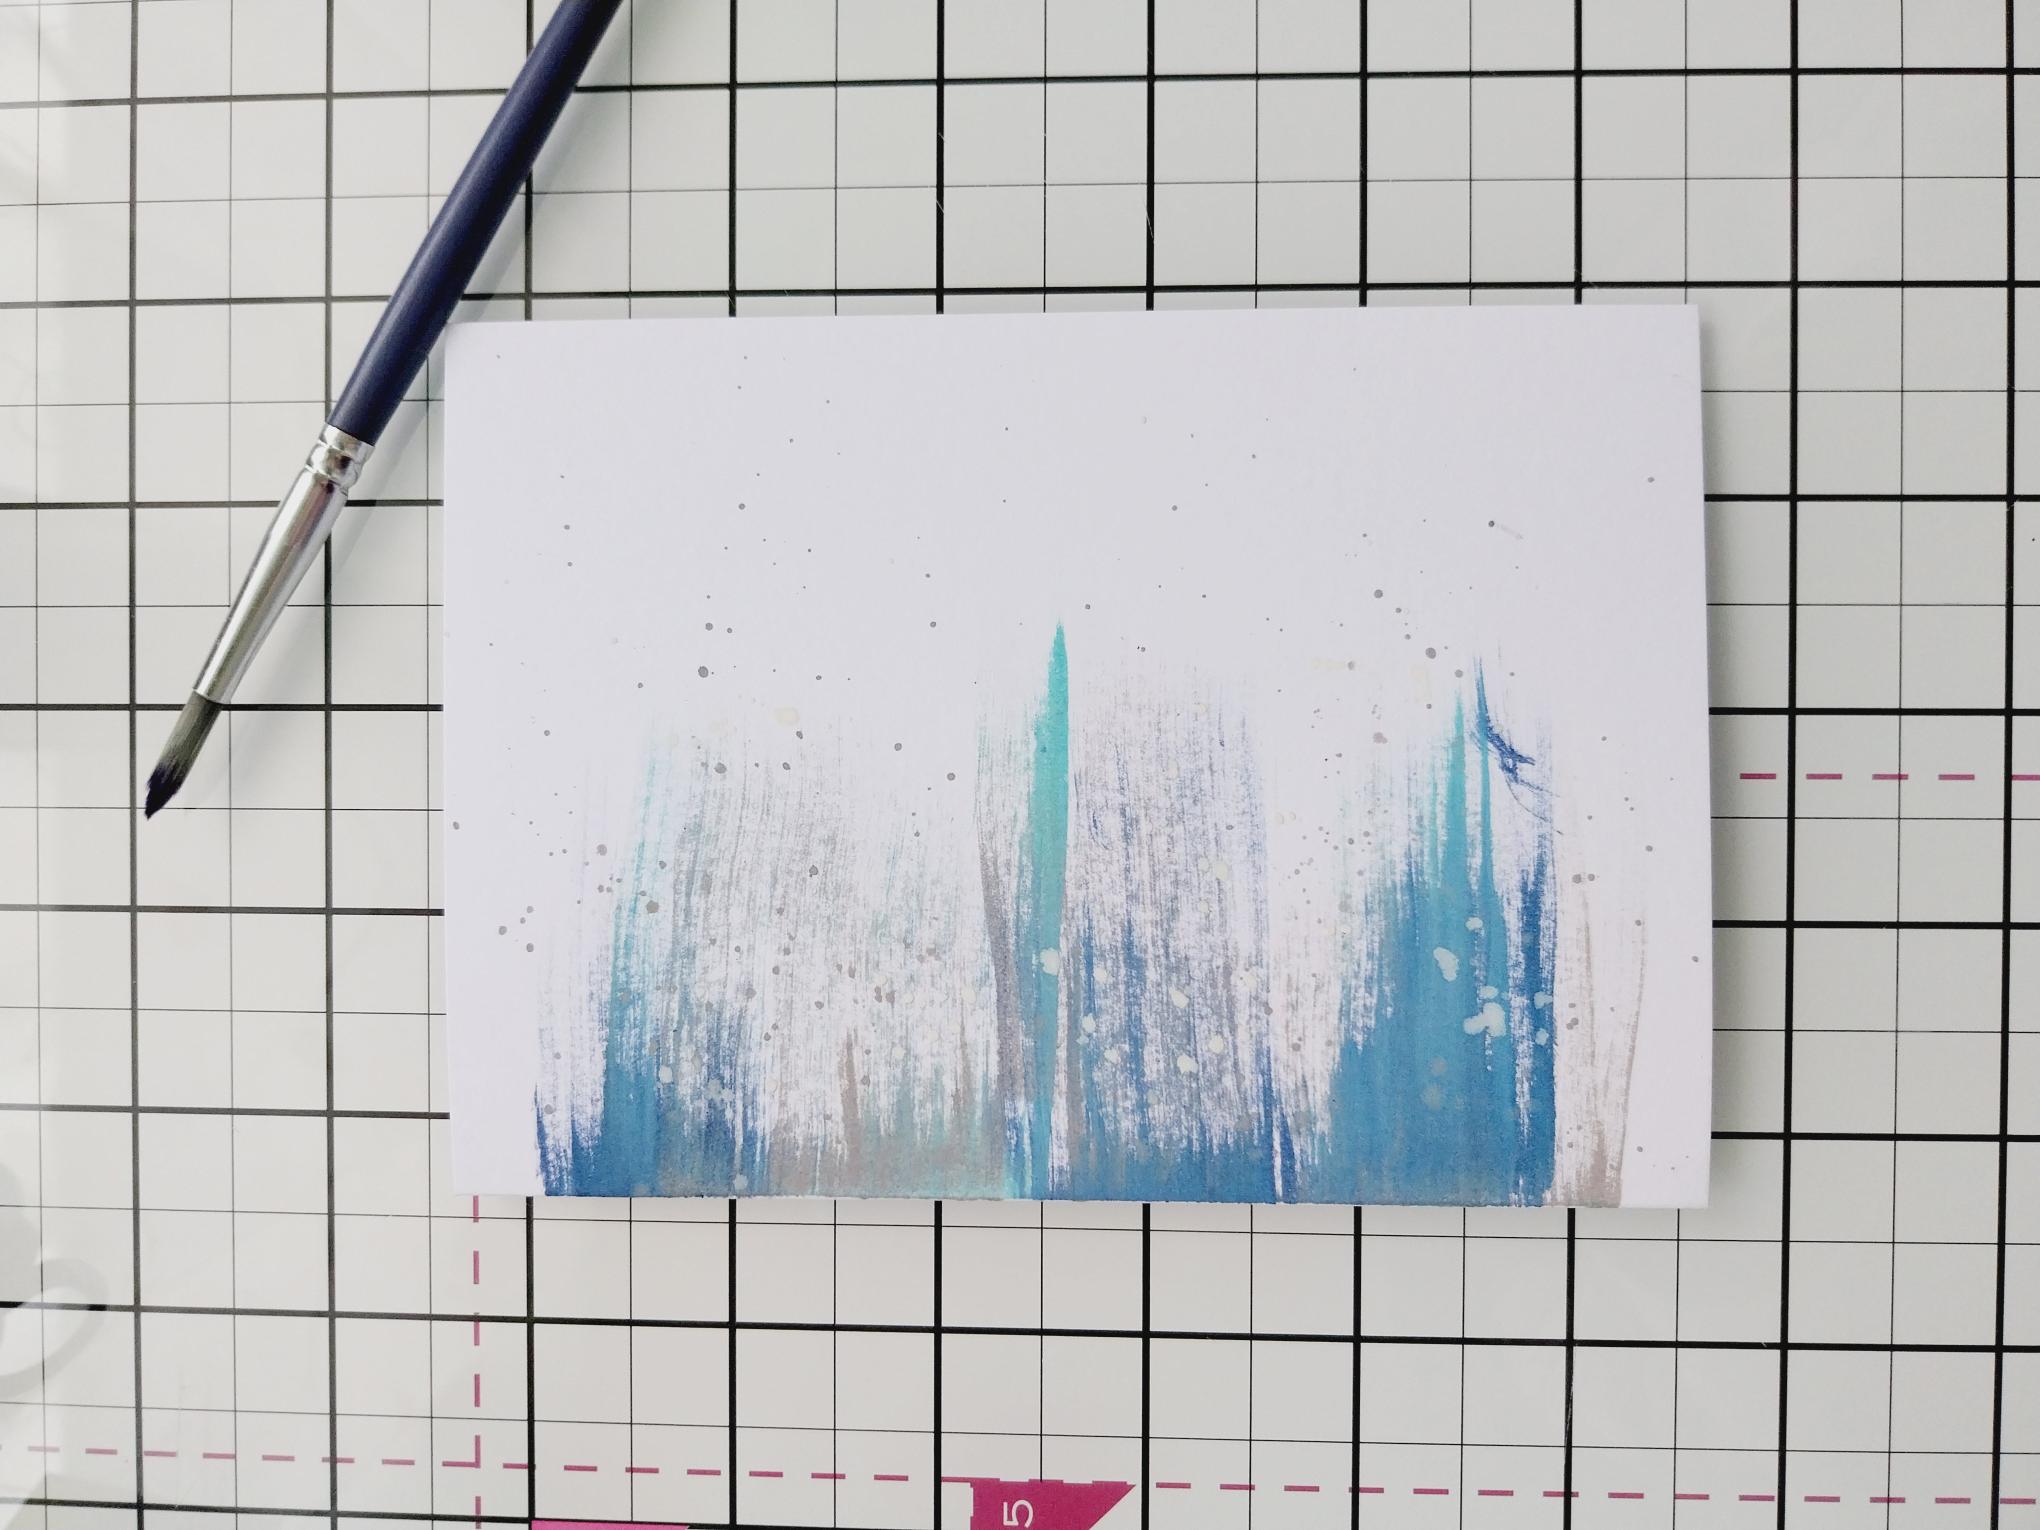
|
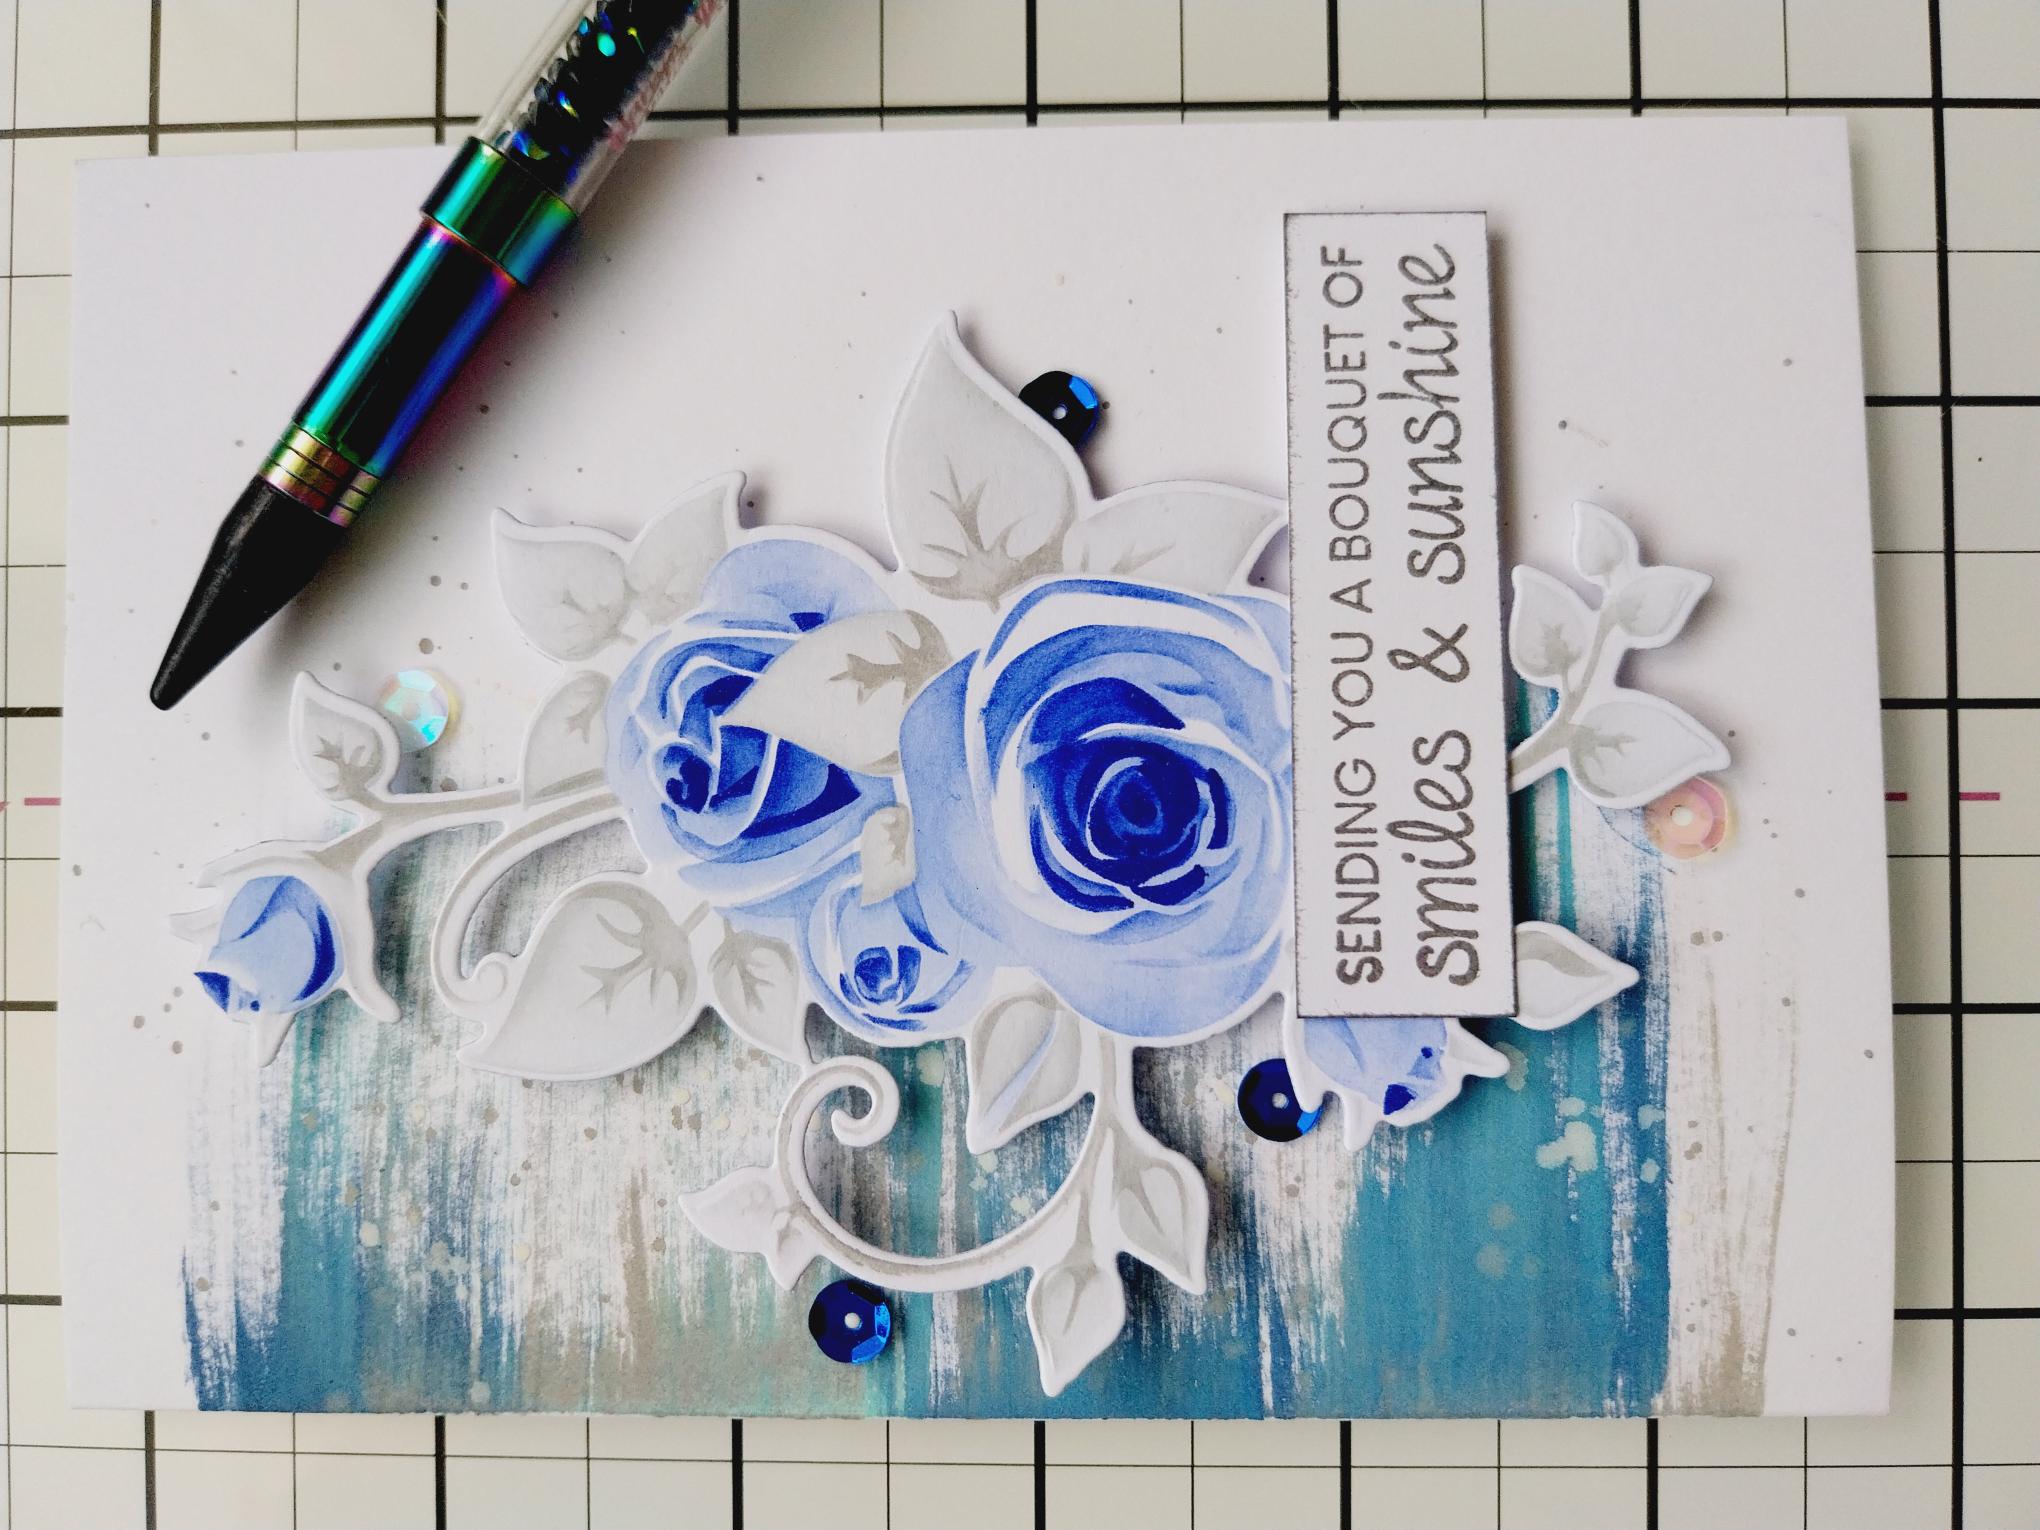
Swipe your Distress ink pads across your card blank, coming in from the left side, as seen here. This creates a random, distressed background for your floral element. Add a few splats before popping to one side. |
|
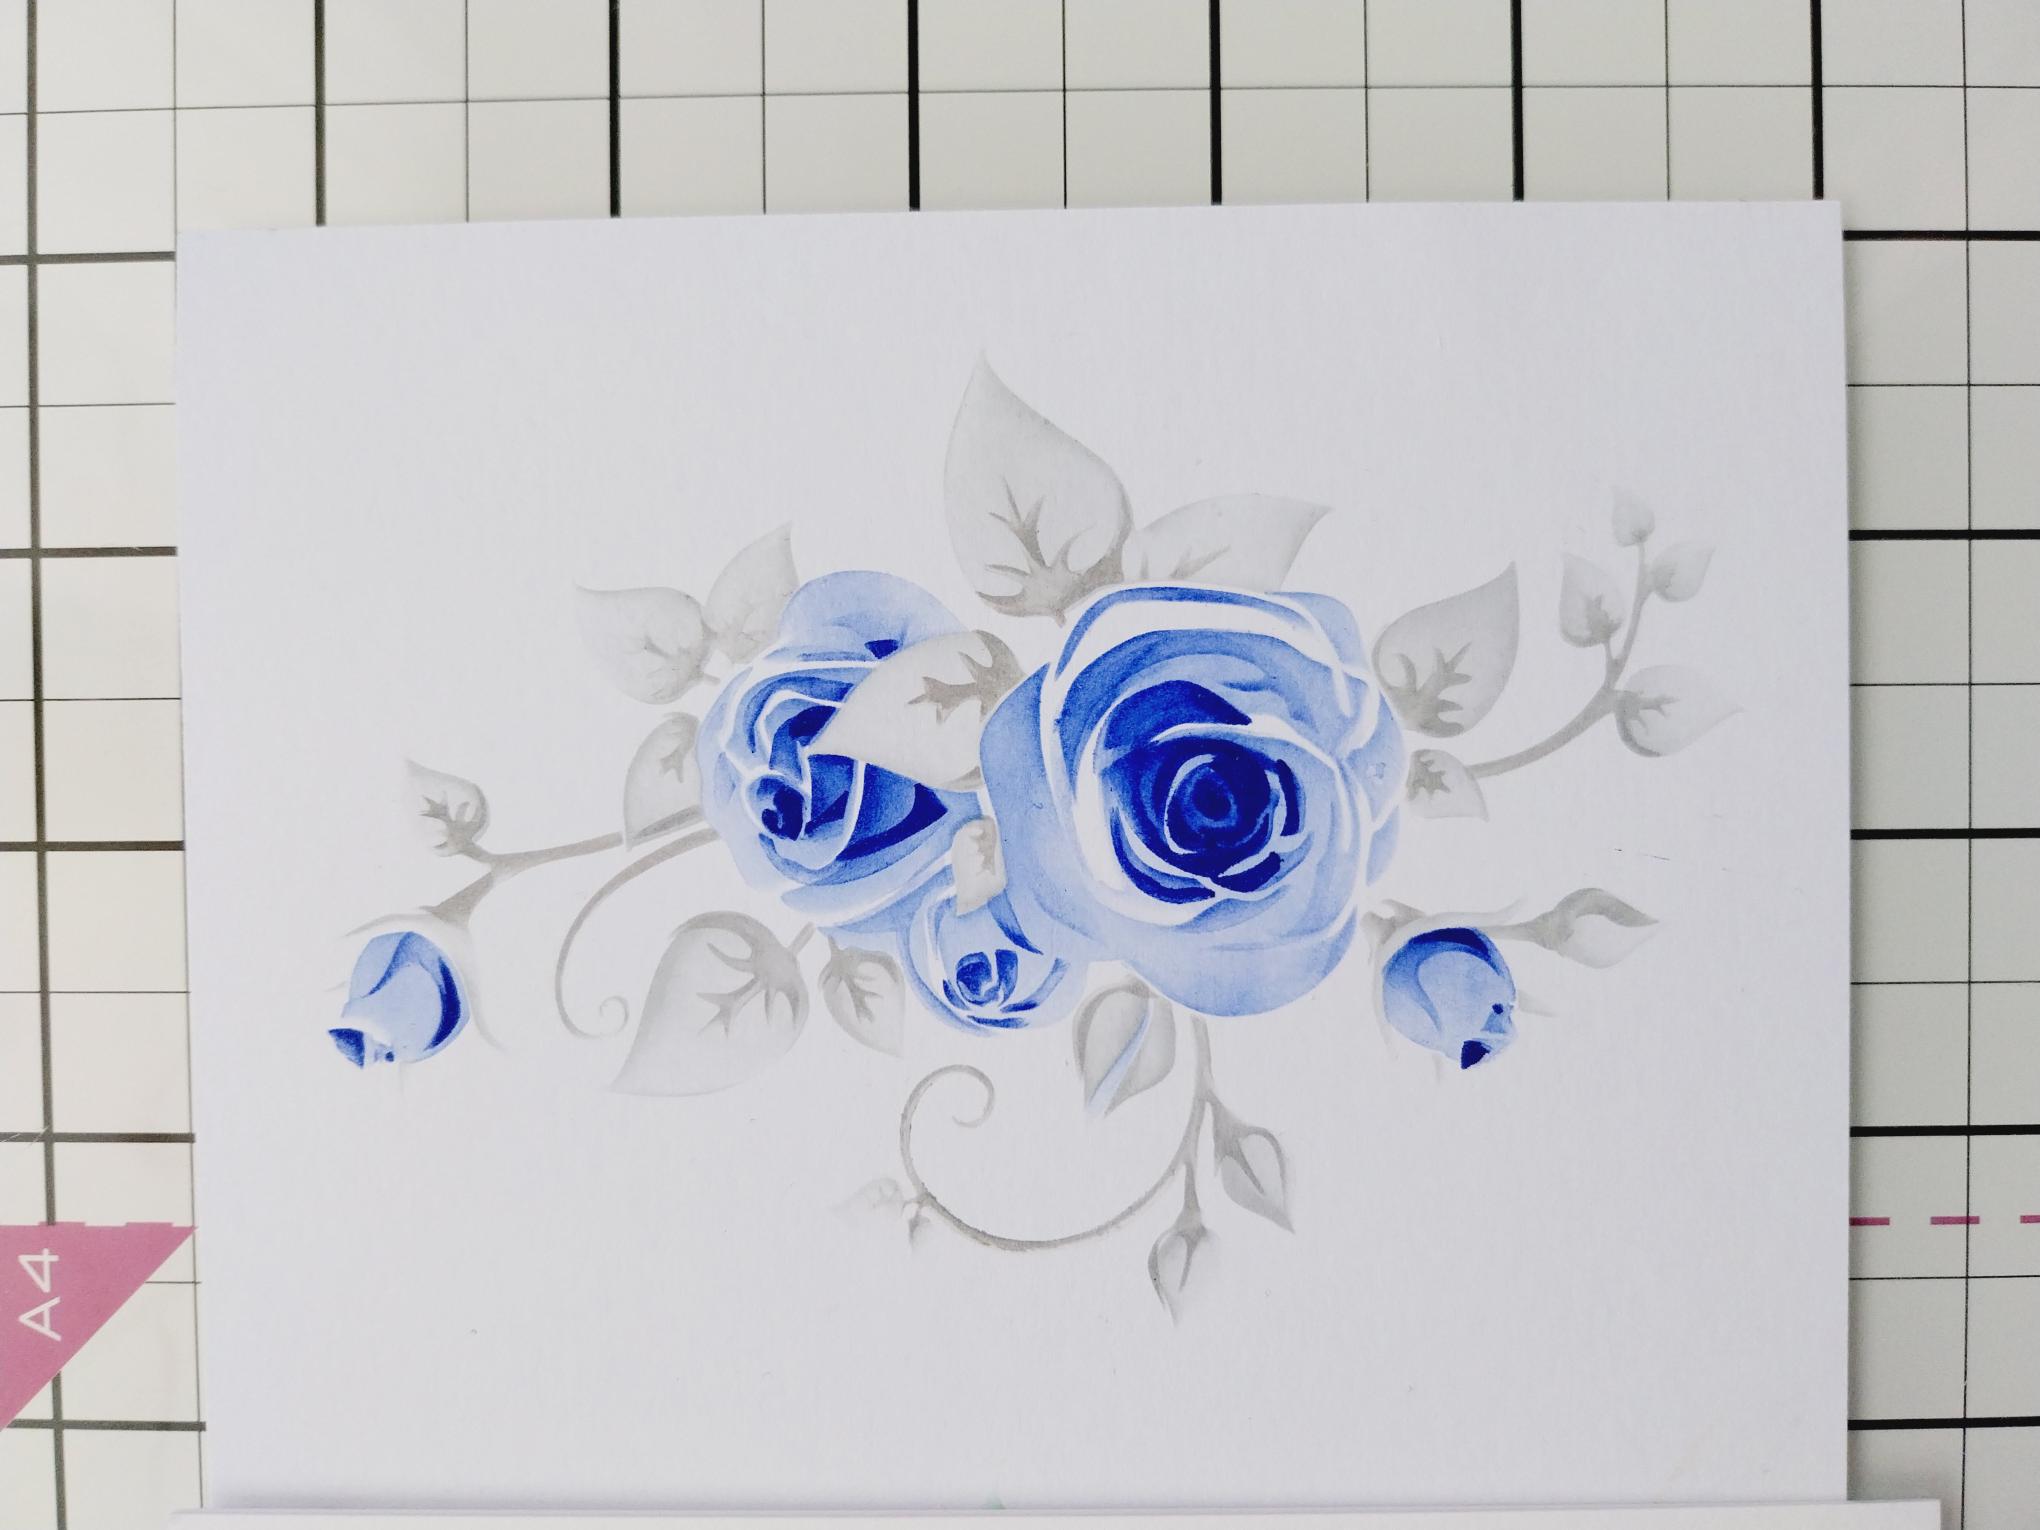
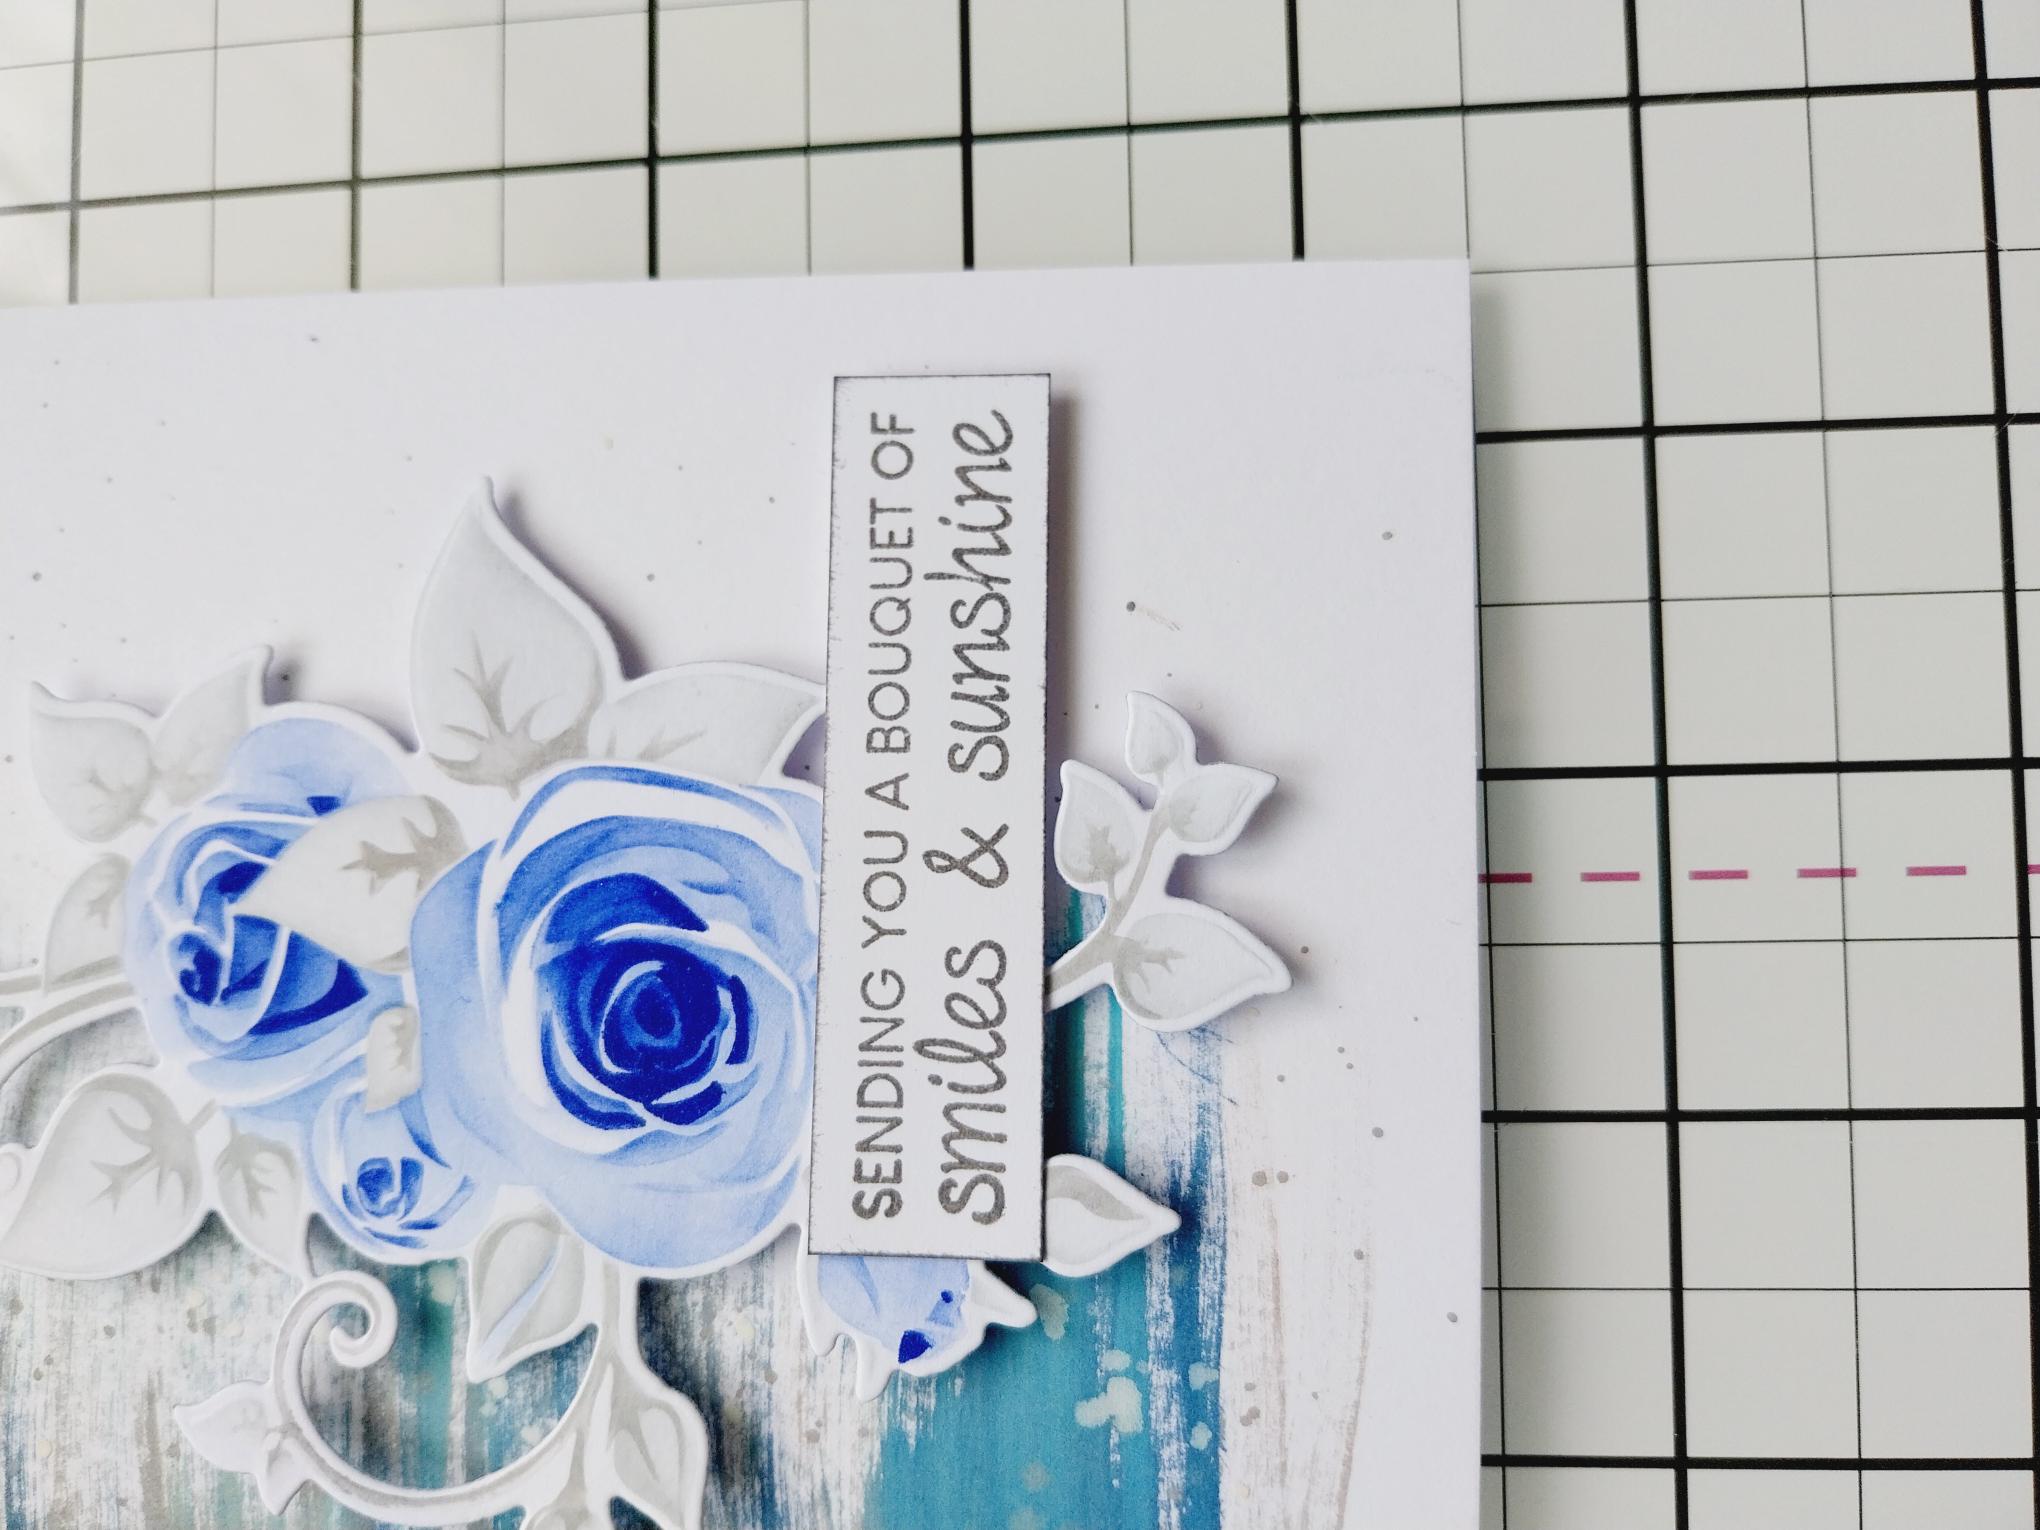
Place stencil 1, from the bookazine kit, on to a piece of white cardstock. Use your Distress inks to build up the colour as you blend through each stencil, using the blues for the buds and flower heads and the grey for the foliage. Always start off light and increase the depth of colour as you work through each layer. |
|
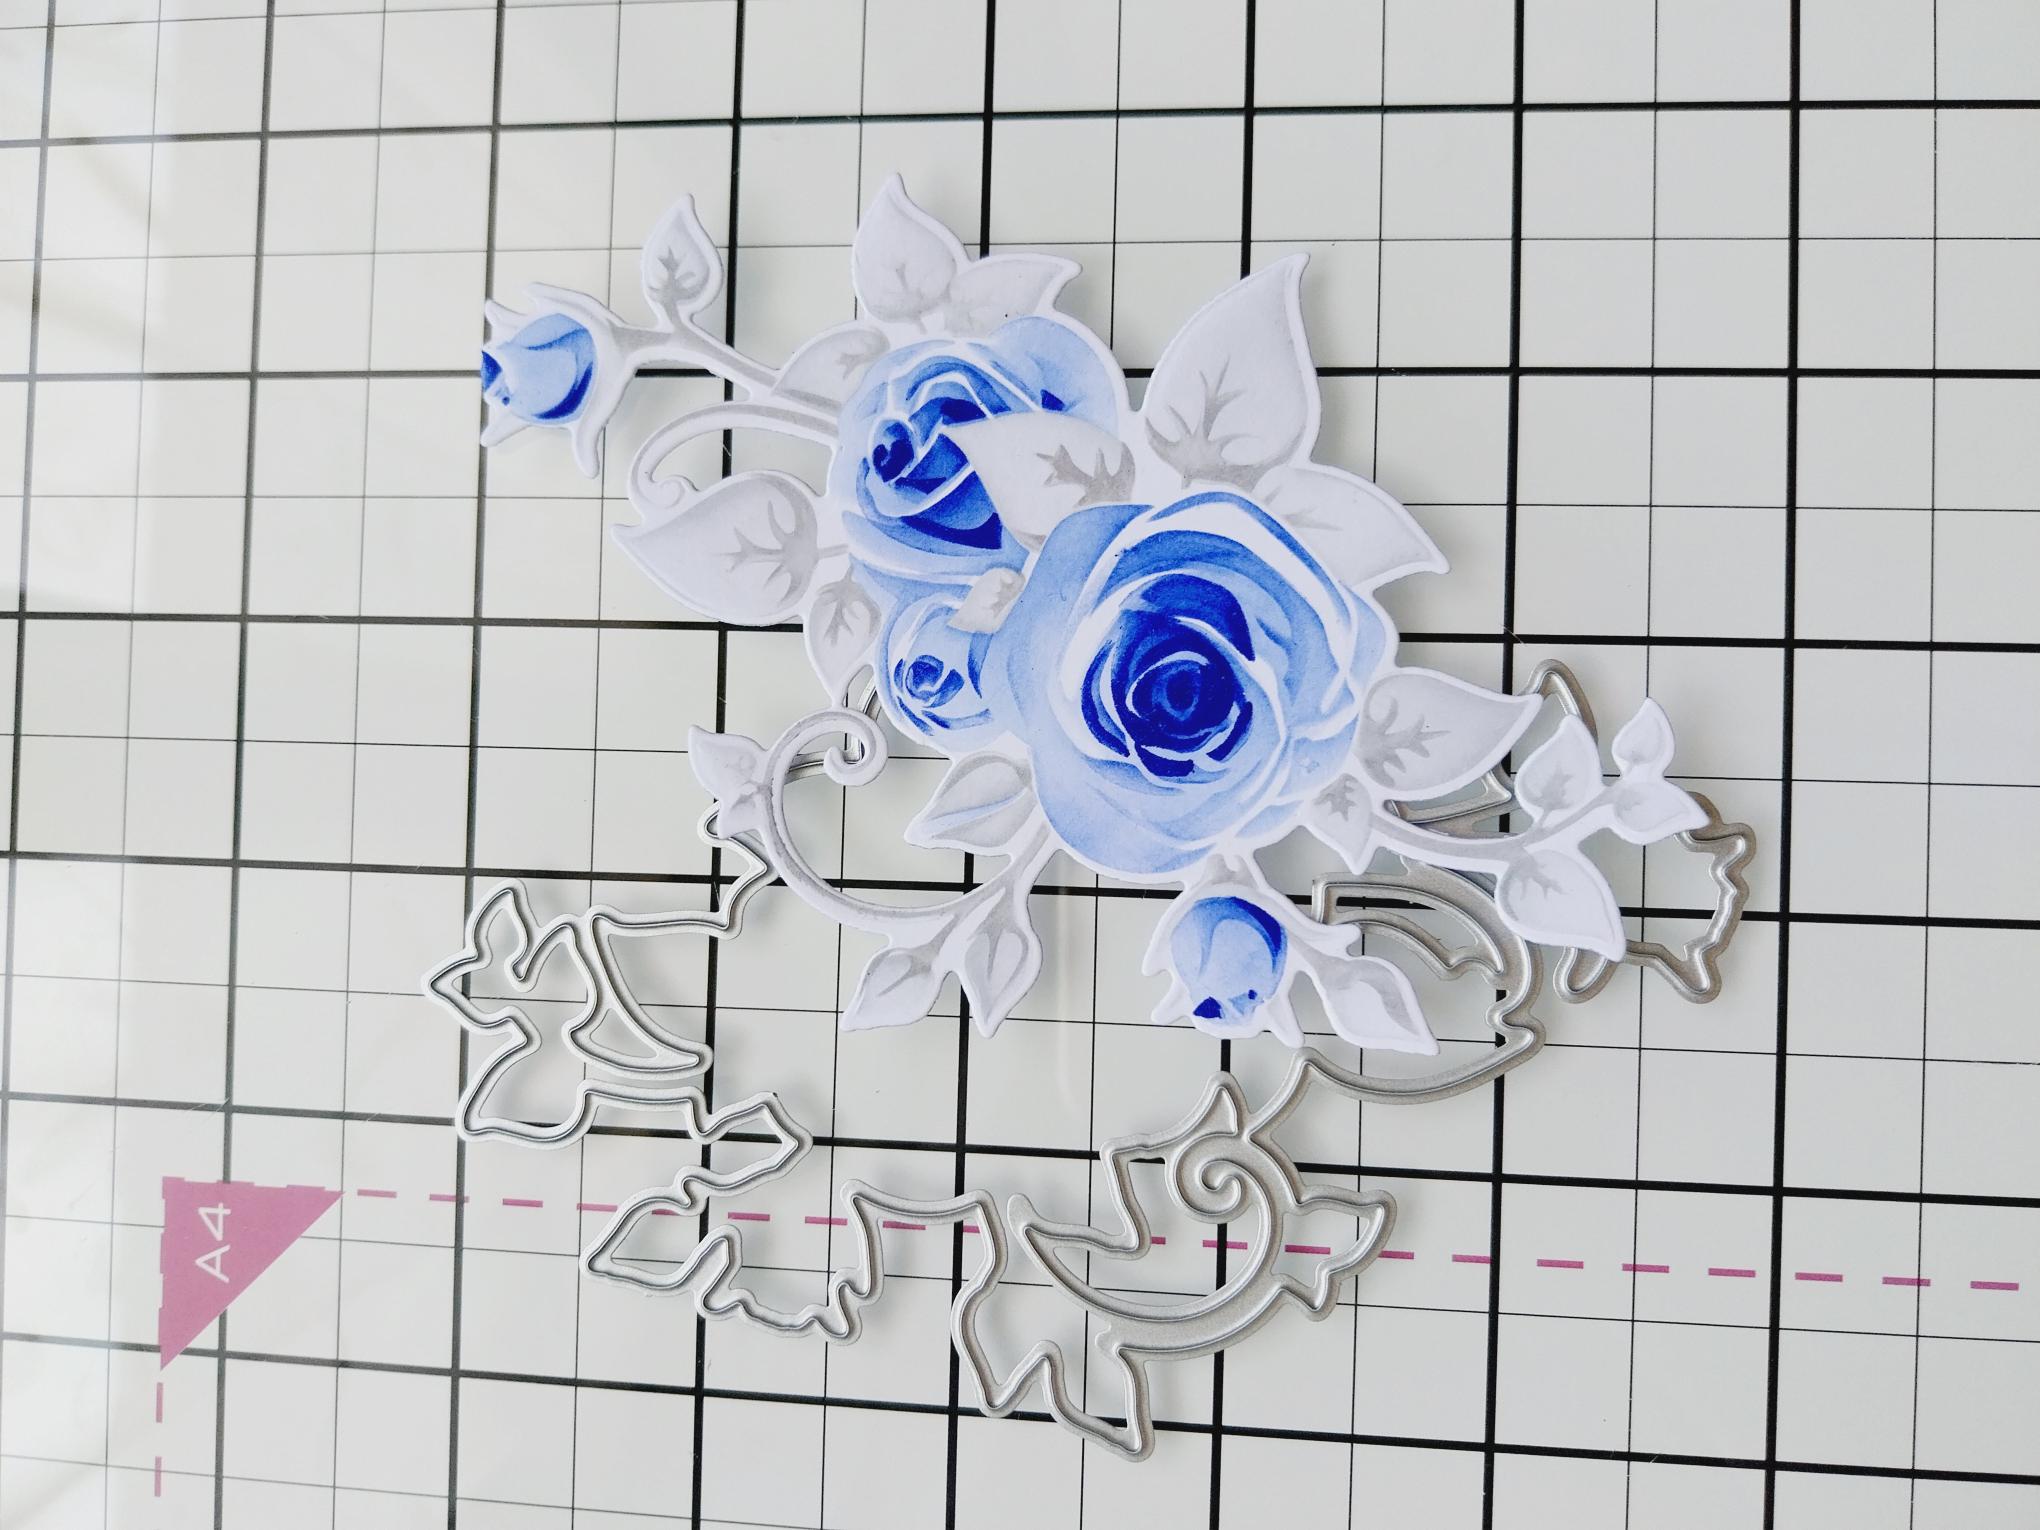
Use the coordinating die to cut out your stencilled element. |
|
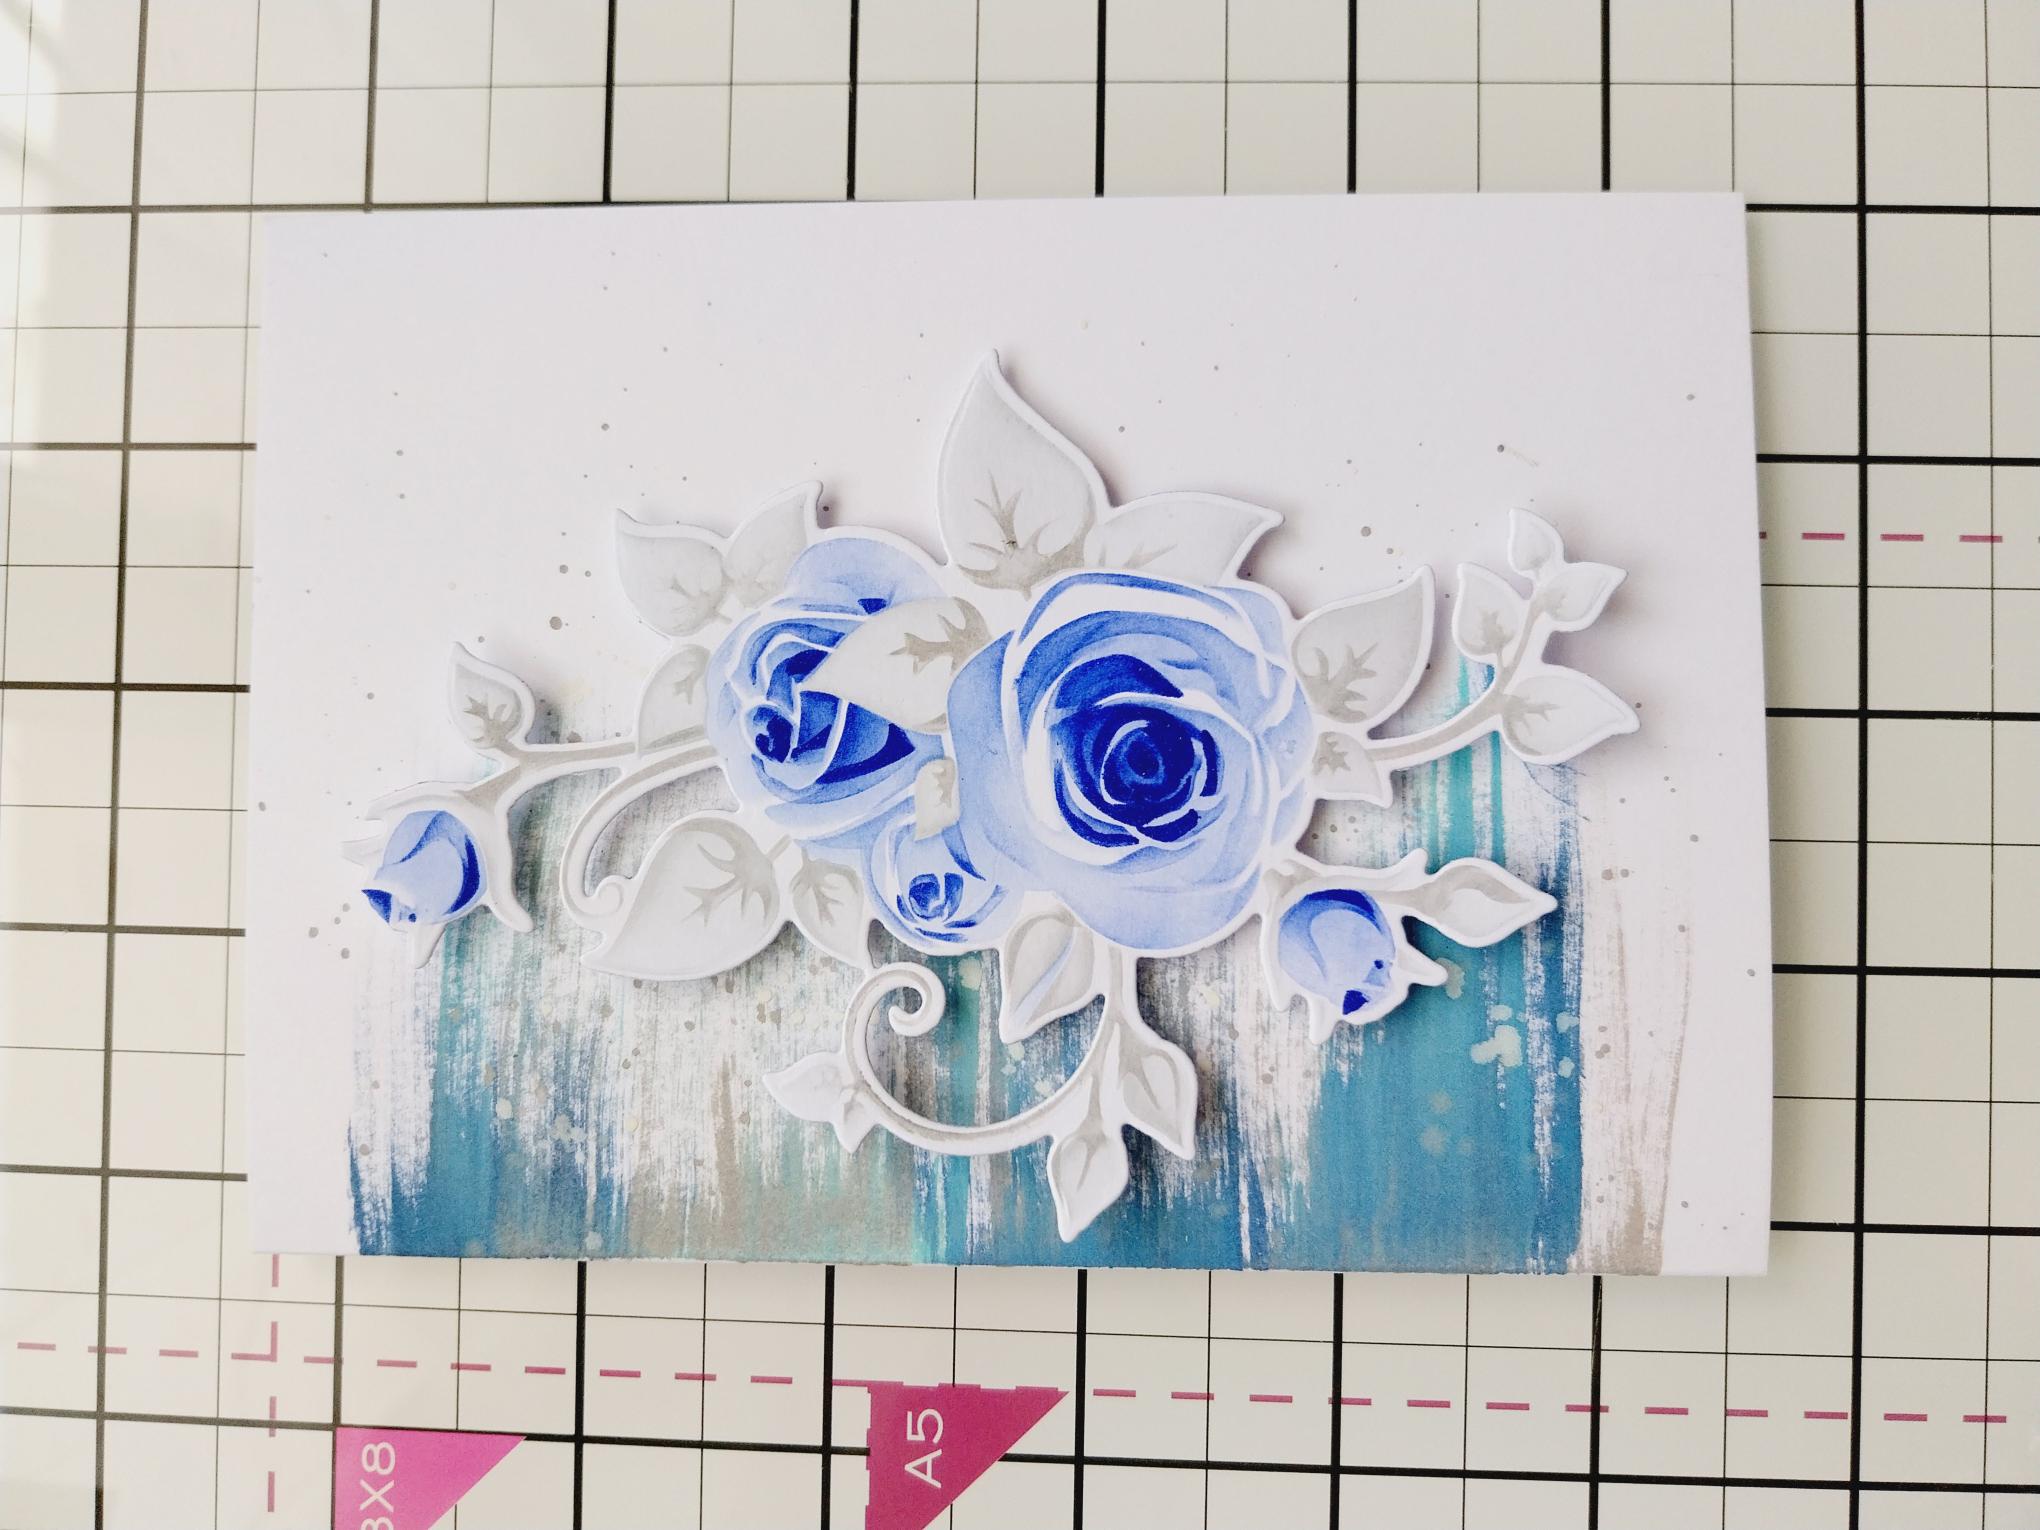
Adhere the floral element with foam pads, positioning it flowing down the inked background. |
|
Stamp your sentiment in the Smoky Grey Versafine, on to a piece of white card and trim to size. Swipe around the edges of the card with your ink pad. Adhere across your floral element with foam pads. |
|
To finish your card, add a few sequins on, around and tucked under your 3D element. |